Manage release flow using pipelines in Azure DevOps
Introduction
It does not matter what kind of application solution you build on Azure. It can be built with web applications, web APIs, Azure Functions or any other services. There is one fact - deploying directly on the production environment is risky. Probably you are already familiar with using different environment like dev, test, qa, and of course production. Continuous integration and delivery is important part of each project to deliver faster. In this article I would like to present how to use Azure DevOps pipelines together with environments to configure release flow of Azure Function Apps to three environments (dev, test, and prod) together with approval gates for the test and production environment.
Azure resources
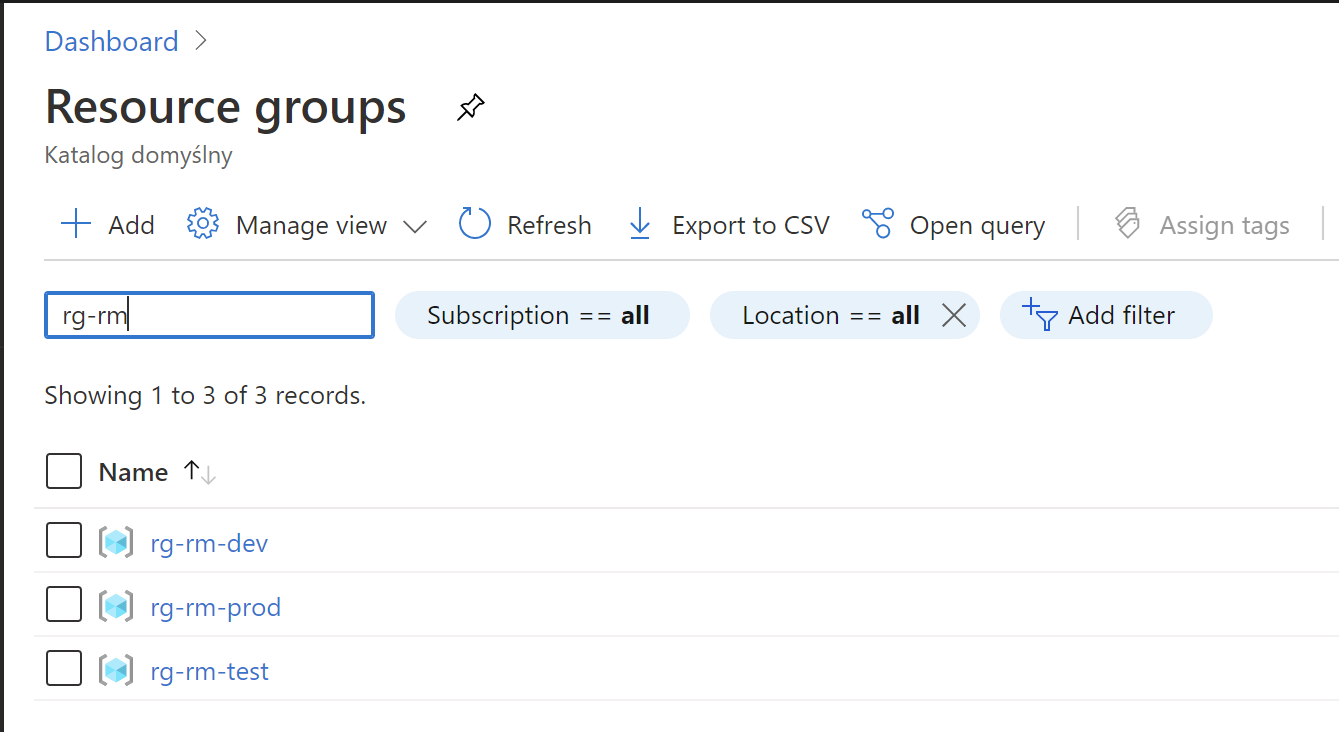
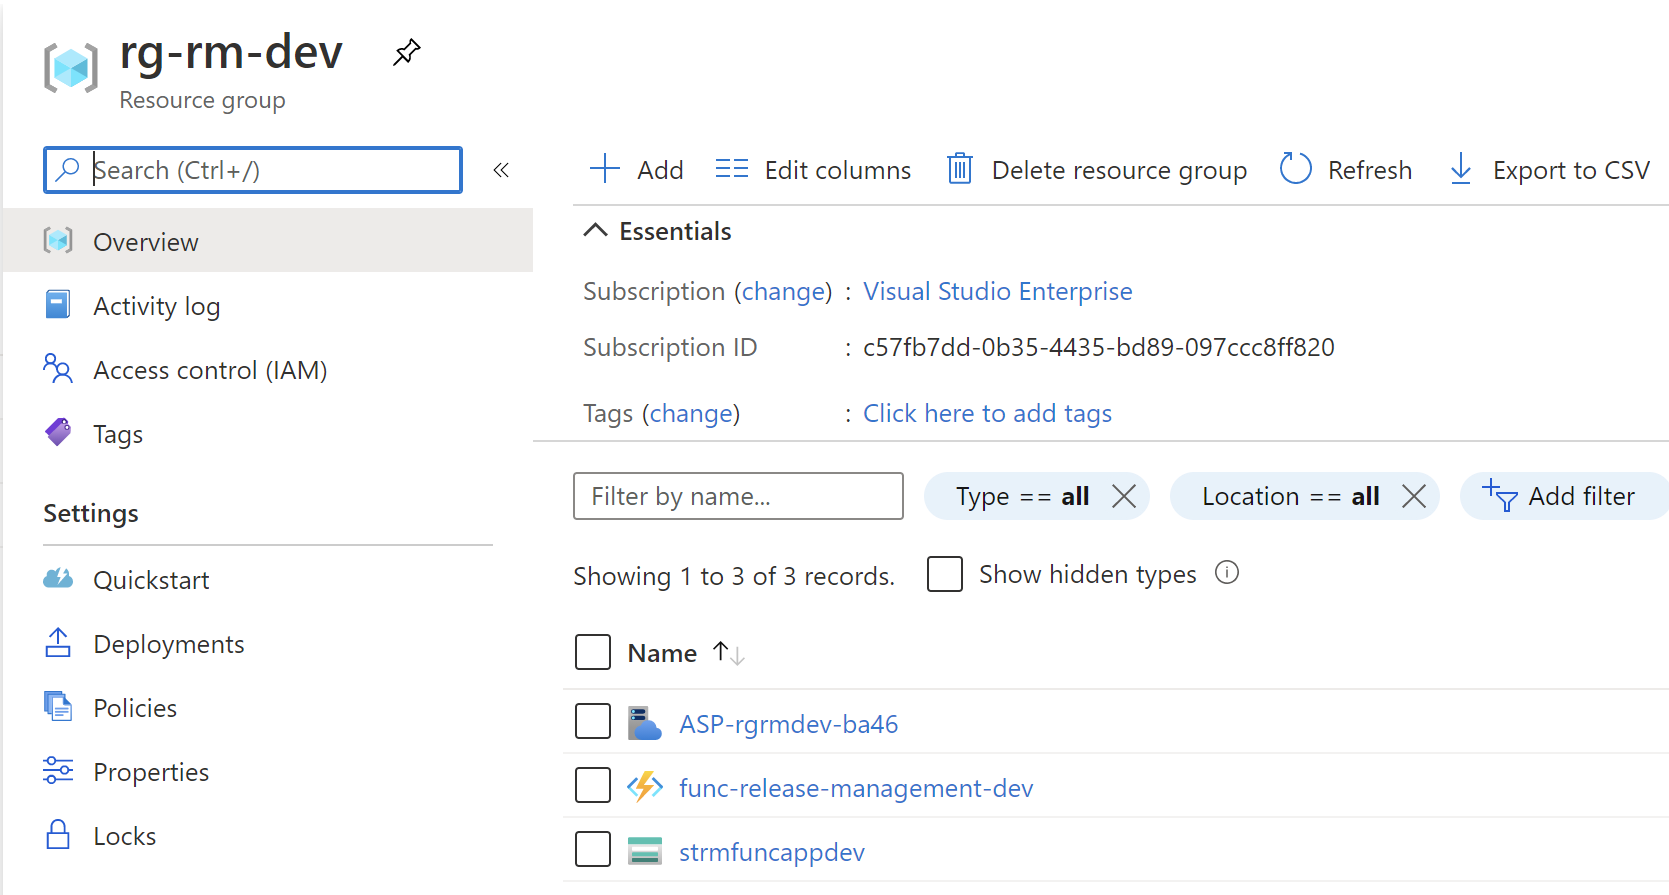
Let me start with the structure of the resource groups and services in the Azure cloud. I have three resource groups, each one for specific environment: DEV, TEST, and PROD:
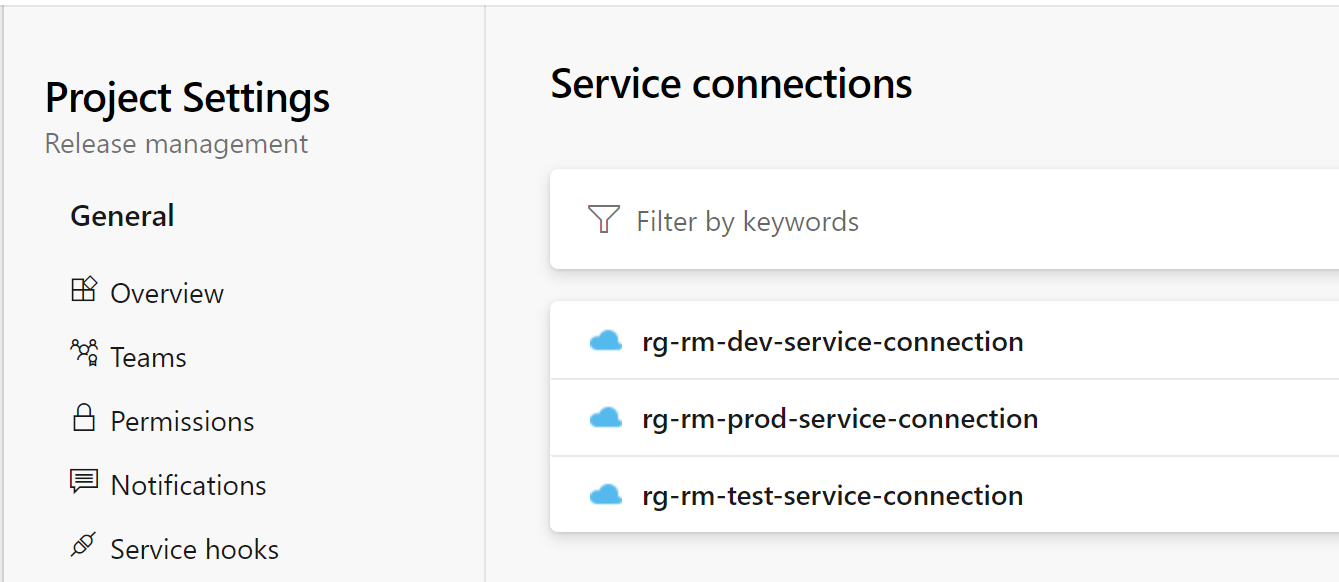
For each resource group I have service connection created in the Azure DevOps:
Source code in GIT repository
Just to confirm - source code has to be kept somewhere so pipelines can access it. Here I use GIT repository. In this article we will not focus on the repositories structure and branching strategy (this will be a part of my another article). Let’s assume now that source code is in the GIT repository on the master branch. In the src folder there is source code for the project. In the scripts folder there are YAML files used in the Azure DevOps pipelines:
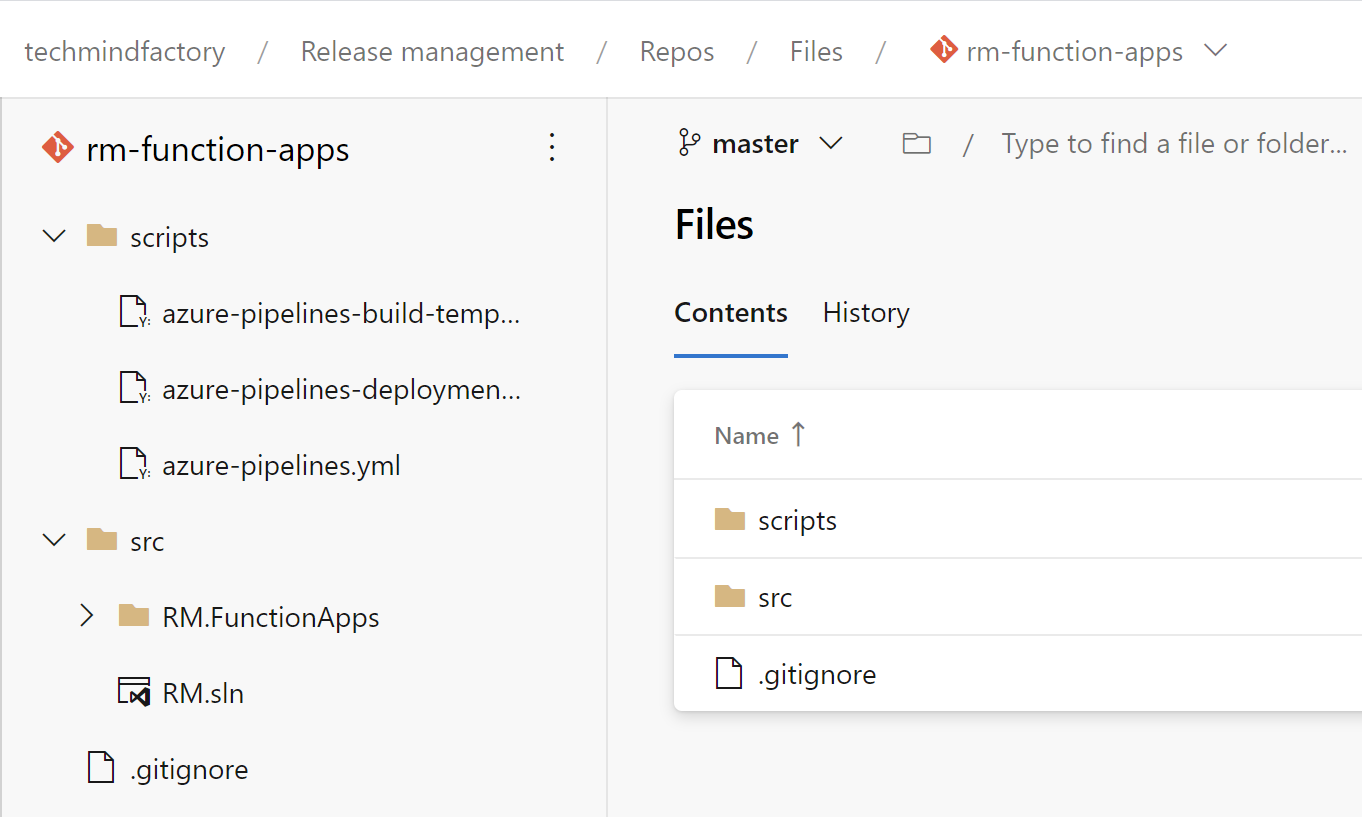
CI/CD scripts
To have a chance to easily configure CI/CD pipelines among different projects, it is good to have their definitions in the YAML files (as a code). This is not the end. It is good to have them generic. It means that we will inject parameters during the build and release phases.
Variable groups
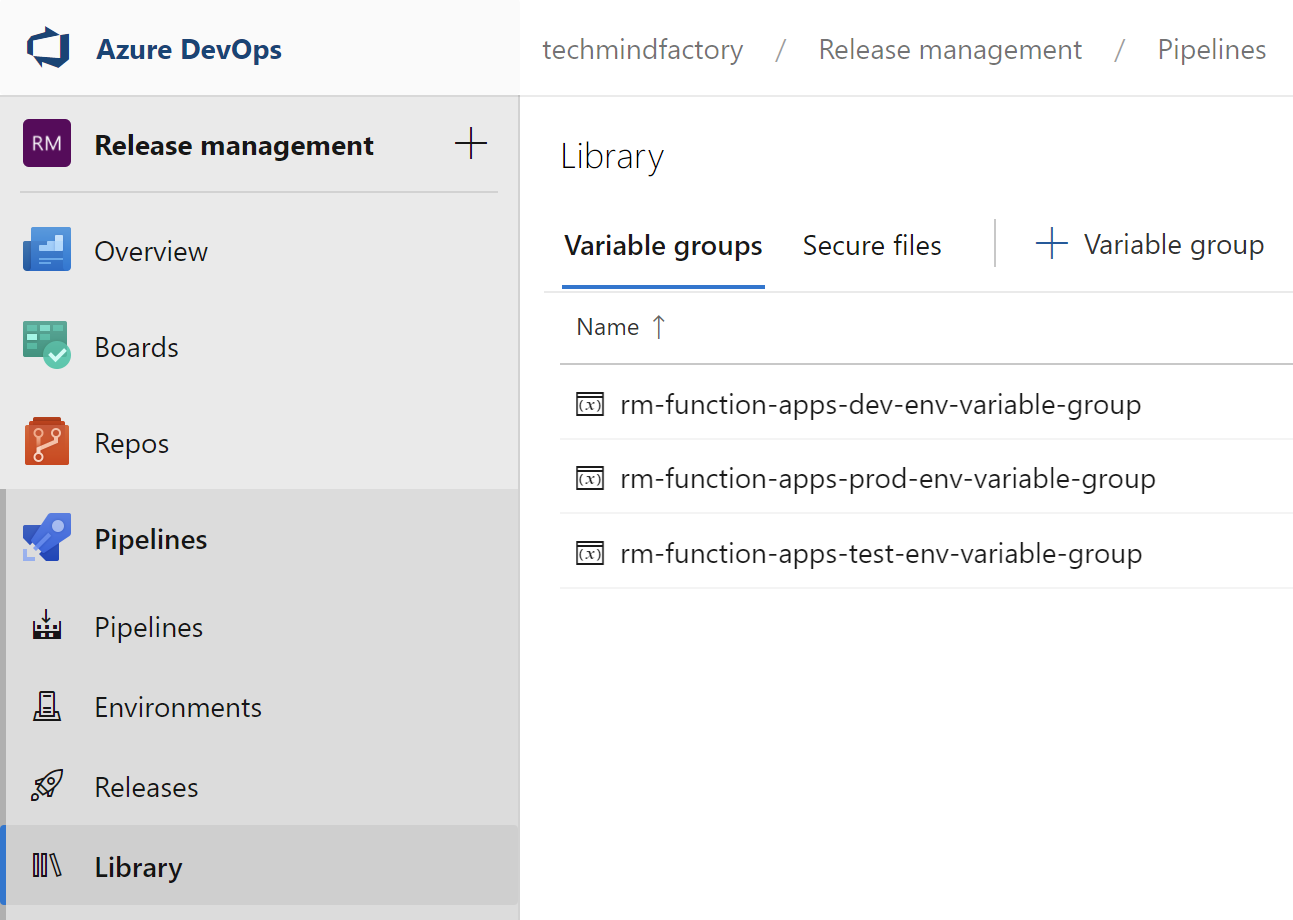
To have consistent knowledge about variables used on different environments, it is good to create Variable Groups in the Azure DevOps. In this case I have three variable groups. They are used in the CI/CD scripts described below in the article:
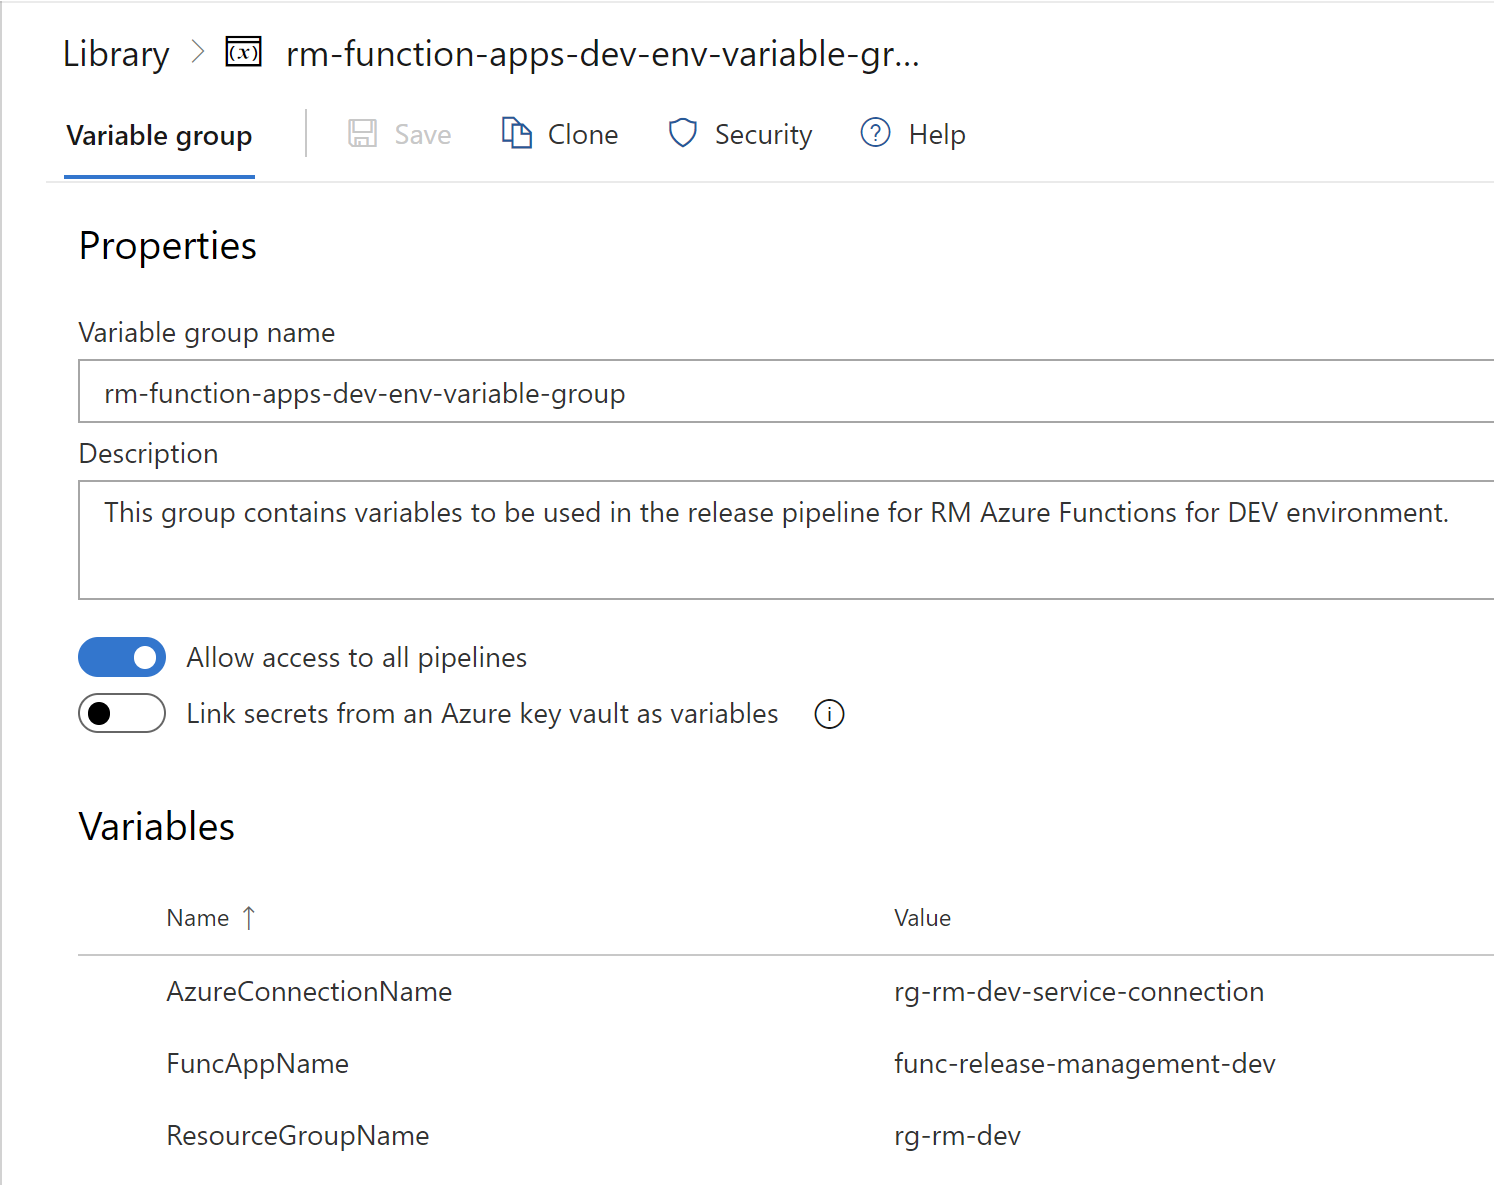
rm-function-apps-dev-env-variable-group
This group contains variables to be used in the release pipeline for RM Azure Functions for DEV environment.
rm-function-apps-test-env-variable-group
This group contains variables to be used in the release pipeline for RM Azure Functions for TEST environment.
rm-function-apps-prod-env-variable-group
This group contains variables to be used in the release pipeline for RM Azure Functions for PROD environment.
Environments
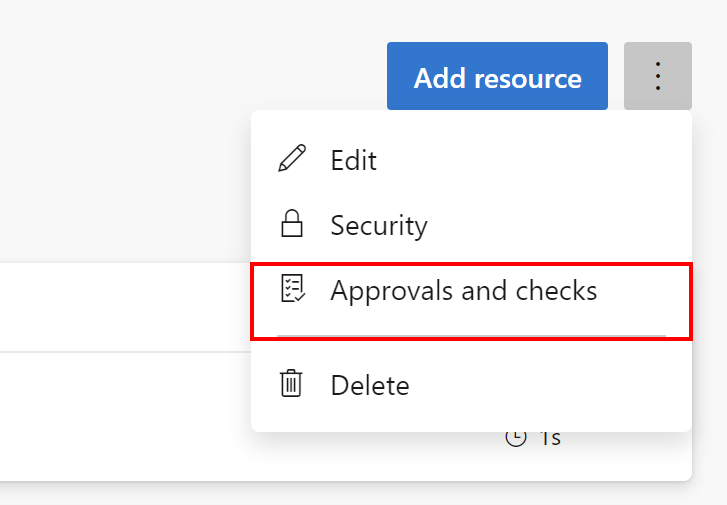
To prevent continuous deployment to the TEST and PROD environments we need to use approvals. First we have to define three environments in the Environments section. Please note that we use these names in the YAML pipelines so environments should be created automatically one you run pipeline first time. Of course you can setup them manually:
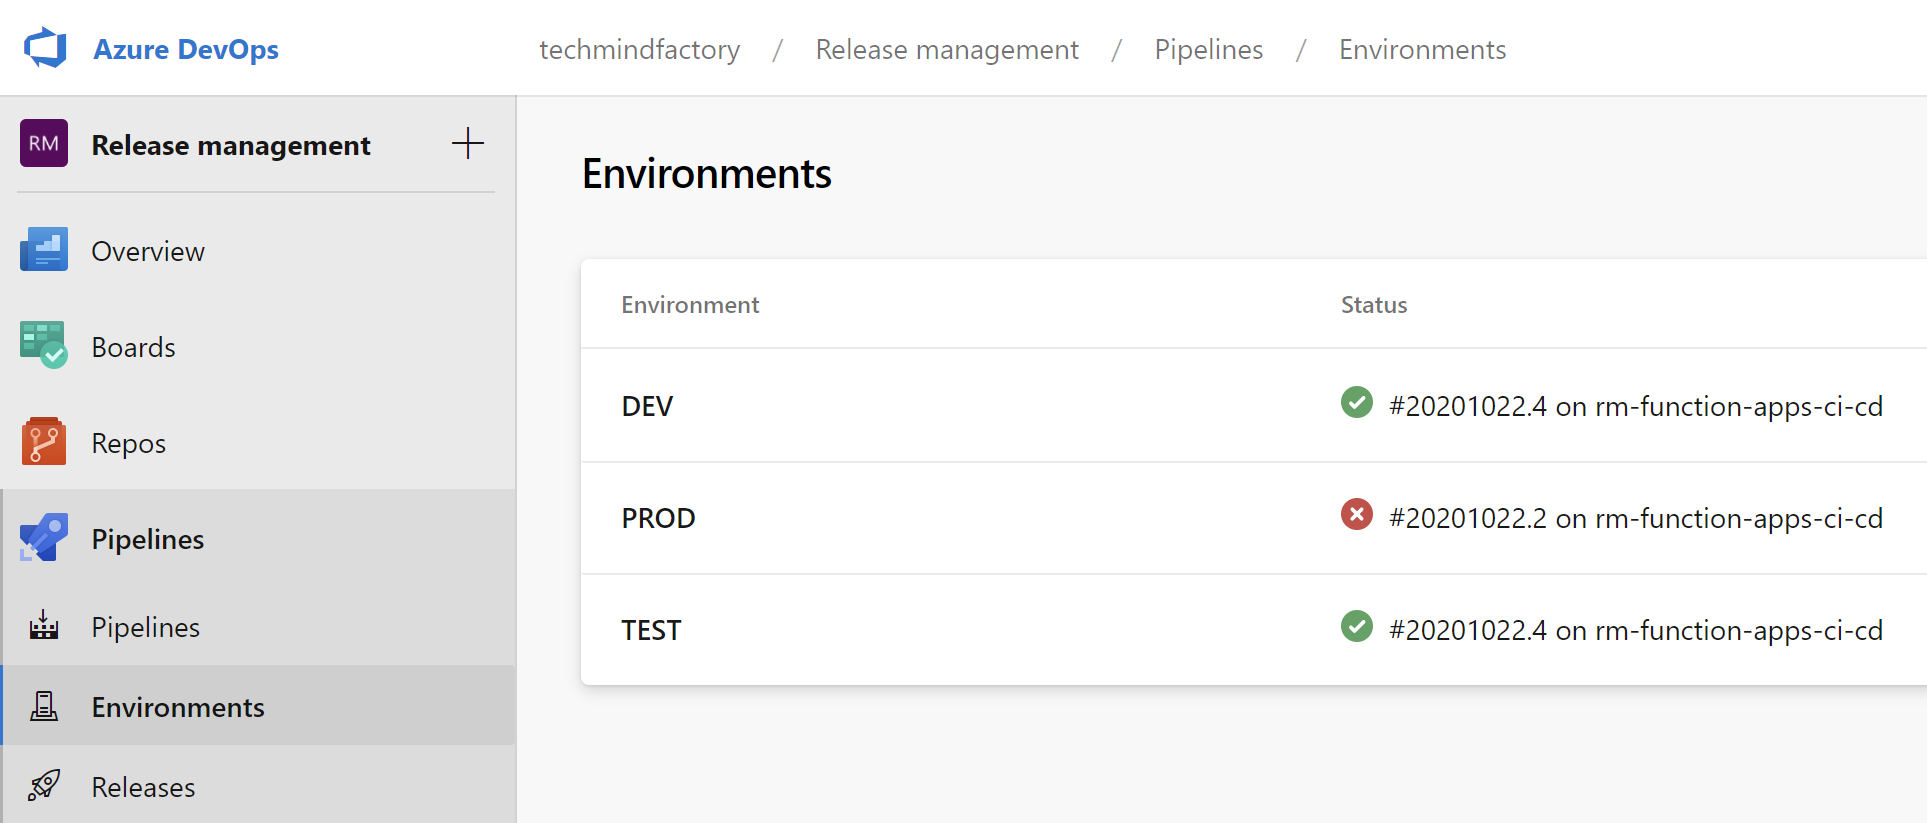
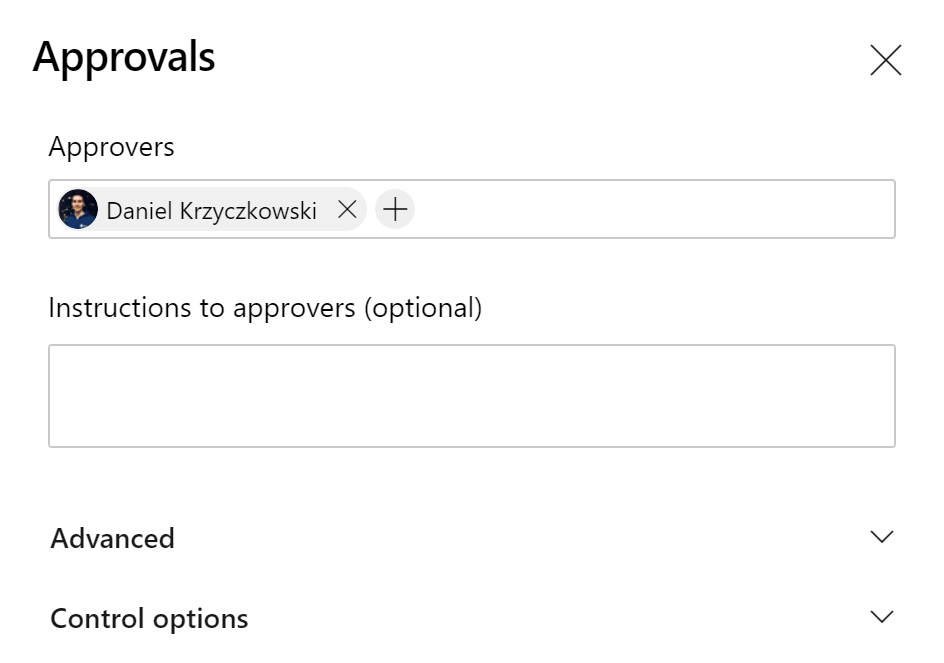
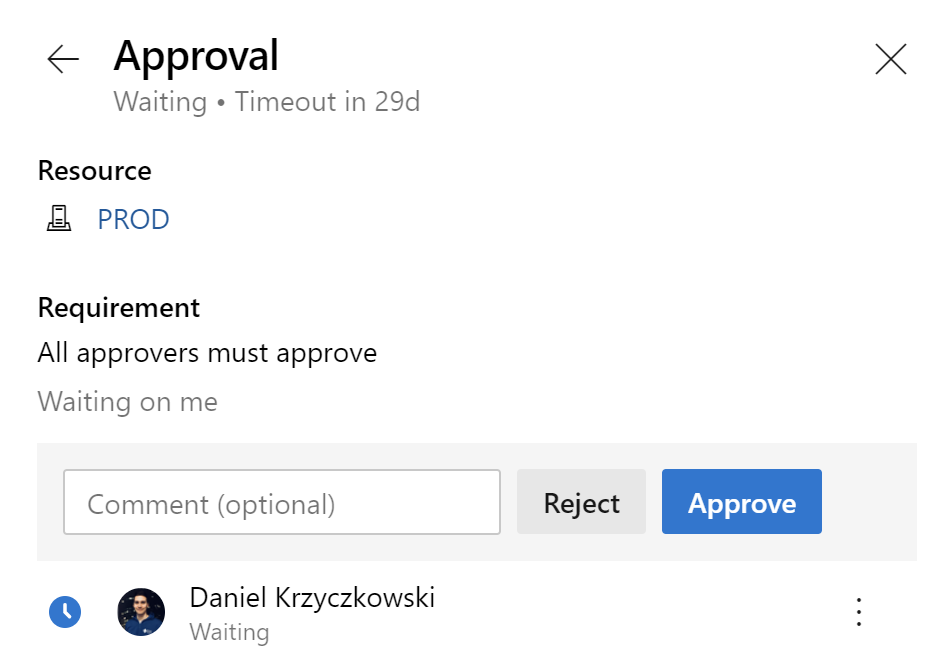
Then we can setup approvals for each environment:

Build generic template
In the azure-pipelines-build-template.yml file I have defined build steps. In this case I want to build Azure Functions project but please remember that you can adjust it and use it with your solution:
jobs:
  - job: 'Build'
    displayName: "Build RM Azure Functons"
    pool:
      vmImage: 'VS2017-Win2016'
    steps:

    - task: DotNetCoreCLI@2
      displayName: Restore NuGet packages
      inputs:
        command: 'restore'
        projects: '**/*.csproj'

    - task: DotNetCoreCLI@2
      displayName: Build project
      inputs:
        command: 'build'
        projects: '**/*.csproj'

    - task: DotNetCoreCLI@2
      displayName: Publish project
      inputs:
        command: publish
        arguments: '--configuration Release --output publish_output'
        projects: '**/*.csproj'
        publishWebProjects: false
        modifyOutputPath: false
        zipAfterPublish: false

    - task: ArchiveFiles@2
      displayName: Archive project files
      inputs:
        rootFolderOrFile: "$(System.DefaultWorkingDirectory)/publish_output"
        includeRootFolder: false
        archiveFile: "$(System.DefaultWorkingDirectory)/build$(Build.BuildId).zip"

    - task: PublishBuildArtifacts@1
      displayName: Publish package ready for deployment
      inputs:
        PathtoPublish: '$(System.DefaultWorkingDirectory)/build$(Build.BuildId).zip'
        artifactName: 'drop'
Release generic template
In the azure-pipelines-deployment-template.yml file there are steps responsible for downloading artifacts and deploying them to Azure, to specific environment. Please note that environment is injected as a parameter. This also makes this template generic so we can write it once.
  jobs:
  - deployment: Deploy
    displayName: "Deploy RM Azure Functons"
    environment: $
    pool:
      vmImage: 'VS2017-Win2016'
    strategy:
      runOnce:
        deploy:
          steps:
          - task: DownloadBuildArtifacts@0
            displayName: 'Download the build artifacts'
            inputs:
              buildType: 'current'
              downloadType: 'single'
              artifactName: 'drop'
              downloadPath: '$(System.DefaultWorkingDirectory)'

          - task: AzureFunctionApp@1
            displayName: Release package to Azure Funcion App
            inputs:
              azureSubscription: $
              appType: functionApp
              appName: $
              resourceGroupName: $
              package: $(System.DefaultWorkingDirectory)/**/*.zip
Release pipeline script
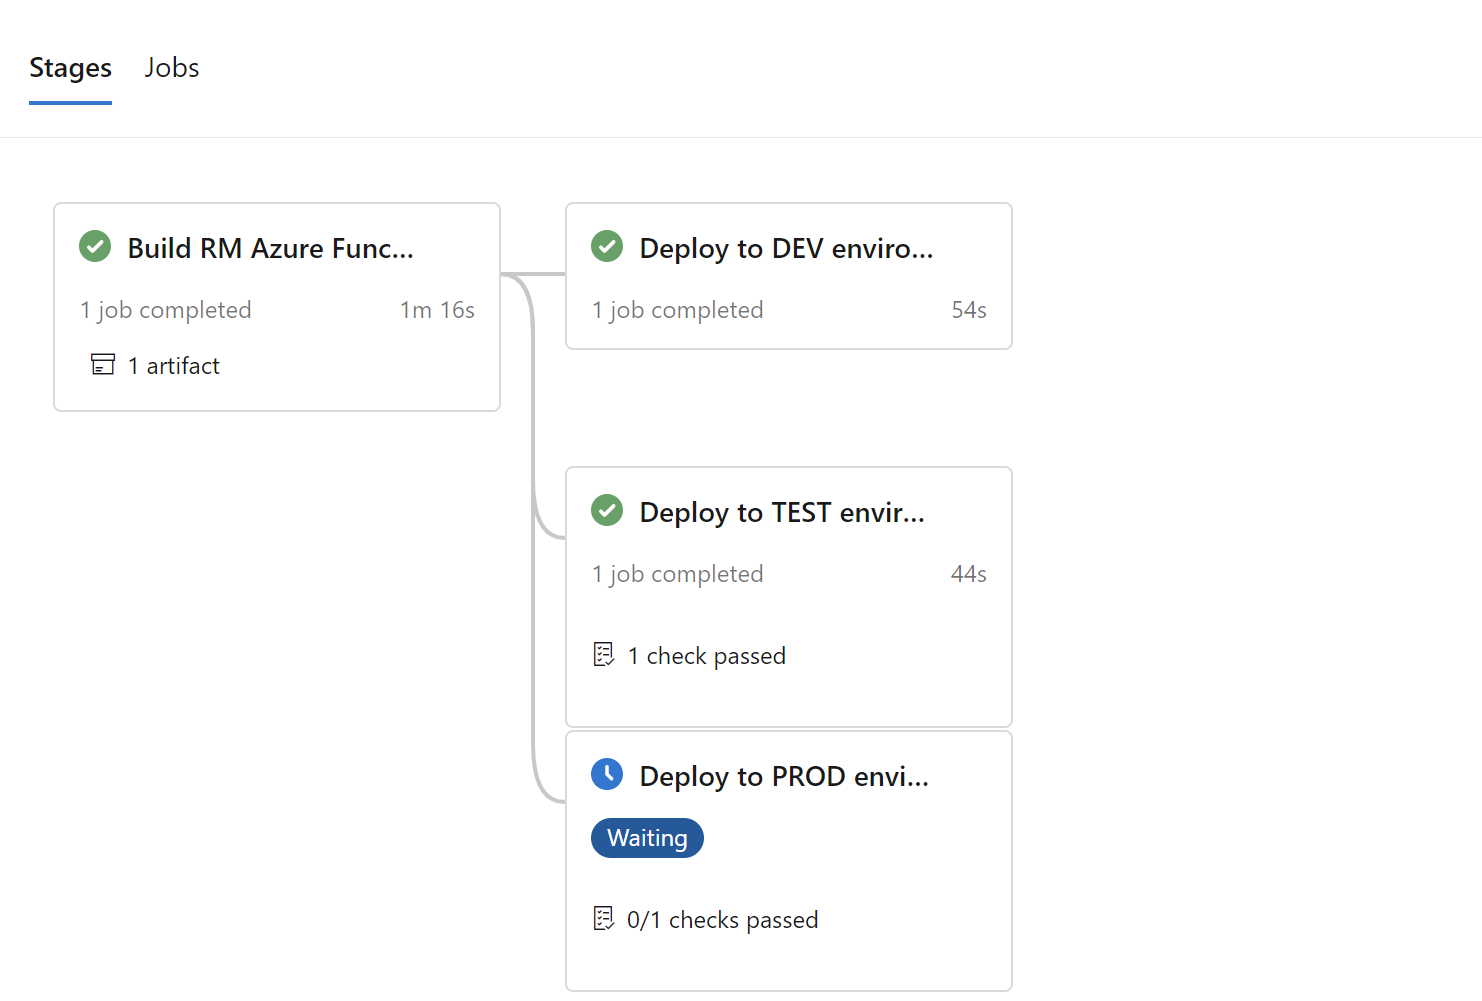
Once we have build and release YAML templates ready, we can use them together in the azure-pipelines.yml script. Please note that we provide the name of the build and release templates files in the template section. There are also stages: DEV, TEST, and PROD and each stage is related to specific environment. I configured approval gates for the TEST, and PROD environments so I will have to approve releases to these environments first:
trigger:
- master

stages:
- stage: Build
  displayName: 'Build RM Azure Functions'
  jobs:
  - template: azure-pipelines-build-template.yml

- stage: DeployDEV
  displayName: 'Deploy to DEV environment'
  condition: succeeded()
  dependsOn: Build
  variables:
  - group: 'rm-function-apps-dev-env-variable-group'
  jobs:
  - template: azure-pipelines-deployment-template.yml
    parameters:
      azureConnectionName: '$(AzureConnectionName)'
      funcAppName: '$(FuncAppName)'
      resourceGroupName: '$(ResourceGroupName)'
      environment: 'DEV'

- stage: DeployTEST
  displayName: 'Deploy to TEST environment'
  condition: succeeded()
  dependsOn: Build
  variables:
  - group: 'rm-function-apps-test-env-variable-group'
  jobs:
  - template: azure-pipelines-deployment-template.yml
    parameters:
      azureConnectionName: '$(AzureConnectionName)'
      funcAppName: '$(FuncAppName)'
      resourceGroupName: '$(ResourceGroupName)'
      environment: 'TEST'

- stage: DeployPROD
  displayName: 'Deploy to PROD environment'
  condition: succeeded()
  dependsOn: Build
  variables:
  - group: 'rm-function-apps-prod-env-variable-group'
  jobs:
  - template: azure-pipelines-deployment-template.yml
    parameters:
      azureConnectionName: '$(AzureConnectionName)'
      funcAppName: '$(FuncAppName)'
      resourceGroupName: '$(ResourceGroupName)'
      environment: 'PROD'
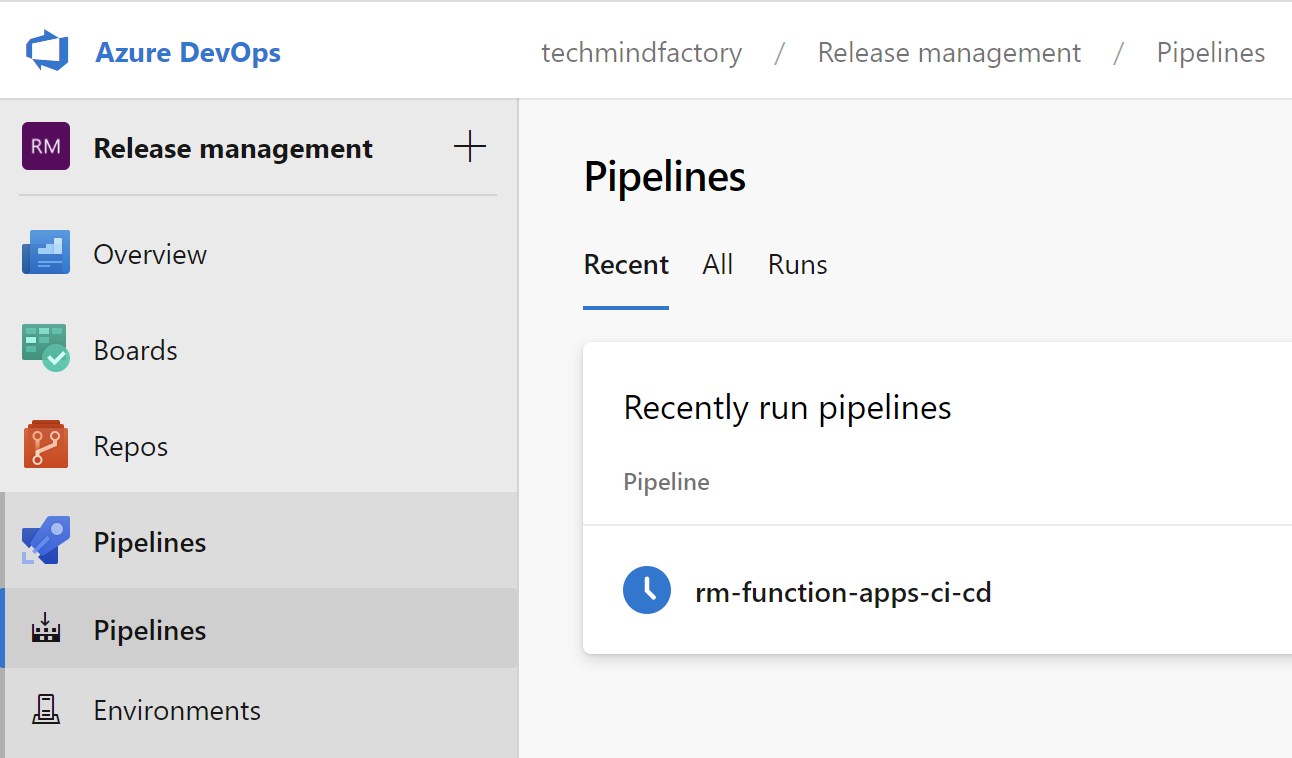
Finally we can configure pipeline in the Pipelines section. We have to indicate in the pipeline definition that we want to use the azure-pipelines.yml file from the repository.
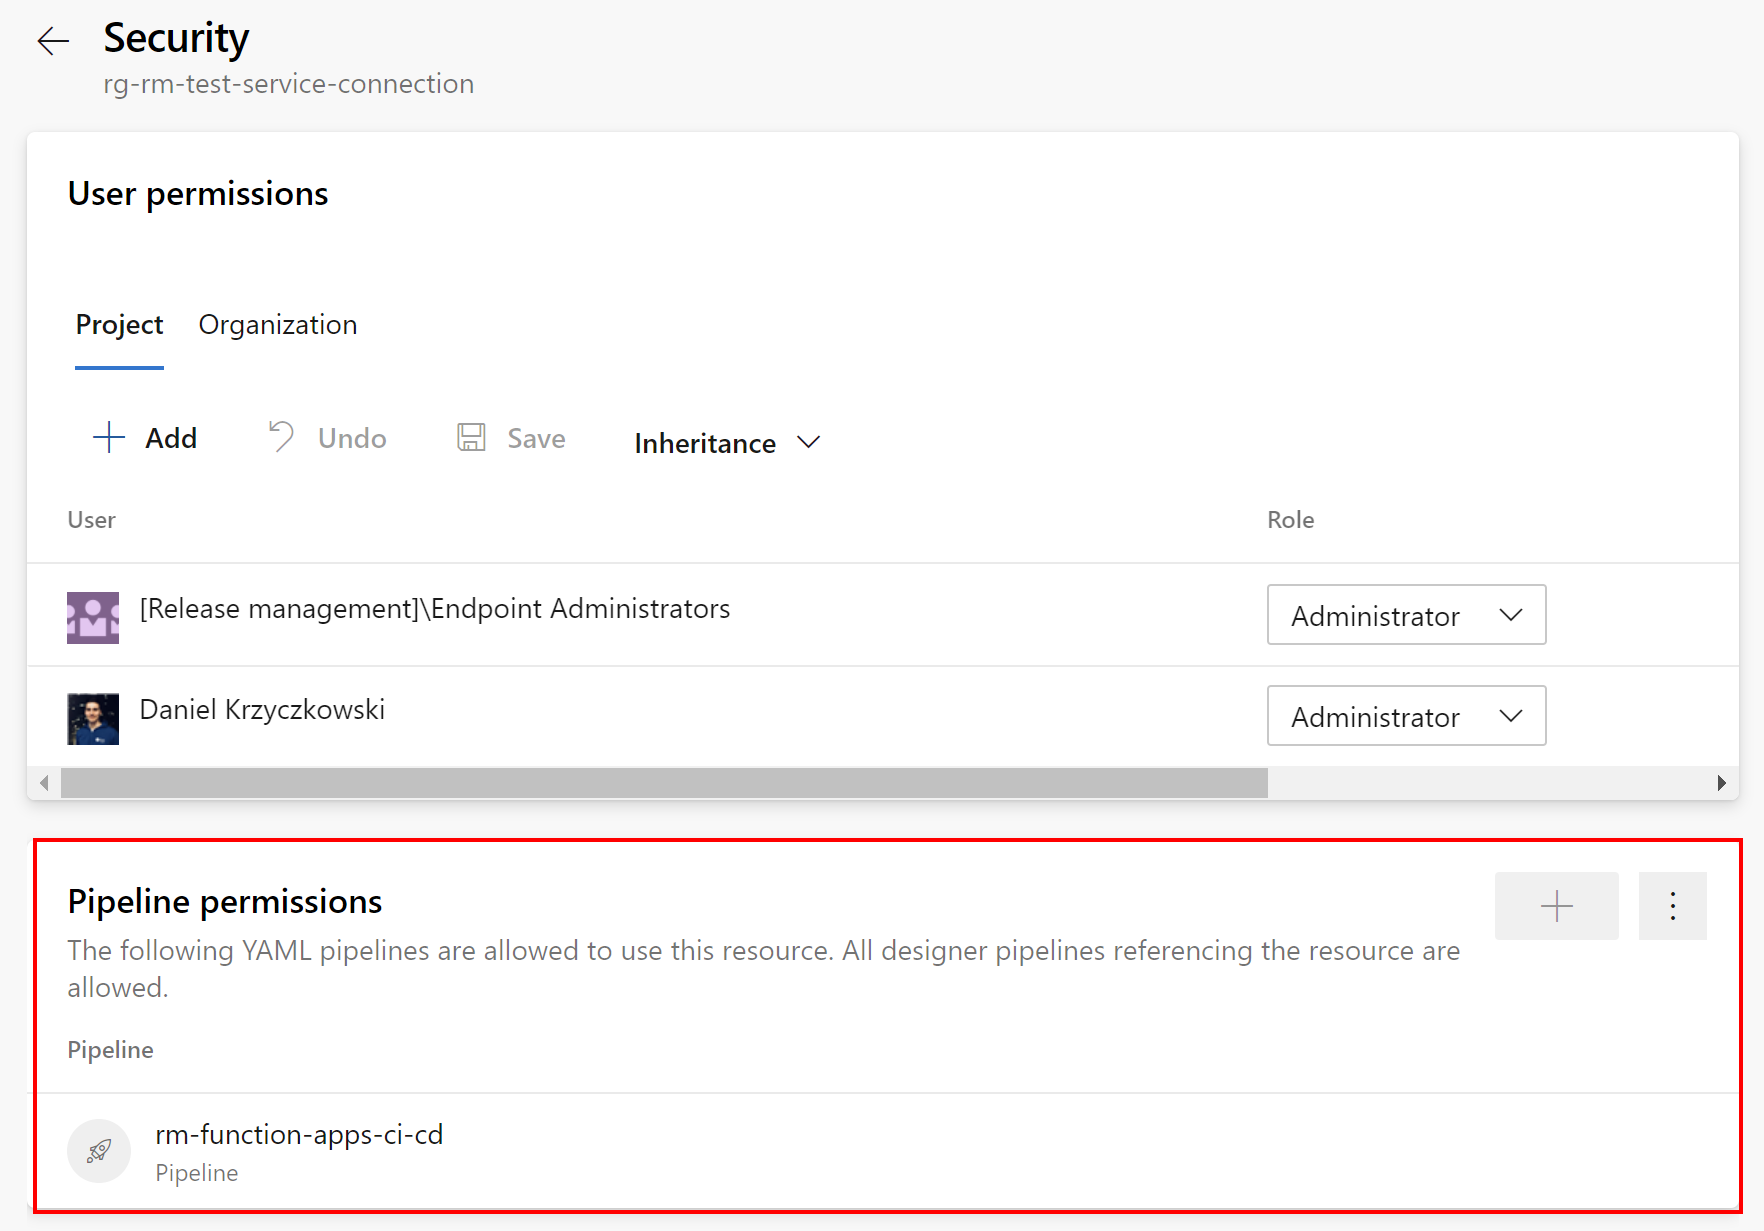
We have to also enable access to the service connections I described above so pipelines can use them to apply deployment. Under security section for specific service connection, we have to setup pipeline permissions:
Final overview
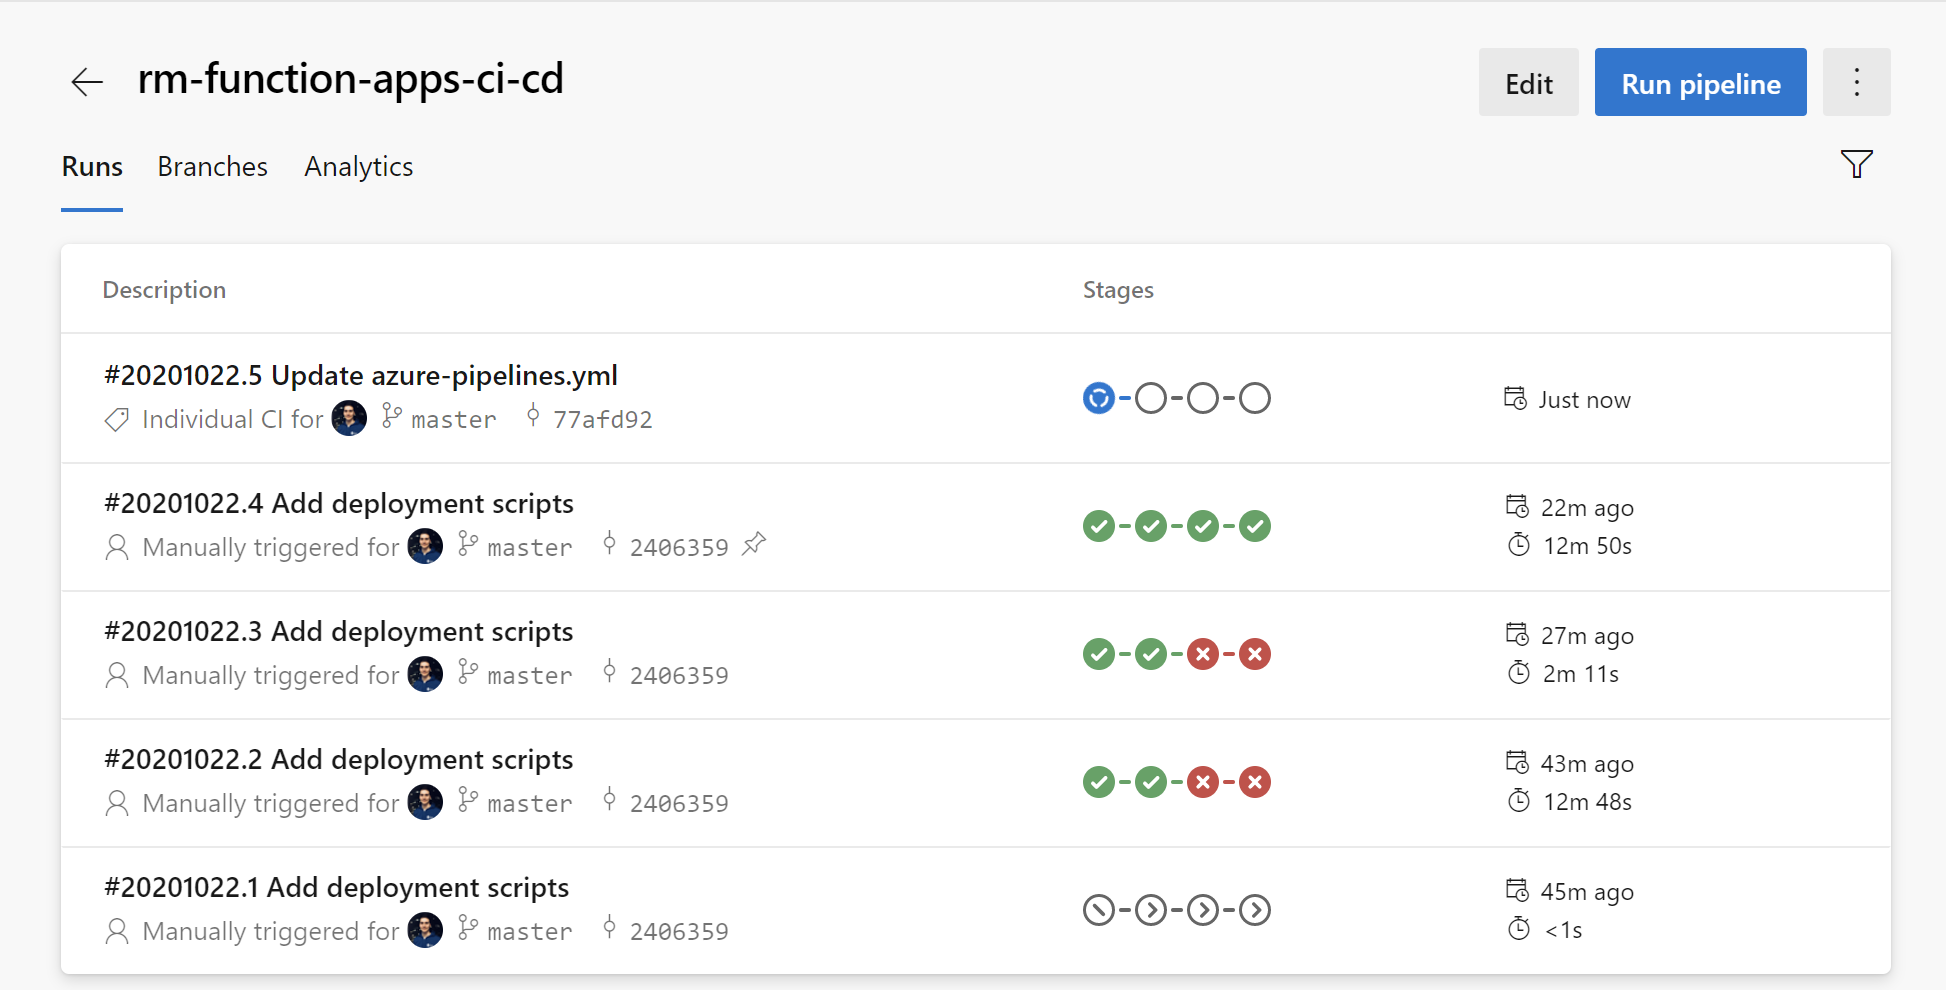
Once everything is configured, pipelien is triggered each time there is a new commit to the master branch in the GIT repository:
Summary
In this article we went through the release process configured in the Azure DevOps. As you can see we can use generic CI/CD YAML templates, inject parameters from the variable groups and release to each environment, including approvals.


