
Lost in Azure cloud identity - part 4

Introduction
I have decided to create series related to identity and access management using Azure cloud services. Important note first - I will focus more on the development side and integration aspects. This series is focused on developers who would like to understand different concepts and mechanisms around identity using Azure cloud services like Azure Active Directory and Azure Active Directory B2C. It does not mean that if you are an architect or administrator, you will not find anything interesting. I think that this series can be helpful for everyone who wants to learn more about identity services in the Microsoft Azure cloud.
This is the fourth article from the series. In this article, we are going to talk about Azure AD B2C custom policies with branded pages to provide a tailored user experience for login and registration pages.
Important
This series assumes that you already have some basic knowledge around identity concepts, application implementation, and Azure cloud services - at least Azure Active Directory.
Source code
Source code of all applications and AD B2C custom policies are available on my GitHub
Links to additional helpful resources
In this specific article, I will focus on the custom policies with branded pages but I will not show how to set up Identity Experience Framework in the Azure Active Directory B2C. There is really good documentation I recommend you to check:
Tutorial: Create an Azure Active Directory B2C tenant
Tutorial: Create user flows in Azure Active Directory B2C using custom policies
Azure AD B2C custom policy overview
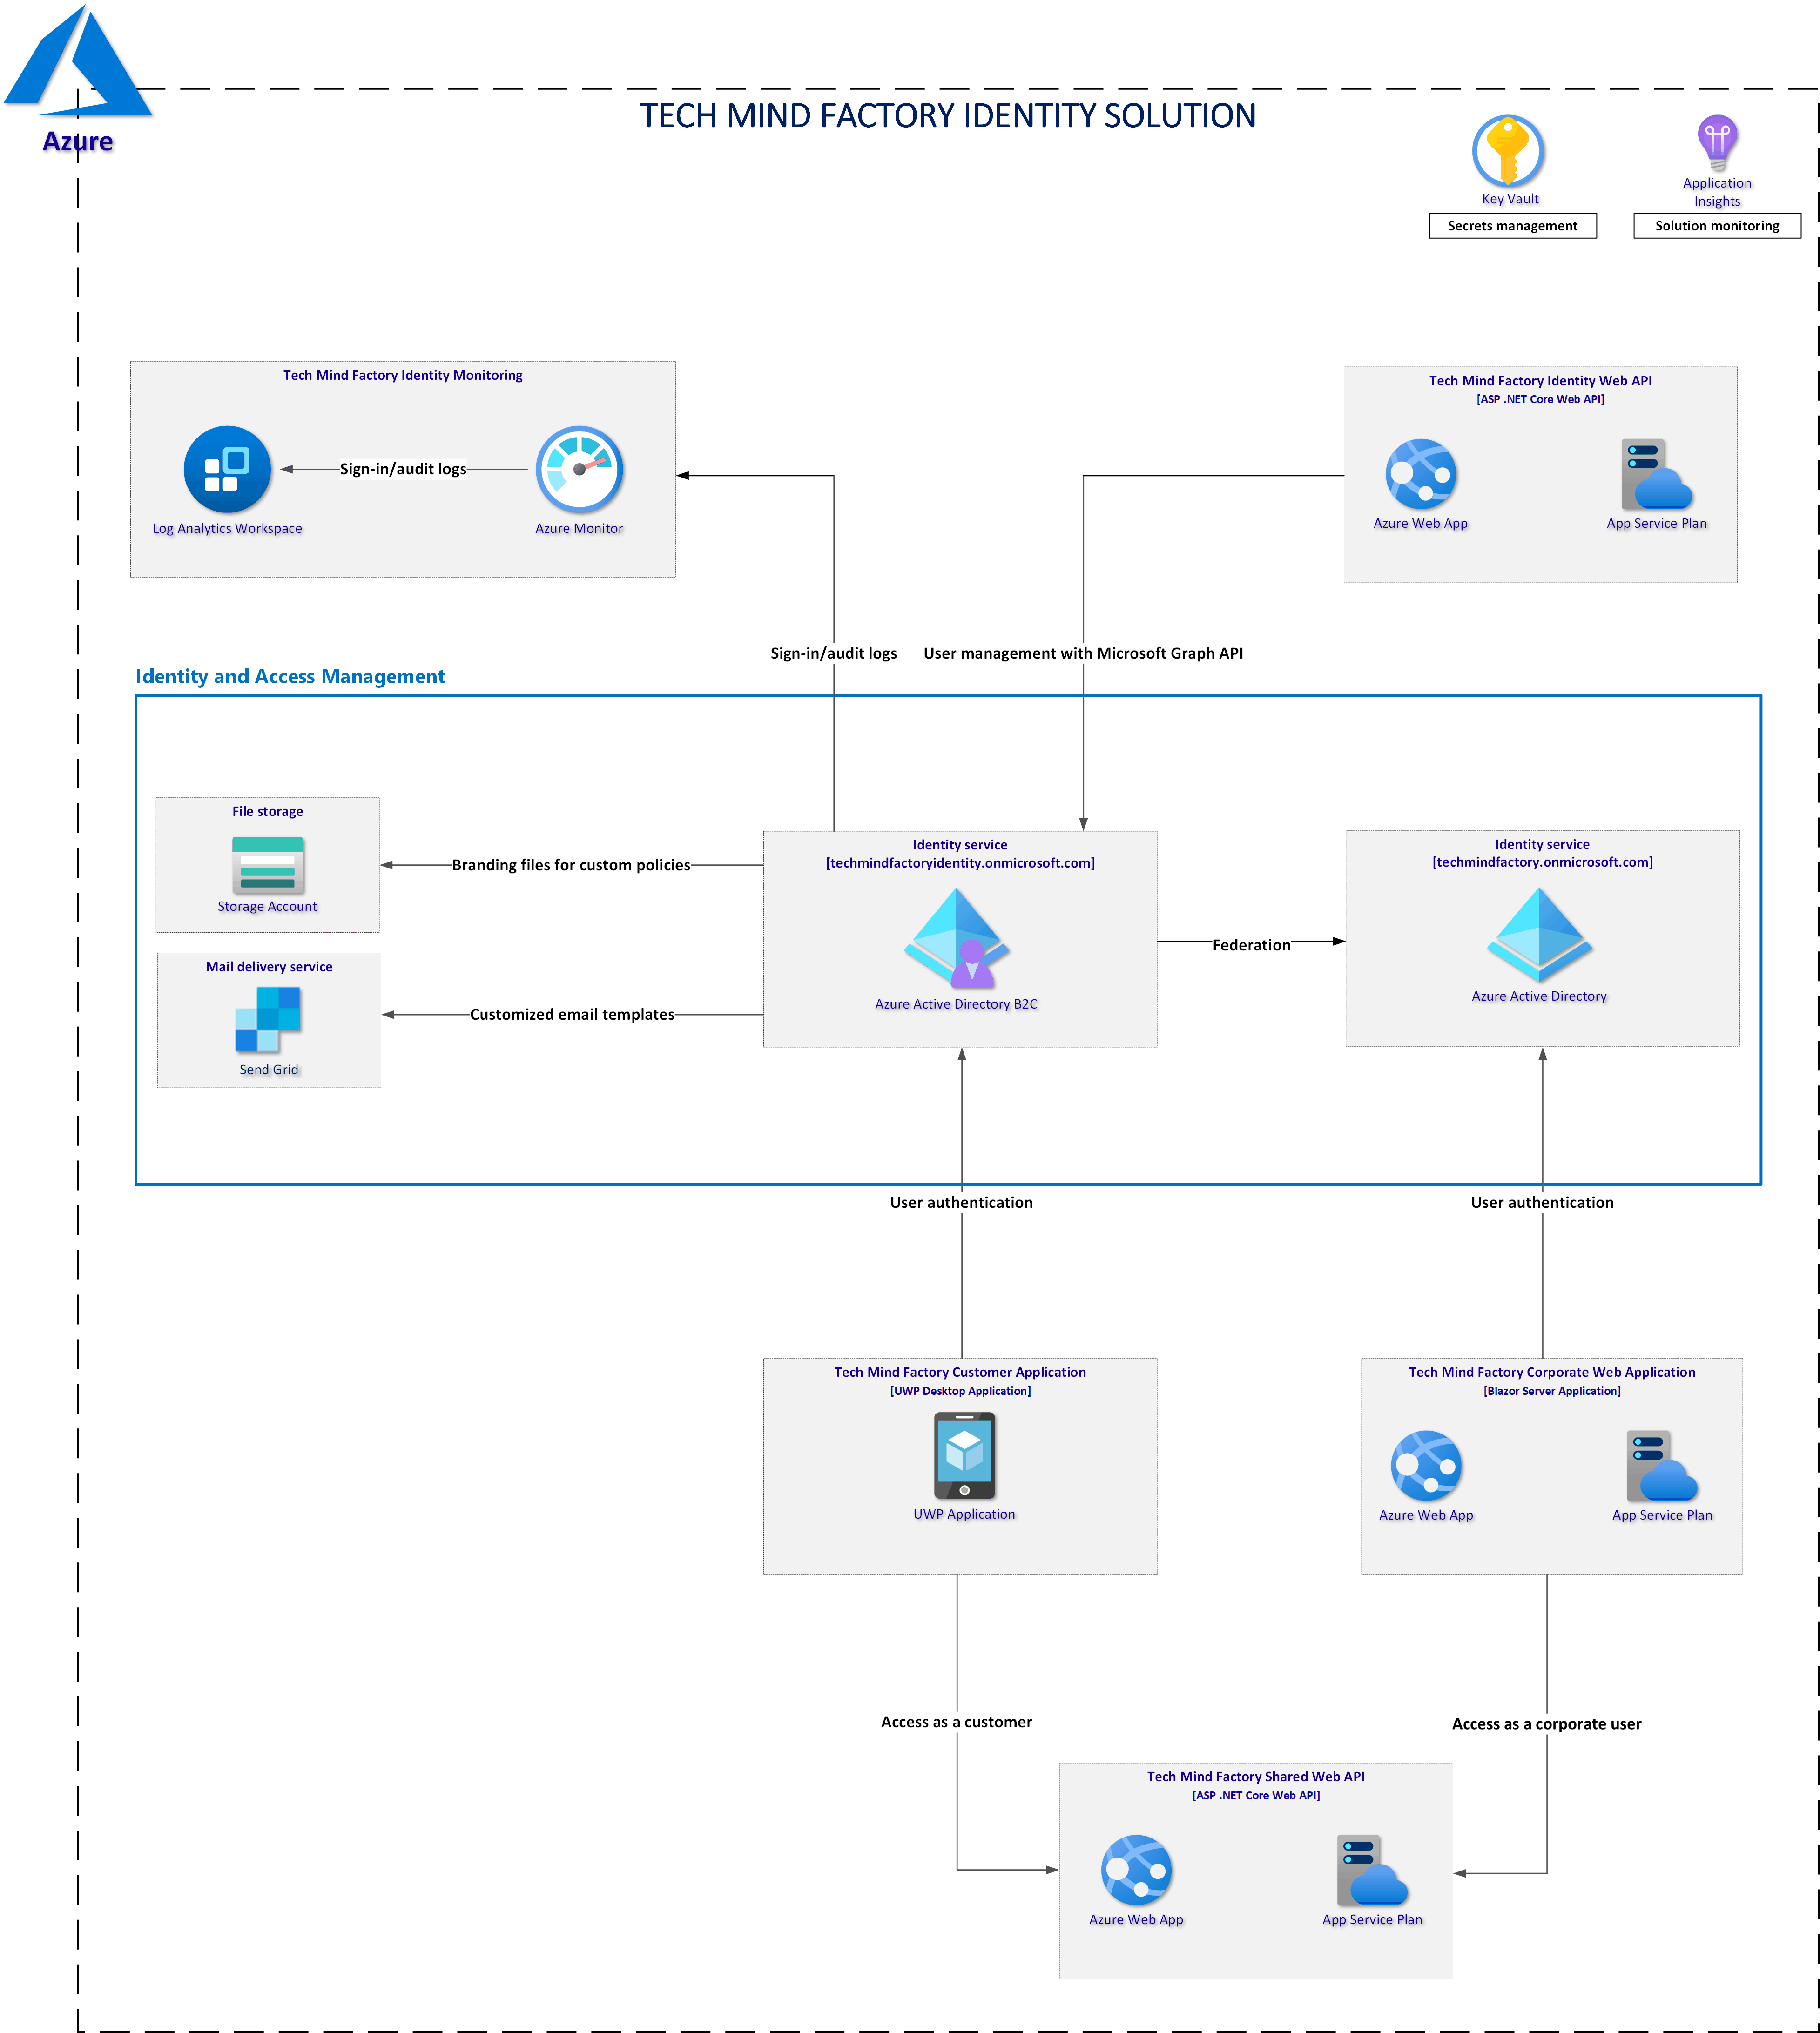
Solution architecture discussed in this series
Azure AD B2C custom policies setup
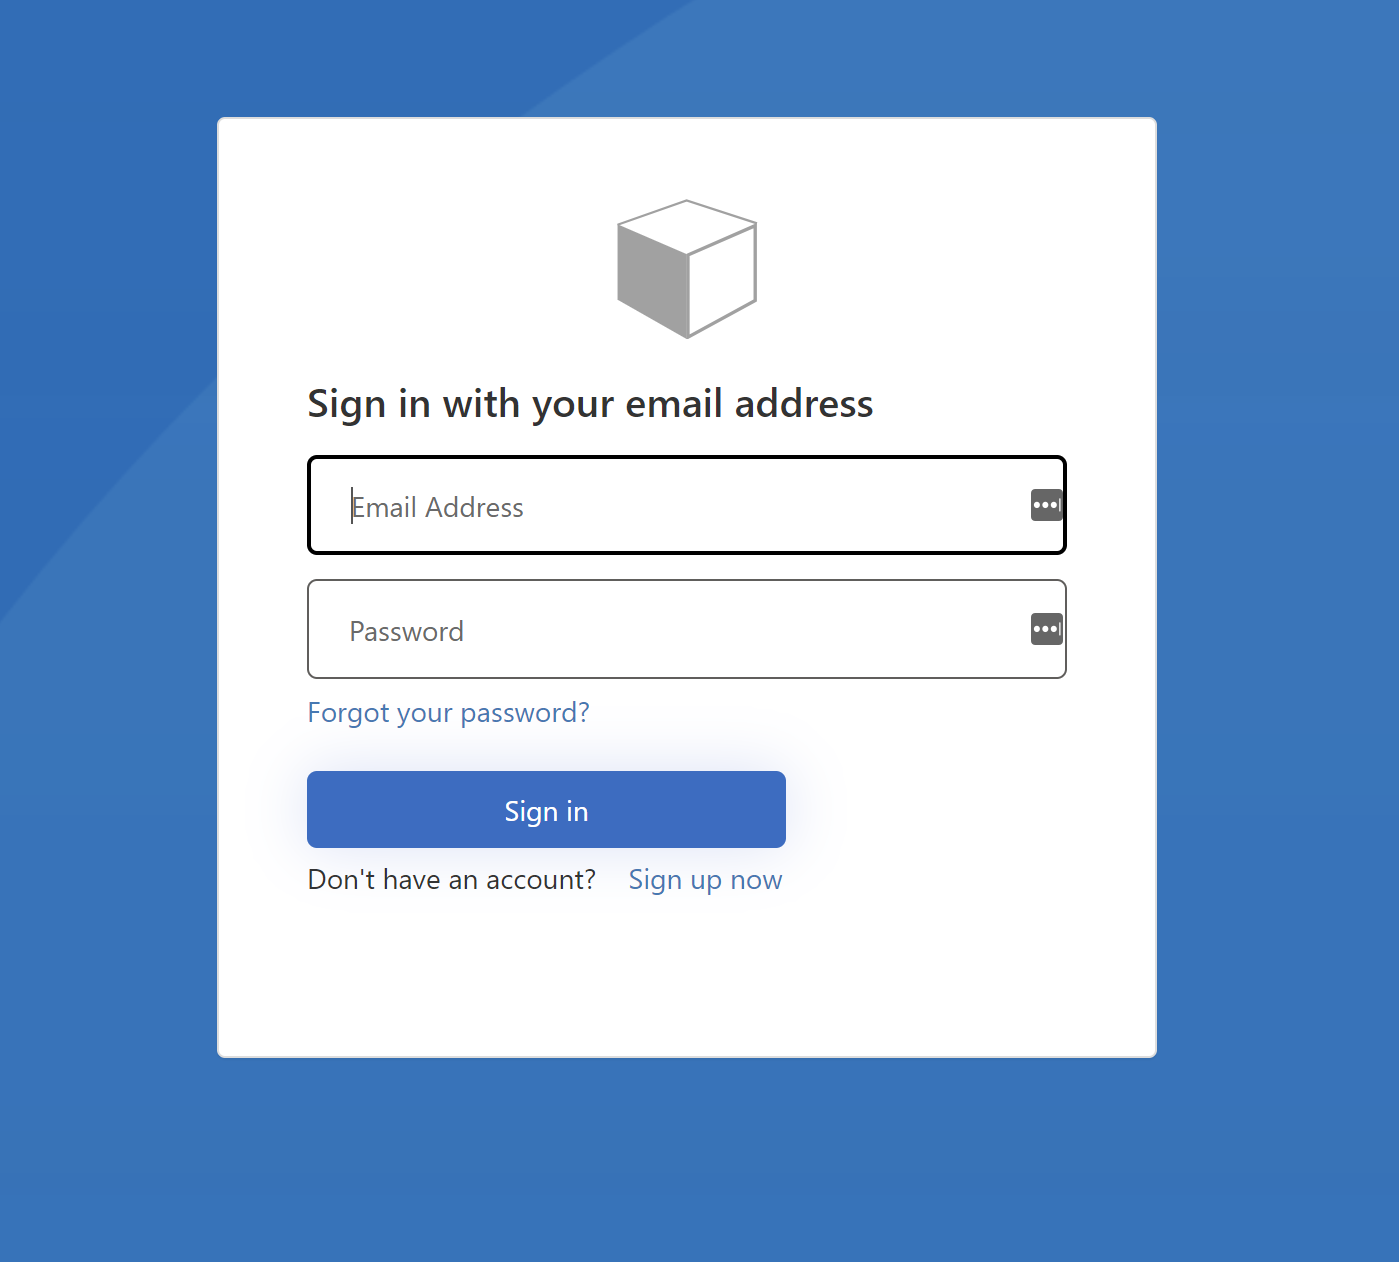
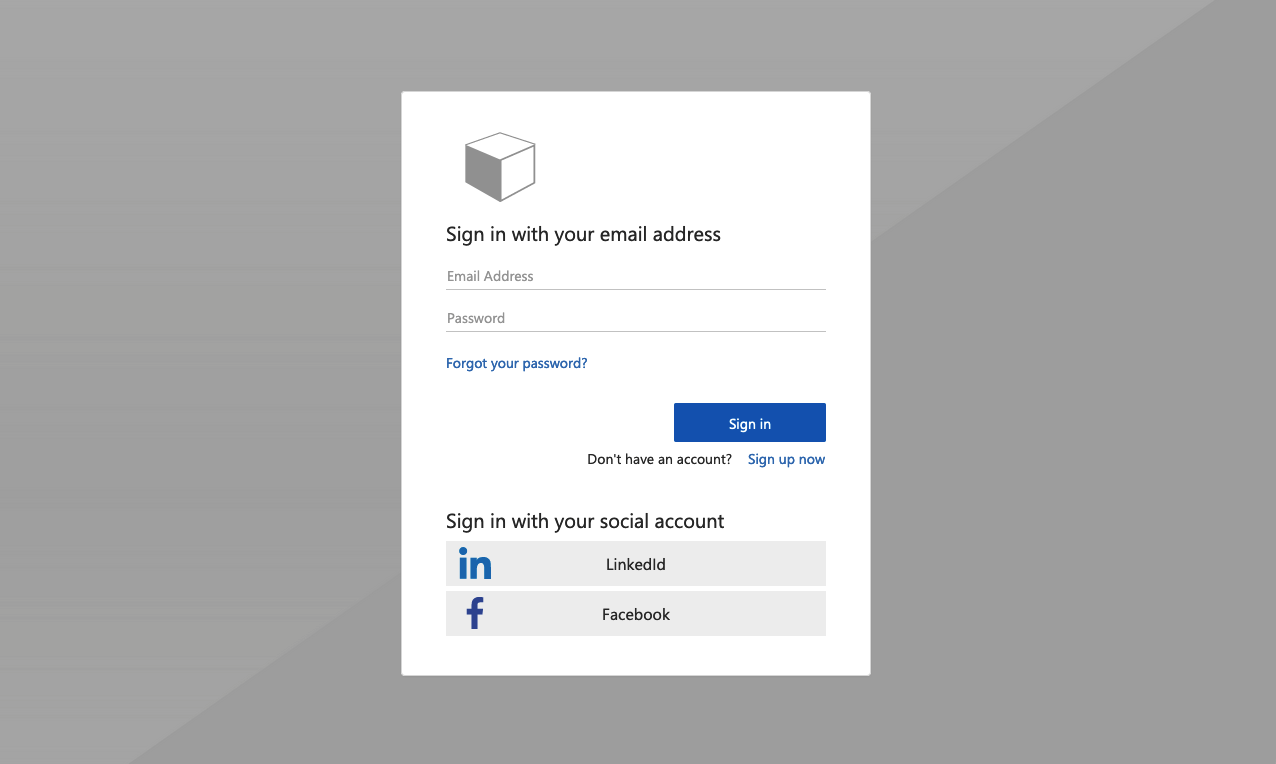
Once you create Azure AD B2C tenant and configure Identity Experience Framework you are ready to start using custom policies and branded pages. As you probably read in the docuemntation, Microsoft provides custom policies starter pack on GitHub. Once you upload them to the Azure AD B2C, you will see the default look & feel:
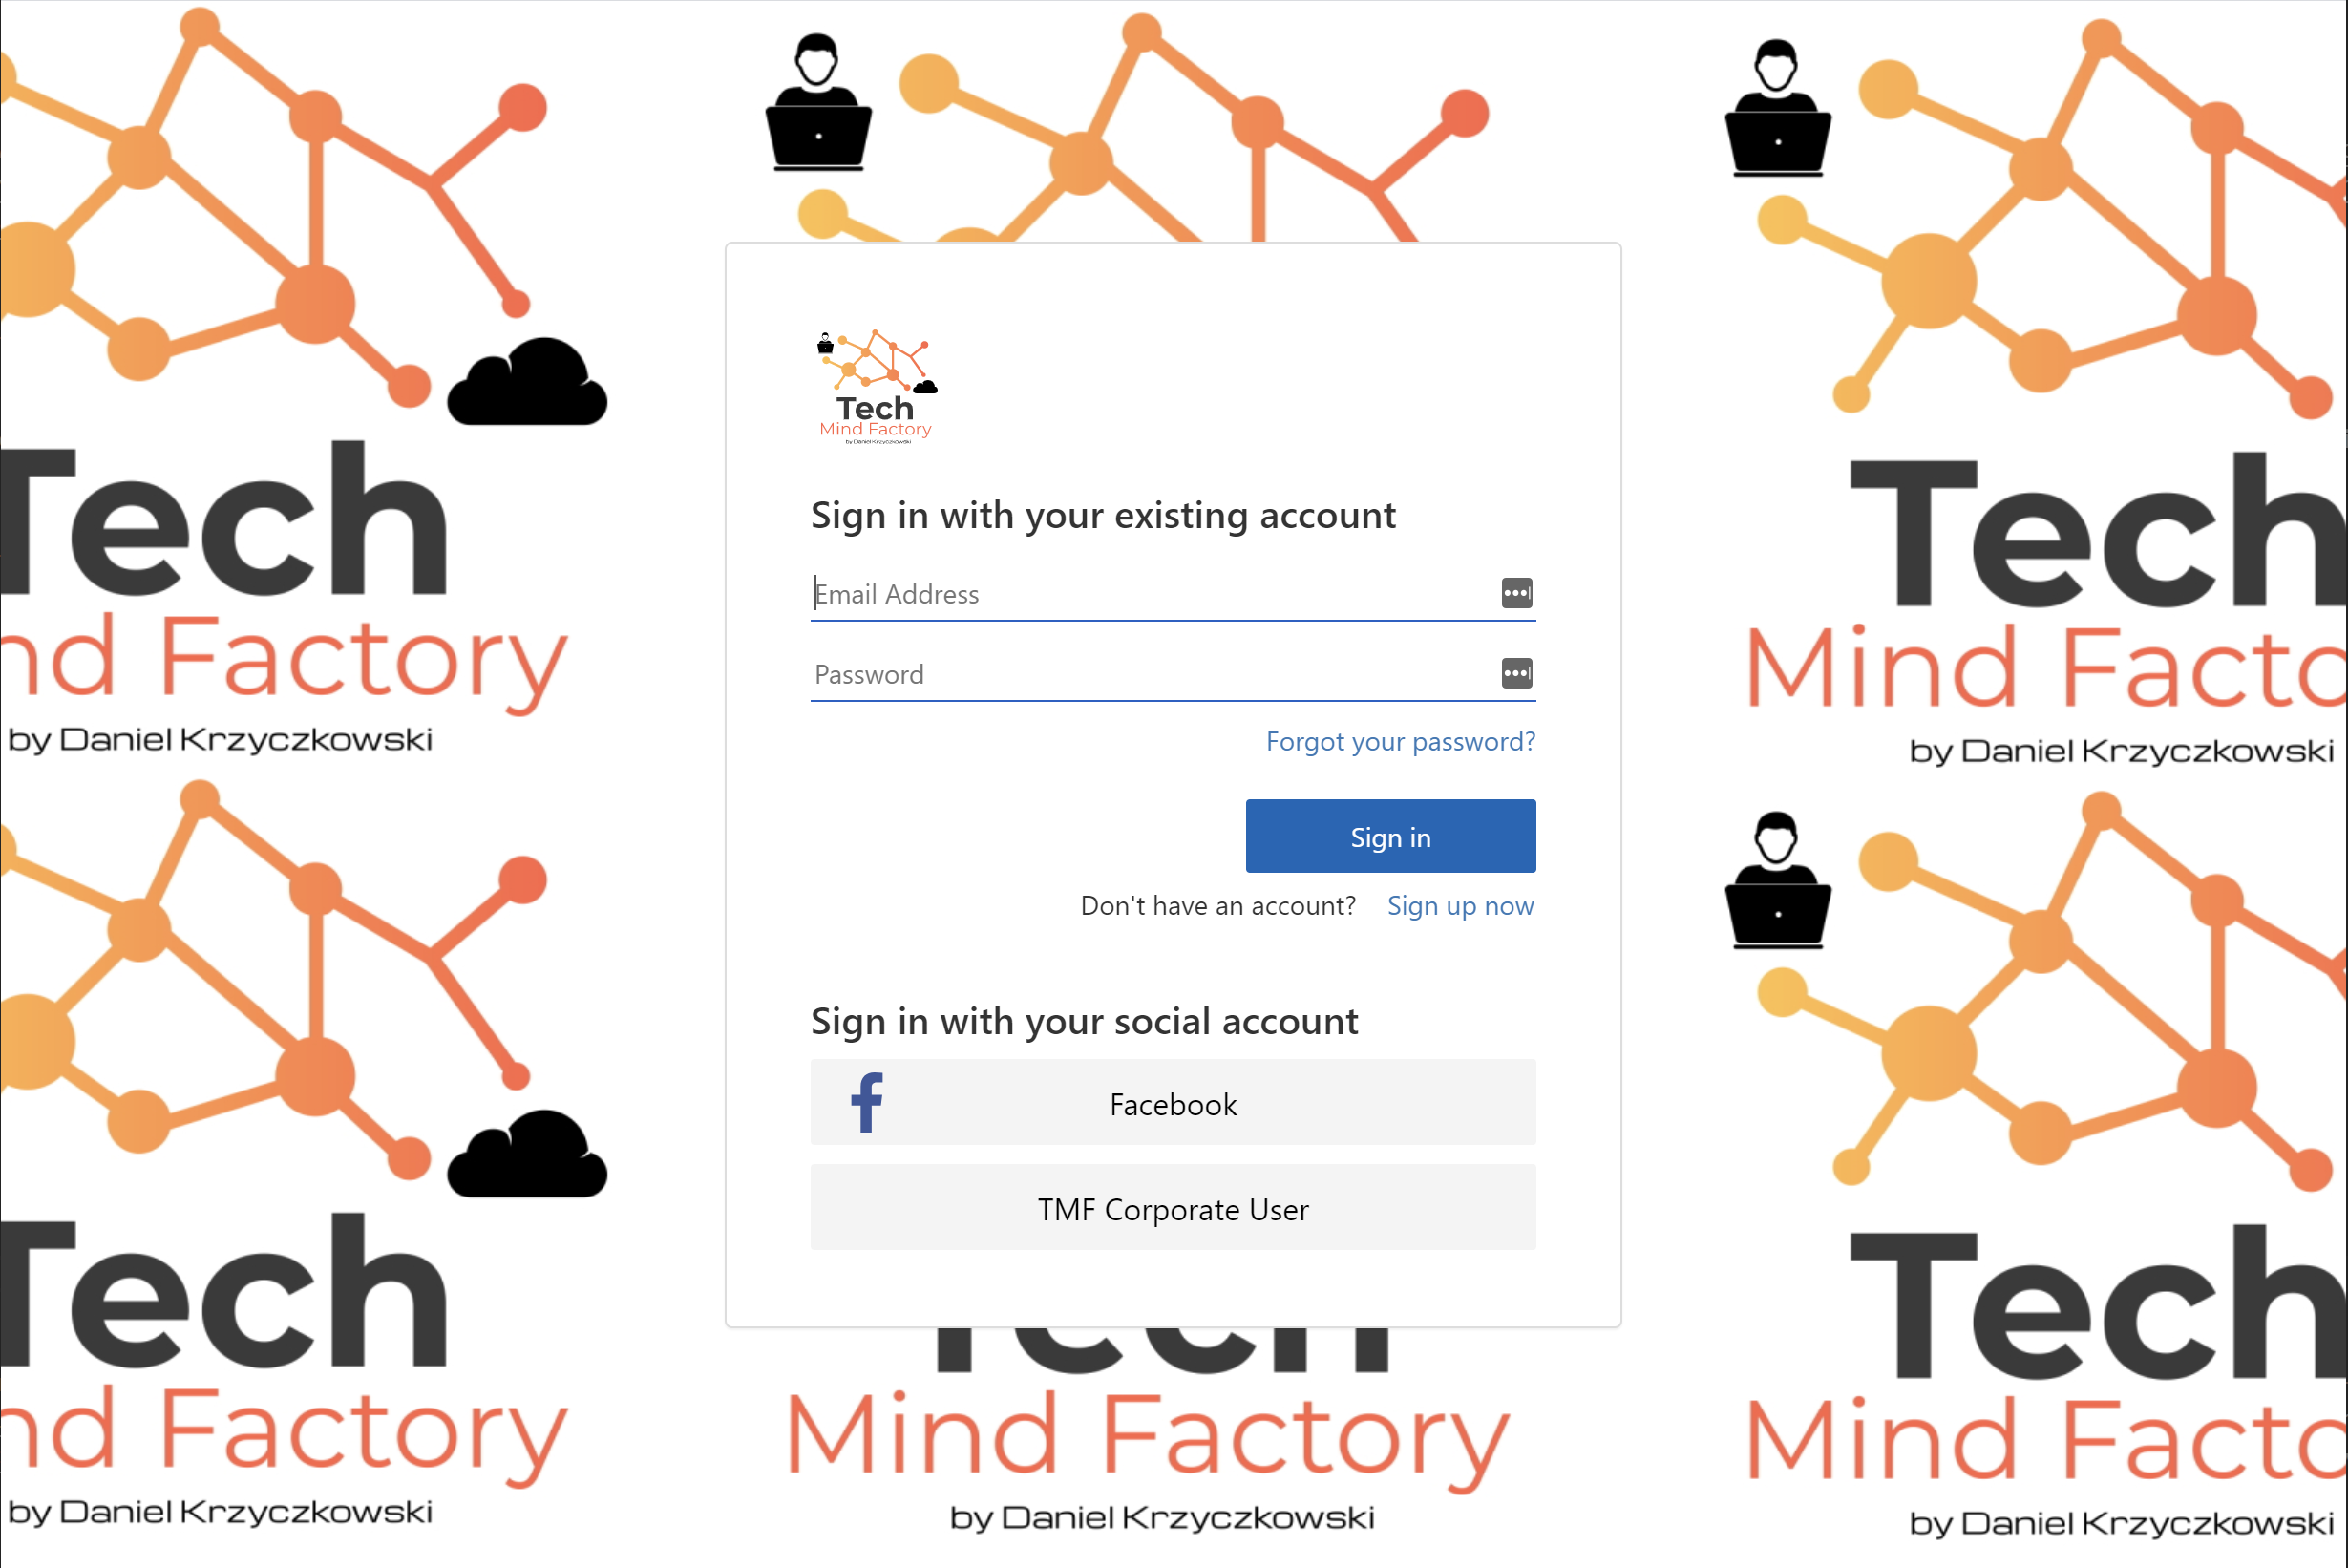
This is quite nice but our goal is to provide a tailored user experience and branding which is aligned with our company branding. In my case I modified custom policies to use my Tech Mind Factory branding:
HTML and CSS assets
User interface customization is possible in the Azure AD B2C with HTML templates. These templates can be found on GitHub. They are provided by Microsoft. As you can see there are three default templates you can use as a base for modifications:
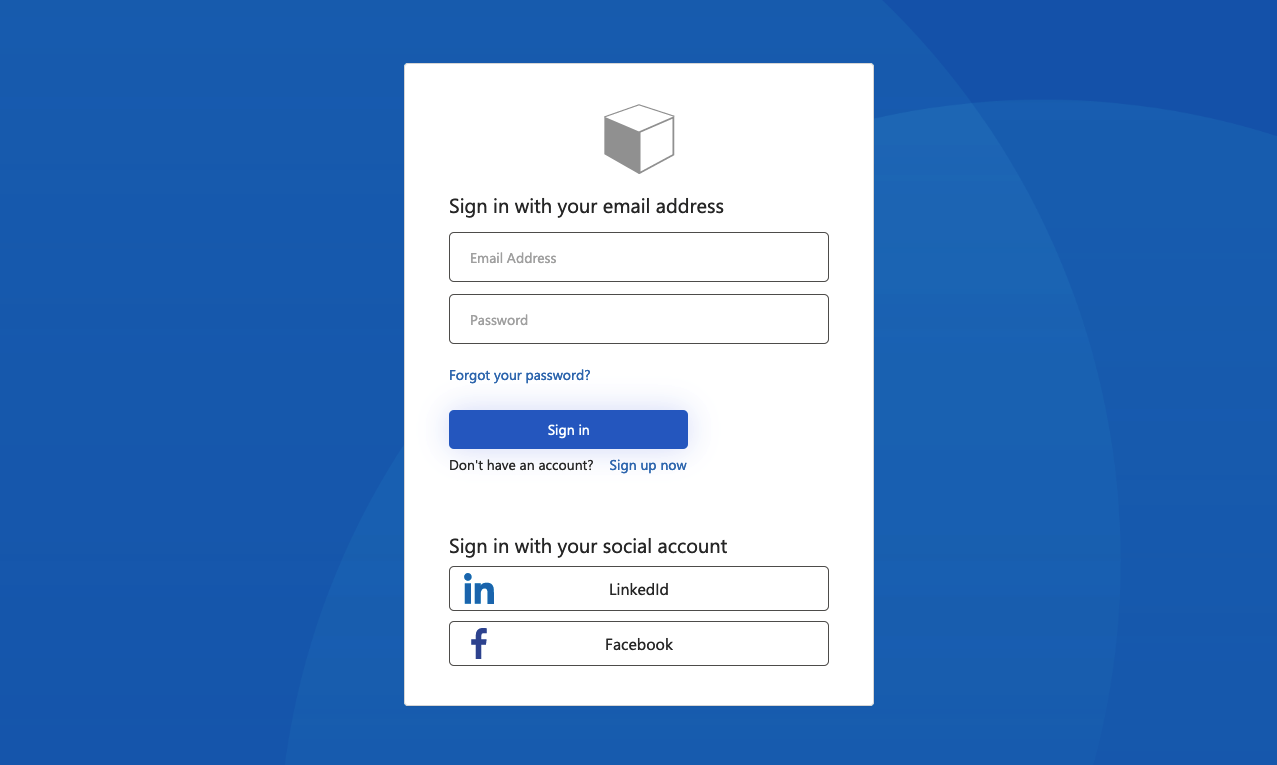

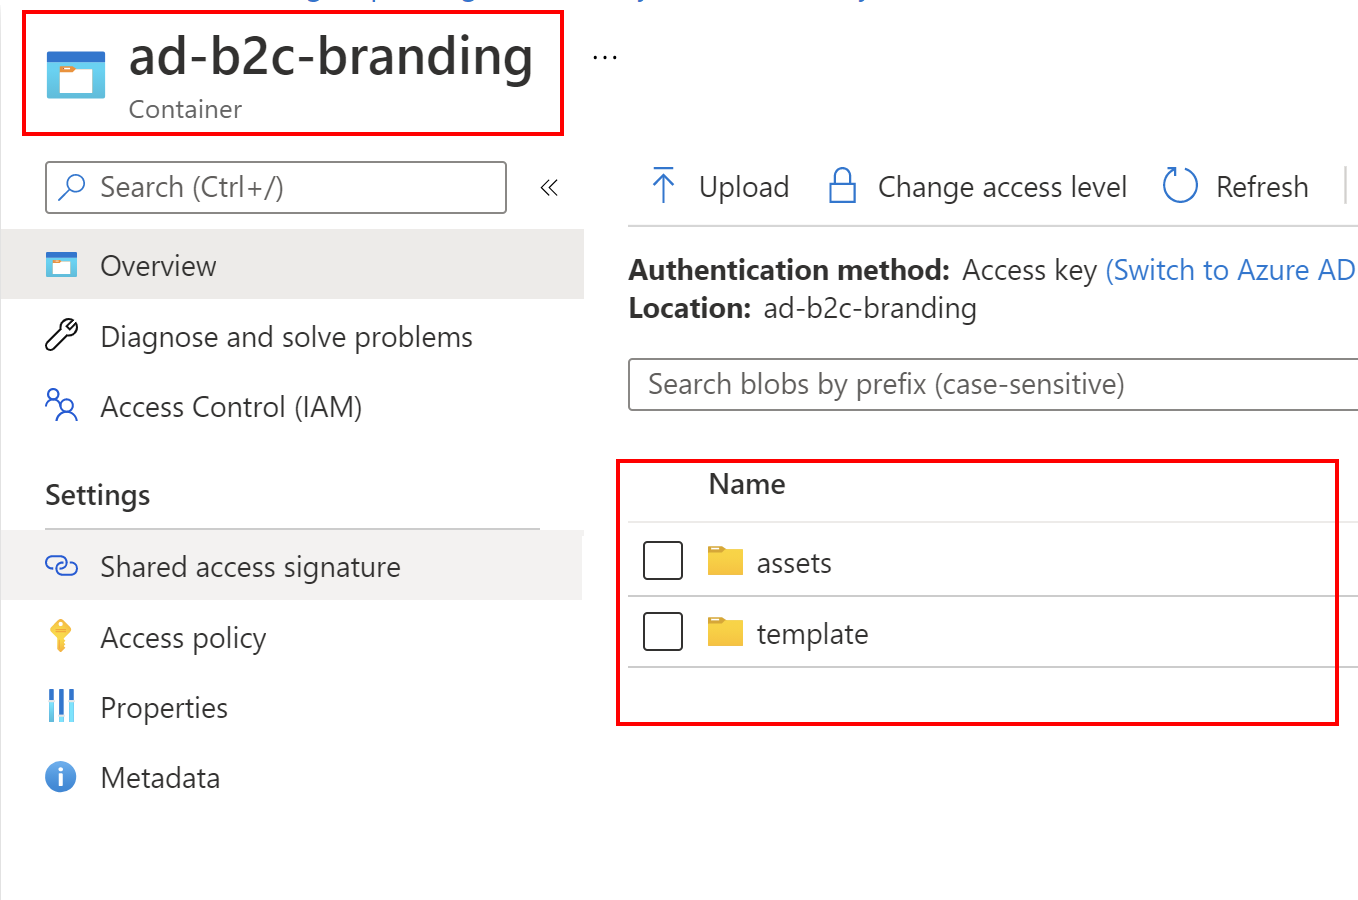
Under this link you can find step-by-step explanation how to modify above branding pages and host them on the Azure Blob Storage. I did the same, my branded pages are hosted on the public blob in the Azure cloud:
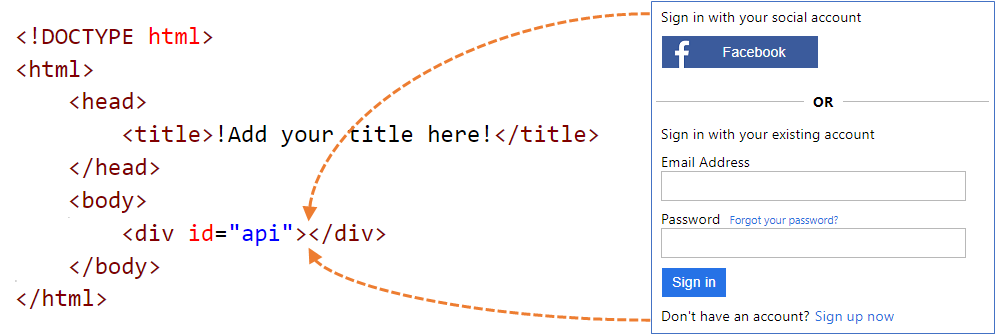
There is also a great explanation of how Azure AD B2C injects content in the api div section:
Each page in the user experience loads its content from the URL you specify for that page (from the Azure Blob Storage in this case). After content is loaded from the blob URL, it’s merged with an HTML fragment inserted by Azure AD B2C (in the api div section), and then the page is displayed to the user:
Linking CSS files in the HTML files
If you open one of the HTML files downloaded in the step above, you will notice that each file reference CSS files. When hosting your files on the Azure Blob Storage it is good to provide absolute path to each file. Here is the example for my selfAsserted.html file:
<!DOCTYPE html>
<!-- saved from url=(0080)../assets/AzureBlue/selfAsserted.cshtml -->
<html><head><meta http-equiv="Content-Type" content="text/html; charset=UTF-8">

    <title>Sign up</title>


    <meta http-equiv="X-UA-Compatible" content="IE=edge">
    <meta name="viewport" content="width=device-width, initial-scale=1">
    <link href="https://ajax.aspnetcdn.com/ajax/bootstrap/3.3.5/css/bootstrap.min.css" rel="stylesheet" type="text/css" />

    <link href="##StorageAccountPath##/template/css/assets.css" rel="stylesheet" type="text/css" />
    <link href="##StorageAccountPath##/template/css/common.css" rel="stylesheet" type="text/css" />
    <link href="##StorageAccountPath##/template/css/selfasserted.css" rel="stylesheet" type="text/css" />
</head>
<body>
    <div class="container  self_asserted_container ">
        <div class="row">
            <div class="col-lg-6">
                <div class="panel panel-default">
                    <div class="panel-body">
                        <img alt="Company Logo" class="companyLogo" src="##StorageAccountPath##/assets/images/tmf-logo.svg">
                        <div id="api">
                        </div>
                    </div>
                </div>
            </div>
        </div>
    </div>


</body></html>
As you can see I have a placeholder called ##StorageAccountPath##. You can replace it with your Azure Blob Storage URL. I also replace this value in the CI/CD pipeline in Azure DevOps but this I am going to explain in another article in this series.
In the backgrounds folder you can see that I have the Tech Mind Factory logo (background-tmf.jpg file). I reference this background file in the assets.css file:
body {
    background-image: url(../../assets/backgrounds/background-tmf.jpg);
}
@font-face {
    font-family: 'SegoeUI';
    src: url(../../assets/fonts/segoeui.WOFF);
    font-weight: normal;
}
@font-face {
    font-family: 'SegoeUI';
    src: url(../../assets/fonts/segoeui_bold.WOFF);
    font-weight: bold;
}
...
I recommend you to check all the files I provided in the idp-pages folder on my GitHub.
Link custom policies with HTML pages hosted on the Azure Blob Storage
Important - make sure that you went through all the steps presented in the documentation. Then you are ready to reference the files in the custom policies files.
Once you upload above HTML, CSS, and assets file to the Azure Blob Storage, you can reference them from the custom policies files. In the TrustFrameworkBase.xml file I referenced above branding files. This linking should be done in the ContentDefinitons section:
      <ContentDefinition Id="api.signuporsignin">
        <LoadUri>##StorageAccountPath##/template/unified.cshtml</LoadUri>
        <RecoveryUri>##StorageAccountPath##/template/exception.html</RecoveryUri>
        <DataUri>urn:com:microsoft:aad:b2c:elements:unifiedssp:1.0.0</DataUri>
        <Metadata>
          <Item Key="DisplayName">Signin and Signup</Item>
        </Metadata>
      </ContentDefinition>
      <ContentDefinition Id="api.selfasserted">
        <LoadUri>##StorageAccountPath##/template/selfAsserted.html</LoadUri>
        <RecoveryUri>##StorageAccountPath##/template/exception.html</RecoveryUri>
        <DataUri>urn:com:microsoft:aad:b2c:elements:selfasserted:1.1.0</DataUri>
        <Metadata>
          <Item Key="DisplayName">Collect information from user page</Item>
        </Metadata>
      </ContentDefinition>
      <ContentDefinition Id="api.selfasserted.profileupdate">
        <LoadUri>##StorageAccountPath##/template/selfAsserted.cshtml</LoadUri>
        <RecoveryUri>##StorageAccountPath##/template/exception.html</RecoveryUri>
        <DataUri>urn:com:microsoft:aad:b2c:elements:selfasserted:1.1.0</DataUri>
        <Metadata>
          <Item Key="DisplayName">Collect information from user page</Item>
        </Metadata>
      </ContentDefinition>
As you can see above, in the LoadUri I reference the specific branding page hosted on the Azure Blob Storage. Note that for the RecoveryUri I also replaced the default value with the link to the exception page html.
Important note - each html file name matches ContentDefinition ID so for instance in the content definition called api.selfasserted we reference the selfAsserted.html file.
The final result after uploading to the portal should look like below:
Summary
In this article, we discussed how to implement user authorization using Azure Active Directory App Roles and authorization handlers. I encourage you to check the source code on my GitHub for the Tech Mind Factory Corporate Web App to learn more in details. You can also ask if the same mechanism can be used with ASP .NET Core Web APIs. Of course, it can be used, and here is the sample from my GitHub how to achieve that. I hope this will help you.