Lost in Azure cloud identity - part 2
Introduction
I have decided to create series related to identity and access management using Azure cloud services. Important note first - I will focus more on the development side and integration aspects. This series is focused on developers who would like to understand different concepts and mechanisms around identity using Azure cloud services like Azure Active Directory and Azure Active Directory B2C. It does not mean that if you are an architect or administrator, you will not find anything interesting. I think that this series can be helpful for everyone who wants to learn more about identity services in the Microsoft Azure cloud.
This is the second article from the series. In this article, we are going to talk about some key differences between Azure Active Directory and Azure Active Directory B2C services and in what specific scenarios they can be helpful. We will talk about app registration in these services, scopes, and integration with libraries: Microsoft Identity Web and Microsoft Identity Client (MSAL - Microsoft Authentication library).
Important
This series assumes that you already have some basic knowledge around identity concepts, application implementation, and Azure cloud services - at least Azure Active Directory.
Source code
Source code of all applications and AD B2C custom policies are available on my GitHub
Links to additional helpful resources
In my articles, I will focus on particular topics and I will make some assumptions. For instance, I assume that you already have access to Azure Active Directory and Azure Active Directory B2C services. If you need additional help, below I provide the links to helpful resources so you can learn more:
Getting started with Azure Active Directory
Getting started with Azure Active Directory B2C
Azure AD B2C custom policy overview
Microsoft identity platform documentation
Overview of the Microsoft identity platform for developers
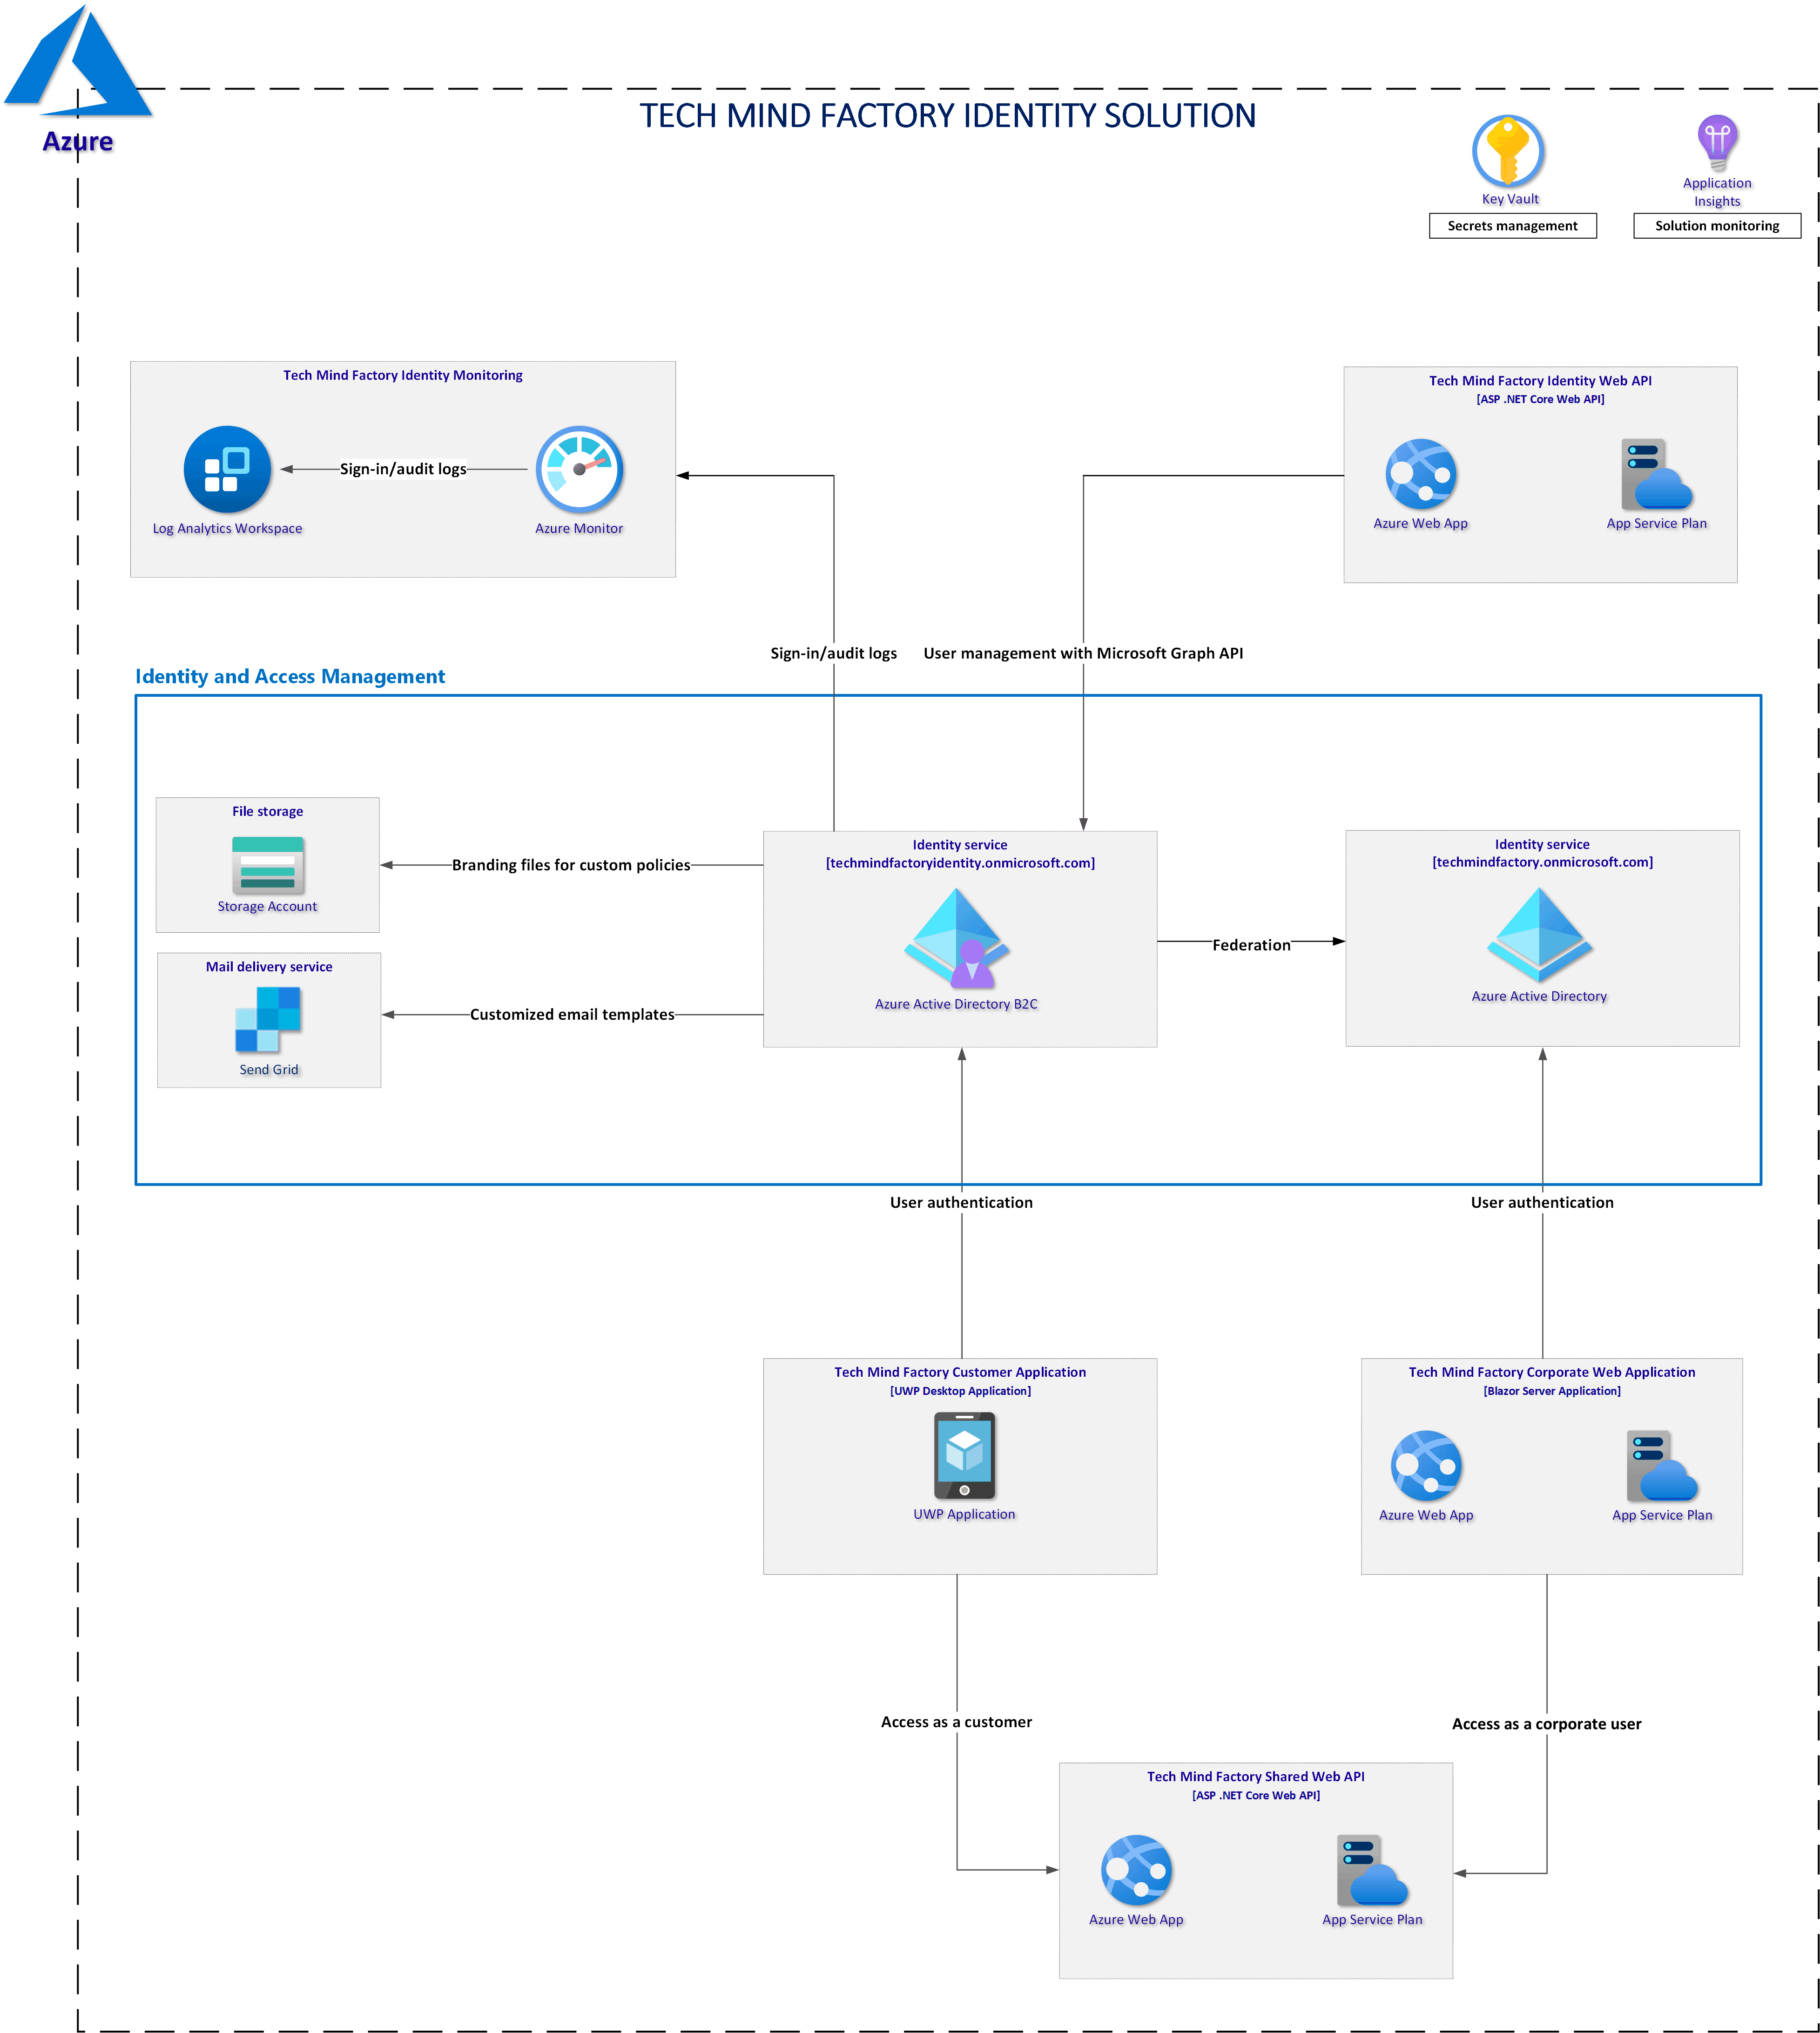
Solution architecture discussed in this series
Difference between Azure Active Directory and Azure Active Directory B2C
Azure Active Directory
Azure Active Directory is a cloud identity provider service, or Identity as a Service (IdaaS), provided by Microsoft. Its primary purpose is to provide authentication and authorization for applications in the cloud. Developers can build apps and secure them with Azure AD. In this case, an application can be developed for a single organization (single-tenant) or as general service (multi-tenant) accessible by any company using Azure AD. This identity service is meant for businesses to allow their users to work with cloud applications. As a company, we store our corporate user accounts there, and our employees can sign in using our domain name (like daniel.krzyczkowski@techmindfactory.com), and in general, it is dedicated to our organization.
Azure Active Directory B2C
Azure Active Directory B2C (Business-to-Consumer) is a separate service from Azure Active Directory. Built on the same technology, but it is designed for different scenarios. The main difference is that it is not for business users. Its target is to make user registration and authentication in the applications possible for end-users (customers). The purpose of Azure AD B2C is to allow companies to build a cloud identity directory for their customers and applications to avoid storing corporate user accounts together with customer accounts.
Example? Azure AD B2C is a perfect match for scenarios like online stores, where customers can register, log in and then make a purchase.
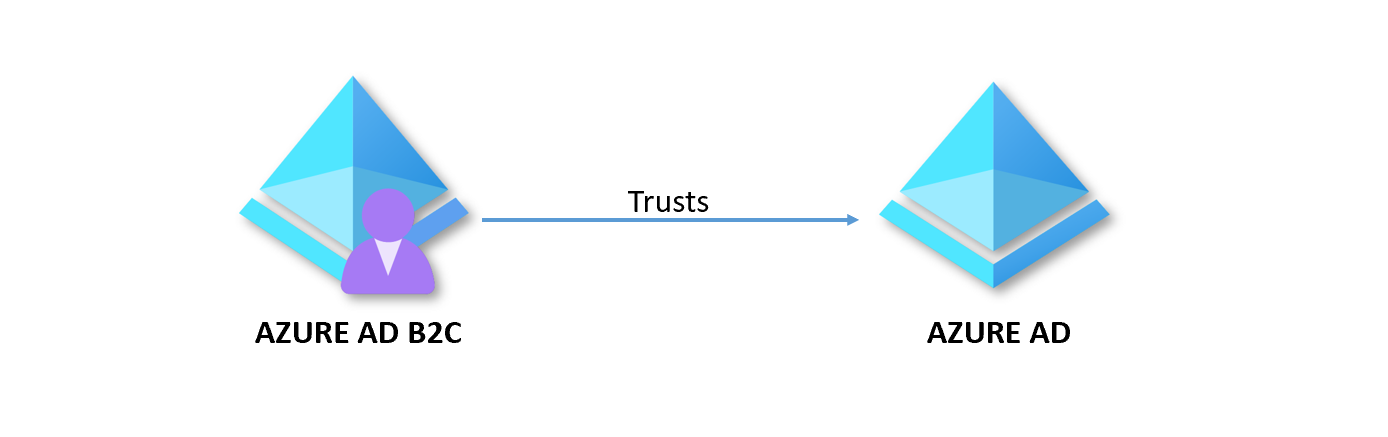
Federation between Azure AD and Azure AD B2C
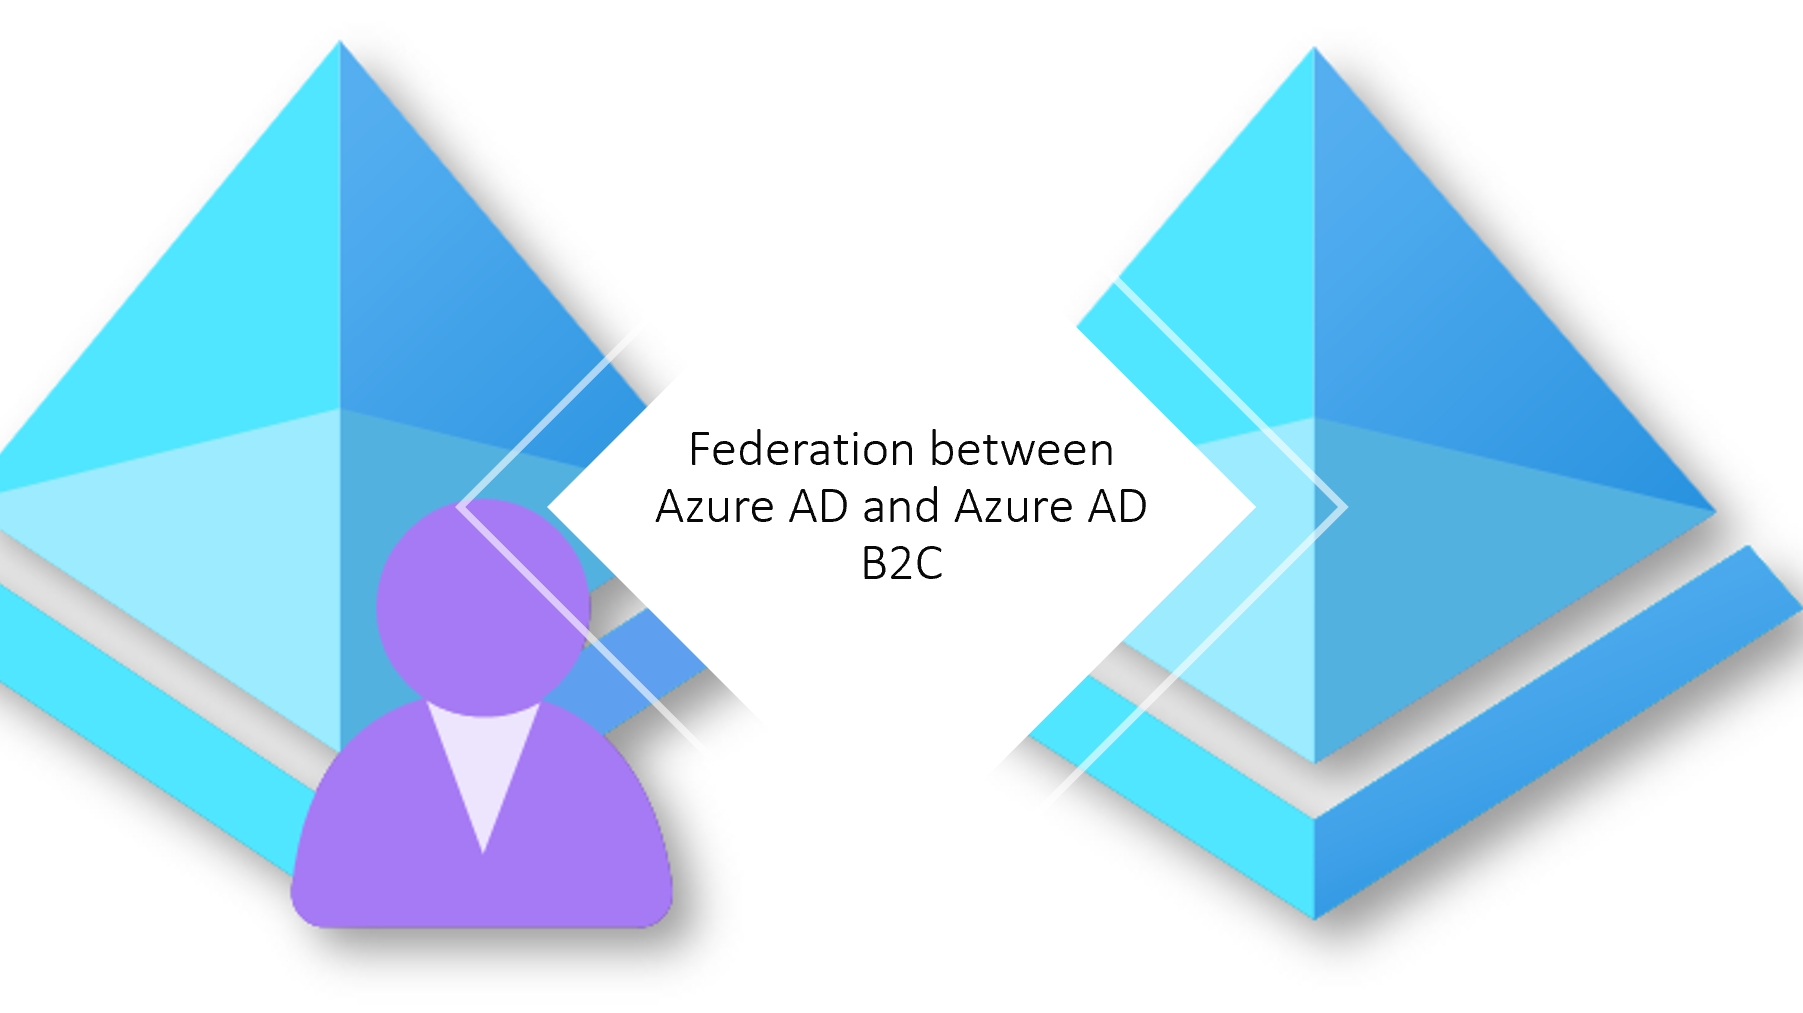
A Federation is a collection of domains that have established trust. Azure AD B2C tenant trusts the Azure AD tenant, so users can sign in using their existing accounts from the Azure Active Directory.
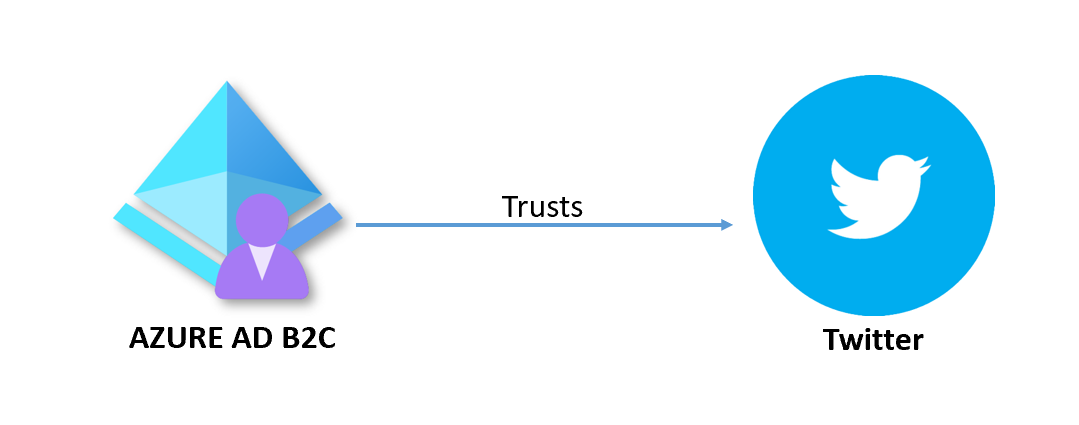
There can be also federation between Azure AD B2C and other external identity providers like Facebook, Google, or Twitter.
What about costs?
I think it is also good to mention few words about cost. Each service has its own pricing rules but I tried to make it more simple.
Azure Active Directory pricing
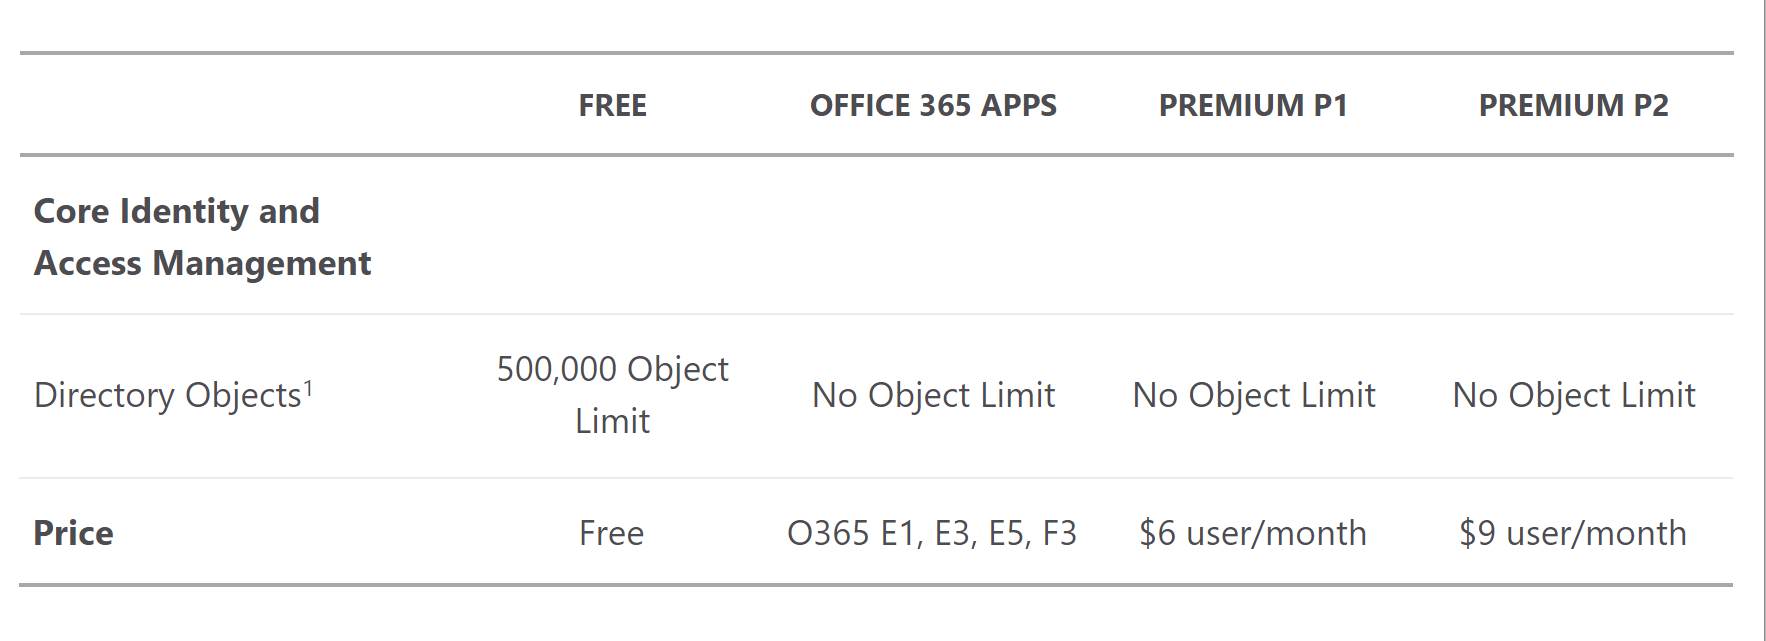
Under this link you can find official pricing for the Azure Active Directory. This page provides details. Azure Active Directory comes in four editions—Free, Office 365 apps, Premium P1, and Premium P2. It is worth mentioning that you can start using it for free but there are also paid plans:
Azure Active Directory B2C pricing
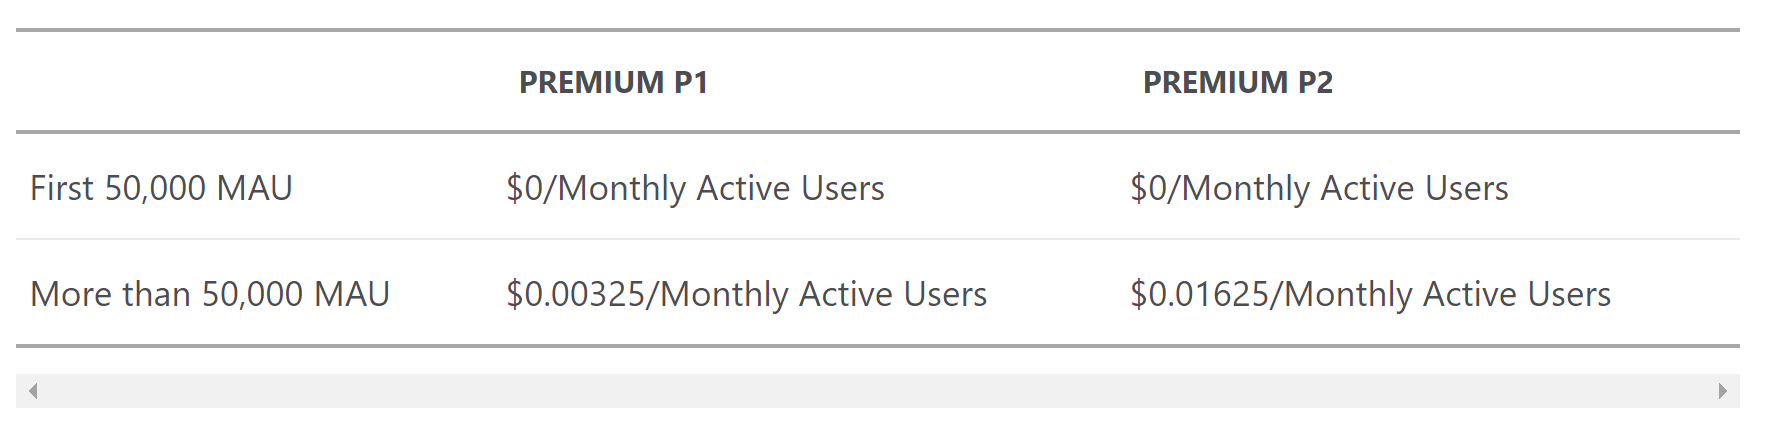
Under this link you can find official pricing for the Azure Active Directory B2C. This page provides details. Azure AD B2C pricing is based on Monthly Active Users (MAU), which means that you are not billed for single user authentication or registration but for an active user per one month (Azure AD B2C verifies users who authenticate during the month and then counts them). Azure AD B2C offers two plans: P1, and P2. Both are free if you not exceed 50.000 Monthly Active Users (MAU):
There is also a separate cost for using MFA. A flat fee of $0.03 is billed for each SMS/Phone-based multi-factor authentication attempt.
How to simply calculate it? Let’s say that we have 100.000 monthly active users. The cost will be 162.5$
Why? 100.000 - 50.000 (free) = 50.000 users. Then 50.000 * 0.00325$ = 162.5$
Azure Active Directory B2C vs Azure AD External Identities (B2B)
I need to avoid confusion so I decided to explain the difference between Azure AD B2C and Azure AD External Identities. With External Identities in Azure Active Directory, you can allow people outside your organization to access your apps and resources while letting them sign in using whatever identity they prefer (like their private Microsoft Account). The external user’s identity provider manages their identity, and you manage access to your apps with Azure AD to keep your resources protected.
Below table gives a detailed comparison of the scenarios:
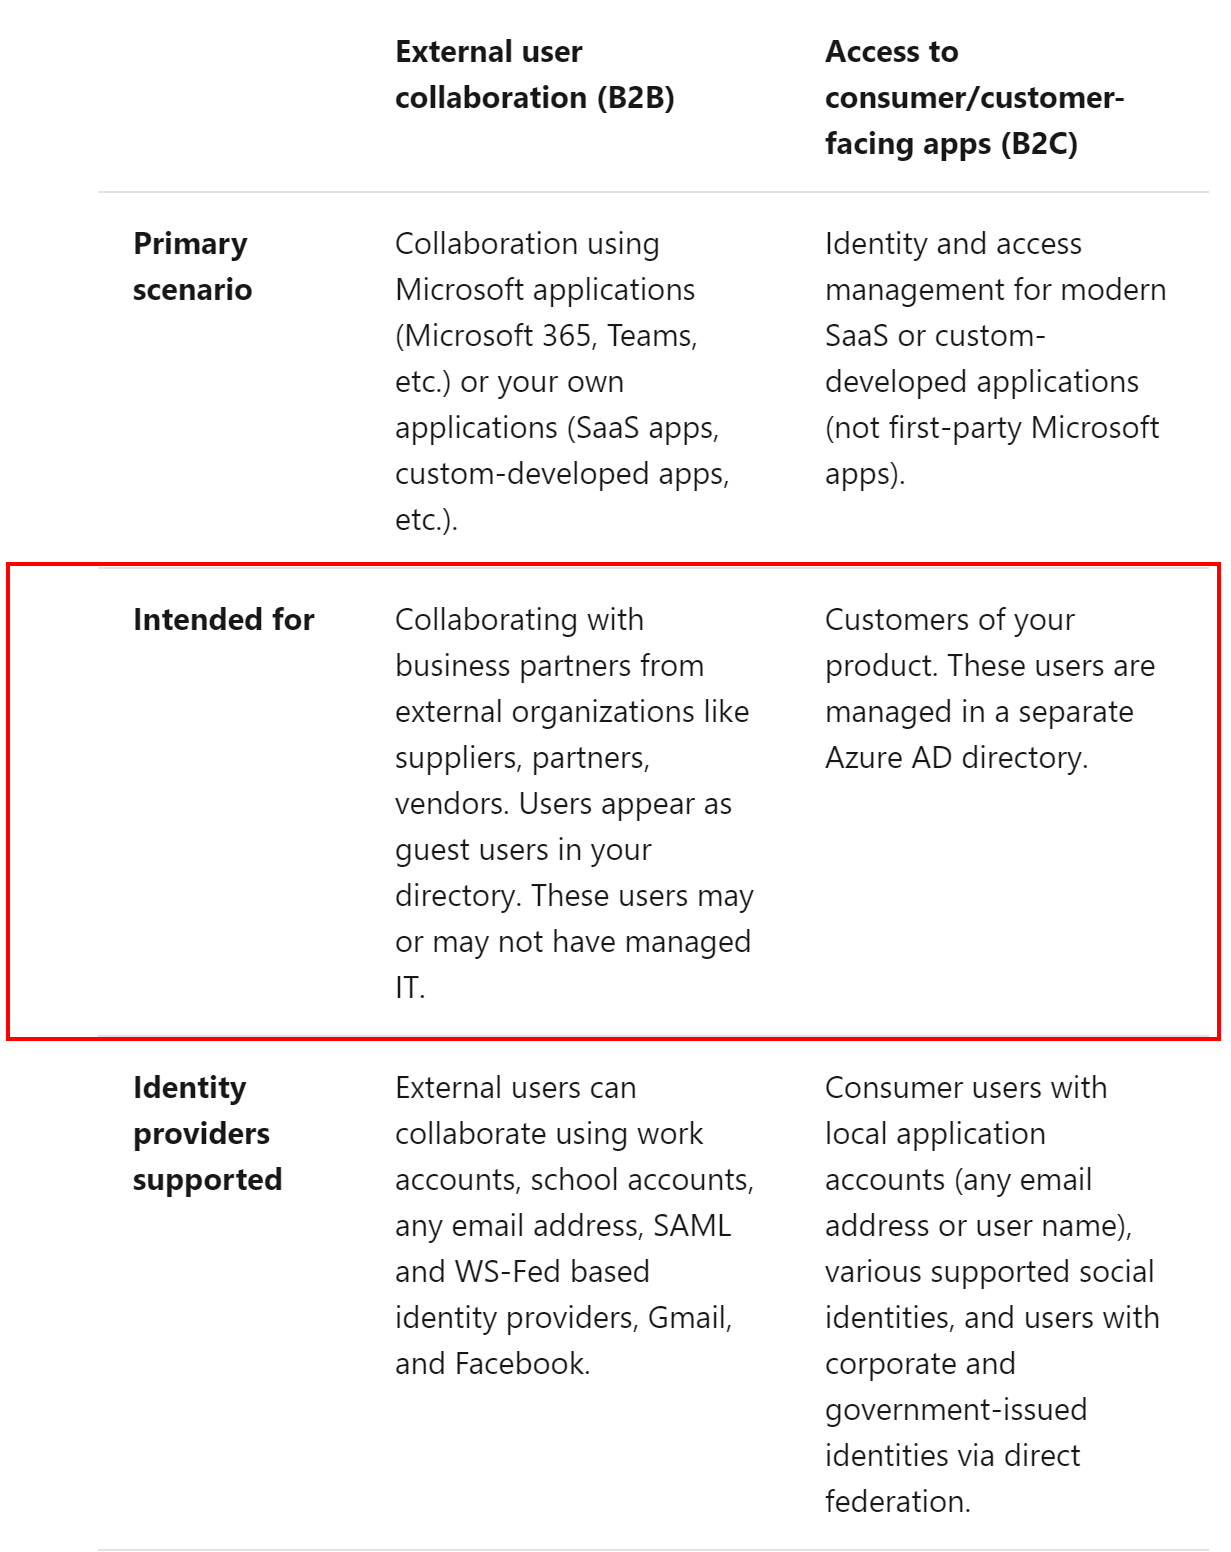
The most important difference is the fact that Azure AD B2C is a stand-alone service that can be created in the Azure cloud. When creating Azure AD B2C, there is a separate Azure AD tenant created underneath. Azure AD B2C provides more customization options. With Azure AD External Identities it is just possible to provide self-sign up for guest users without sending the invitations manually. External Identities is just a feature of Azure AD. Some time ago I wrote a blog post about it.
You can read more about detailed differences under this link.
Difference between ID Token, Access Token, and Refresh Token
- ID tokens - they are sent to the client application as part of an OpenID Connect flow. They can be sent alongside or instead of an access token. ID tokens are used by the client to authenticate the user.
- Access tokens are security tokens that are issued by an authorization server as part of an OAuth 2.0 flow. It contains information about the user and the resource for which the token is intended. The information can be used to access web APIs and other protected resources.
- Refresh tokens - because access tokens are valid for only a short period, authorization servers will sometimes issue a refresh token at the same time the access token is issued. The client application can then exchange this refresh token for a new access token when needed.
I encourage you to read more under this link.
Authentication vs Authorization
- Authentication - the process of proving that you are who you say you are. It’s sometimes shortened to AuthN. The Microsoft identity platform uses the OpenID Connect protocol for handling authentication.
- Authorization is the act of granting an authenticated party permission to do something. It specifies what data you’re allowed to access and what you can do with that data. Authorization is sometimes shortened to AuthZ. The Microsoft identity platform uses the OAuth 2.0 protocol for handling authorization.
I encourage you to read more under this link.
Libraries to integrate with Azure AD and Azure AD B2C
Microsoft provides two official libraries that can be used to integrate with Azure Active Directory and Azure Active Directory B2C identity services.
Microsoft Identity Web
Microsoft Identity Web library simplifies adding authentication and authorization support to web apps and web APIs integrating with the Microsoft Identity Platform (Azure Active Directory and Azure Active Directory B2C). You can read more about this library in the official documentation.
Microsoft Identity Client (MSAL)
Enables developers to acquire tokens from the Microsoft identity platform to authenticate users and access secured web APIs. Acquires tokens on behalf of a user or on behalf of an application (when applicable to the platform). This library is a perfect match when you want to enable user authentication in your desktop apps (like UPW, or WPF), or mobile apps like Android and iOS. You can read more about this library in the official documentation.
Secure applications with Azure Active Directory
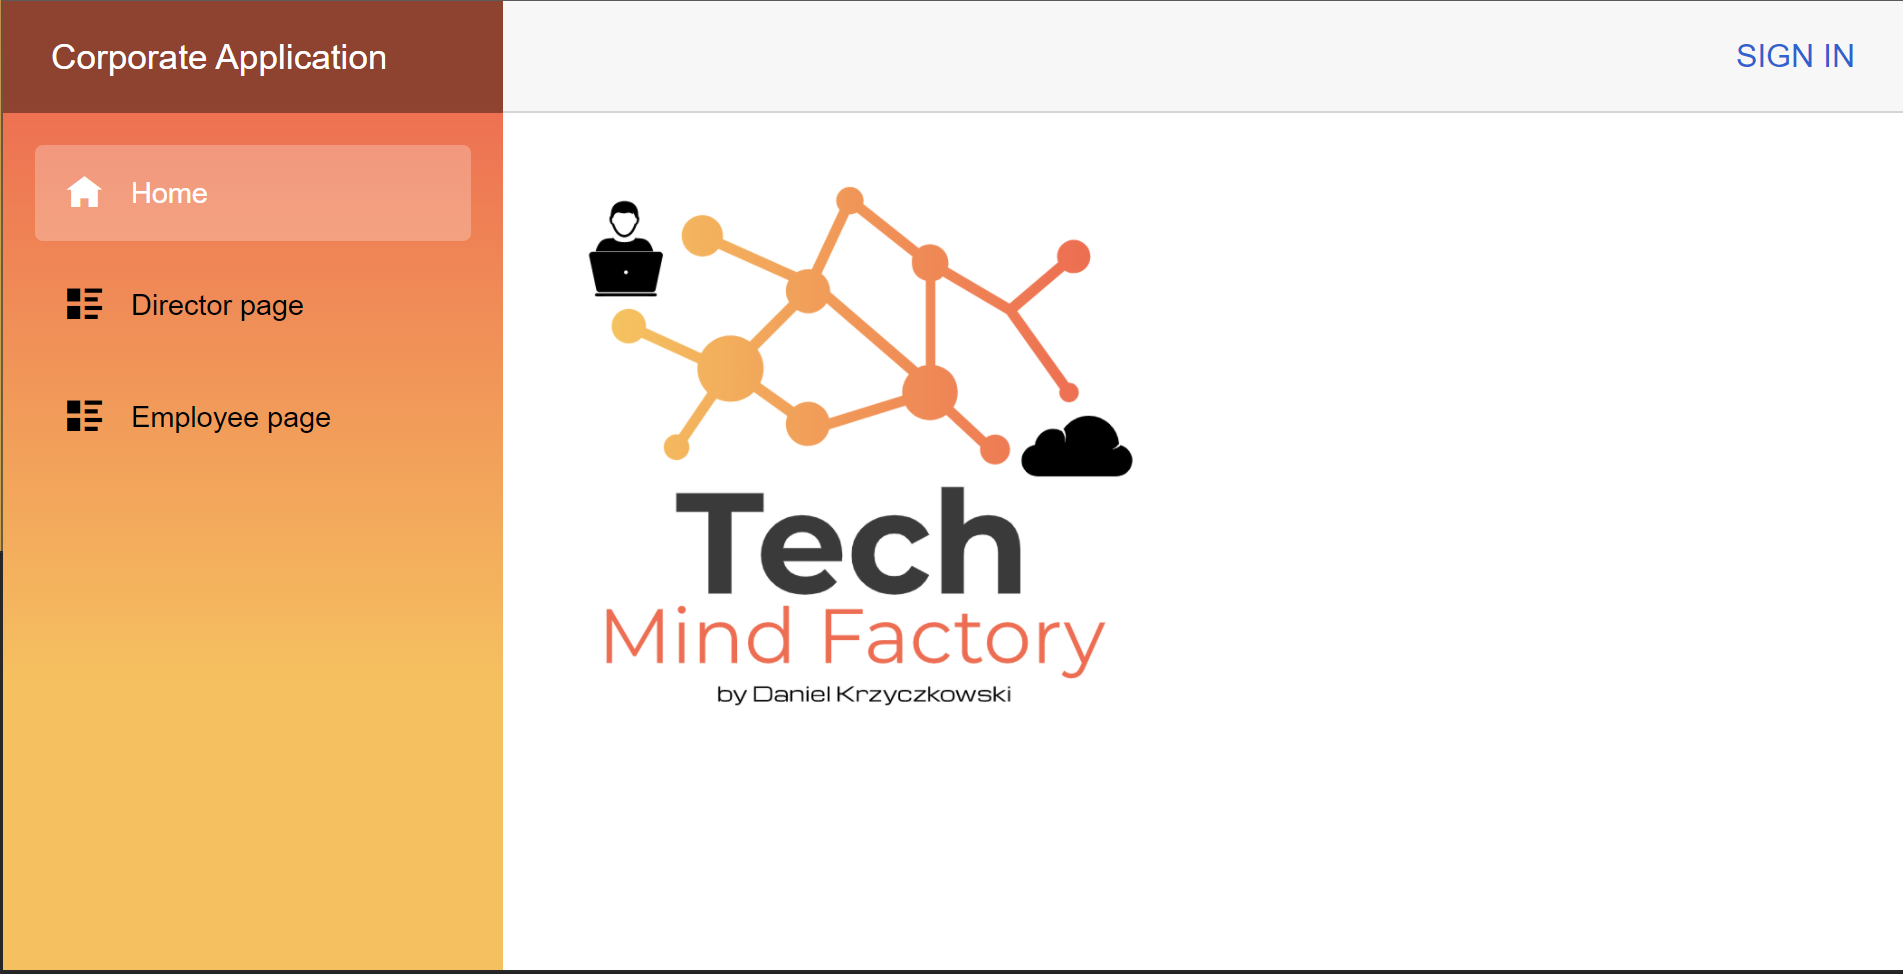
I hope that the above introduction to Azure Active Directory and Azure Active Directory B2C services helped you understand some concepts and scenarios when they should be used. Now it is time to discuss integration with these identity services. Let’s start with Tech Mind Factory Corporate Web Application secured by Azure Active Directory. This application is used by corporate users (Tech Mind Factory employees). They use their corporate accounts created in the Tech Mind Factory Azure AD tenant.
Application registration in the Azure Active Directory tenant
To secure an application with Azure AD, we have to first register it. Below I present how to register TMF Corporate Web App in the Azure AD tenant and then how to register Tech Mind Factory Shared API application.
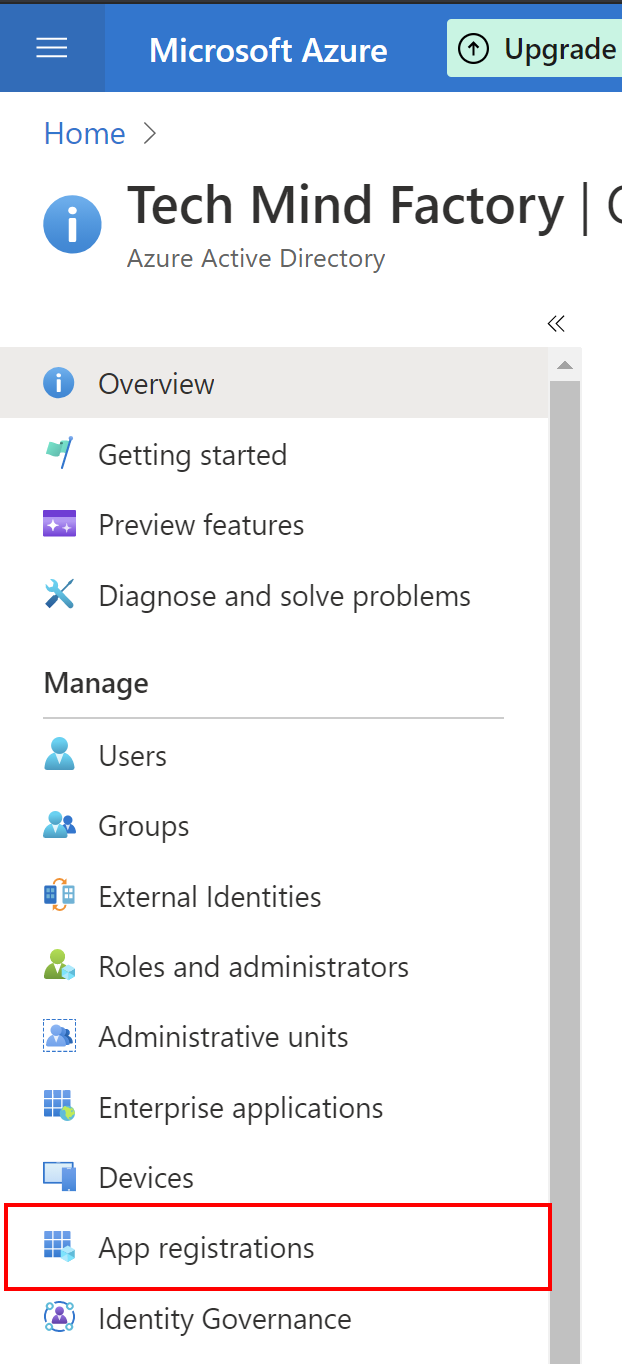
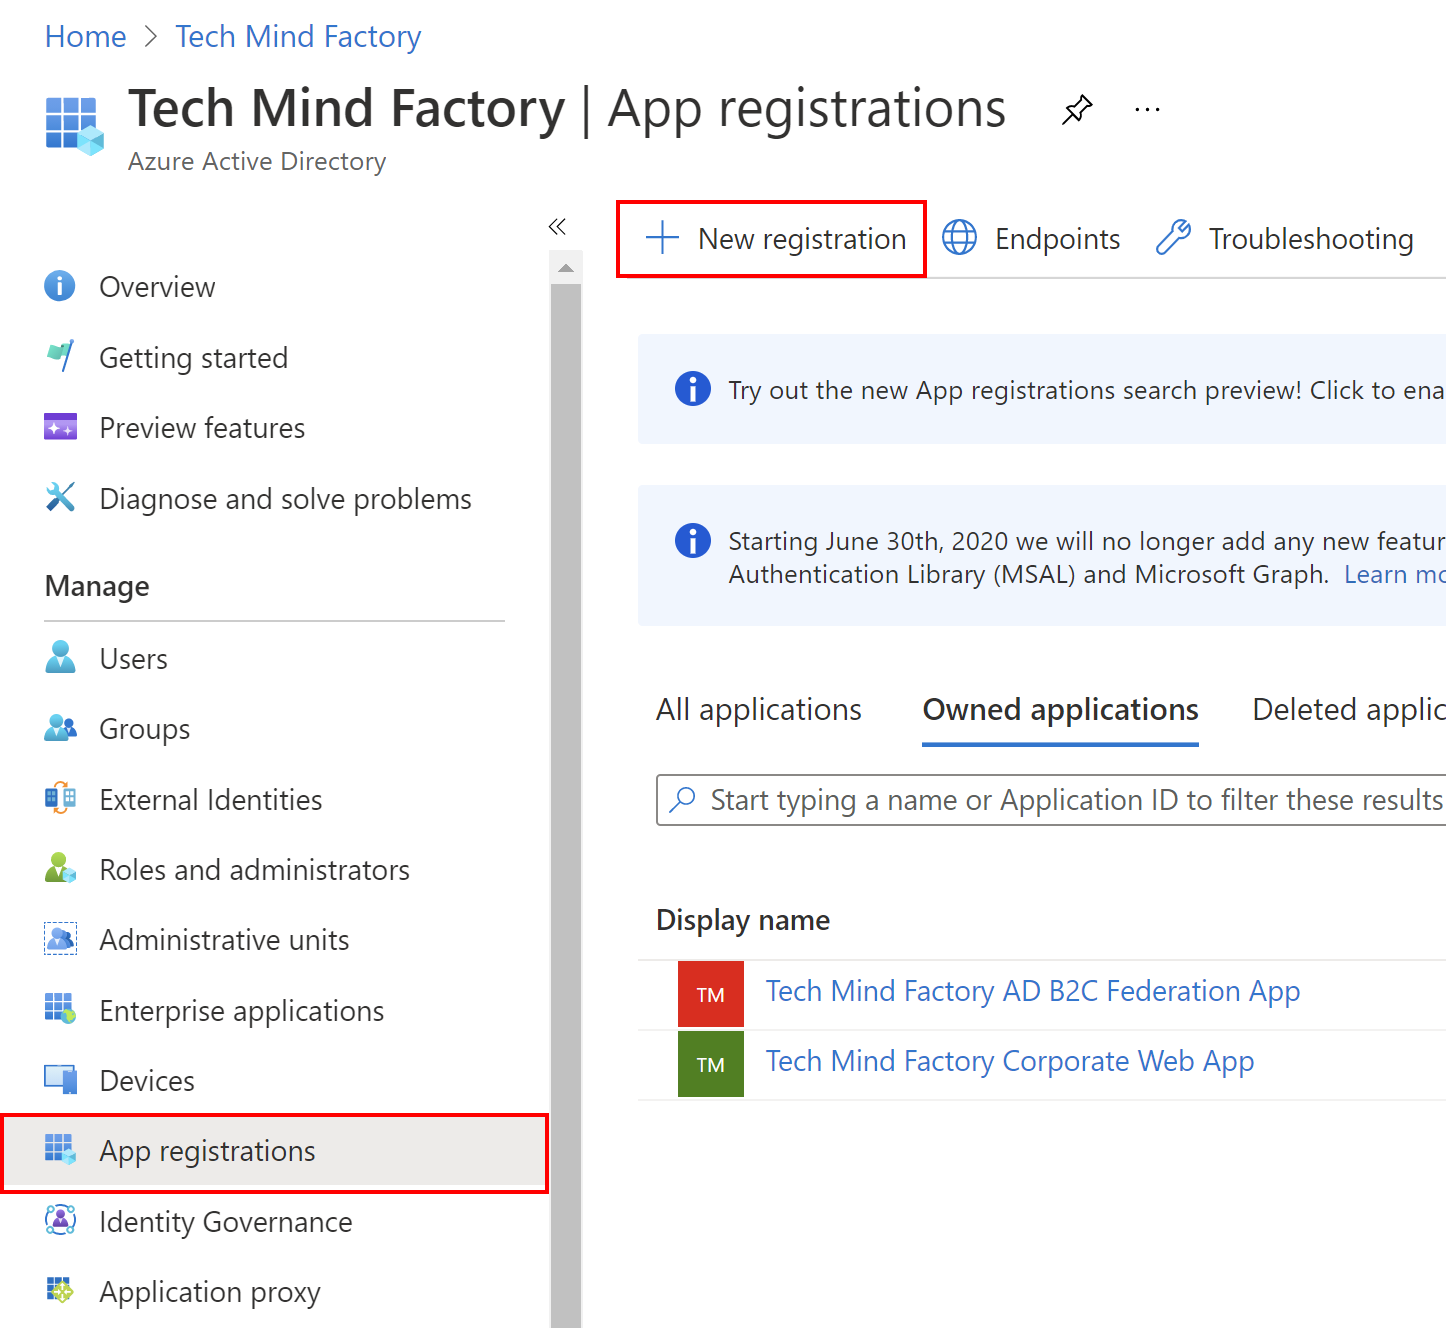
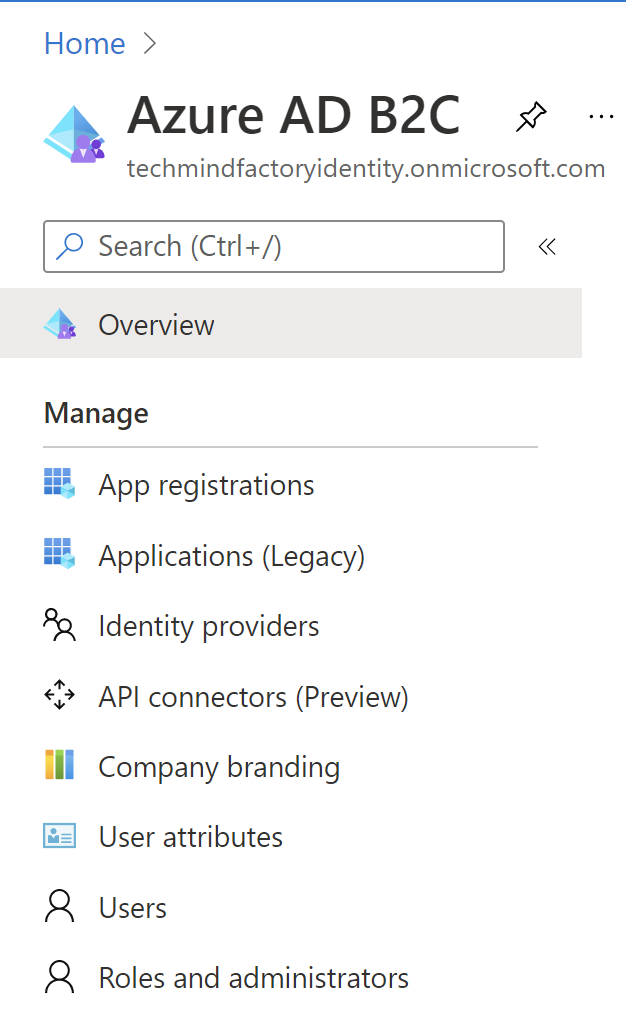
1. From the Azure AD management blade on the left side, select App registrations:
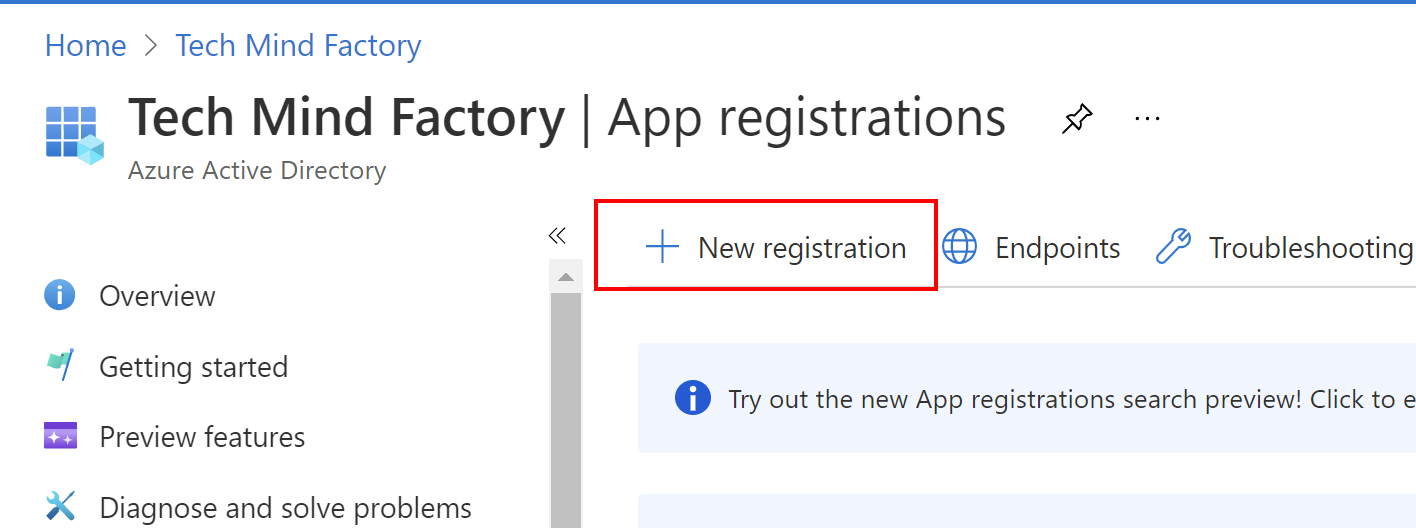
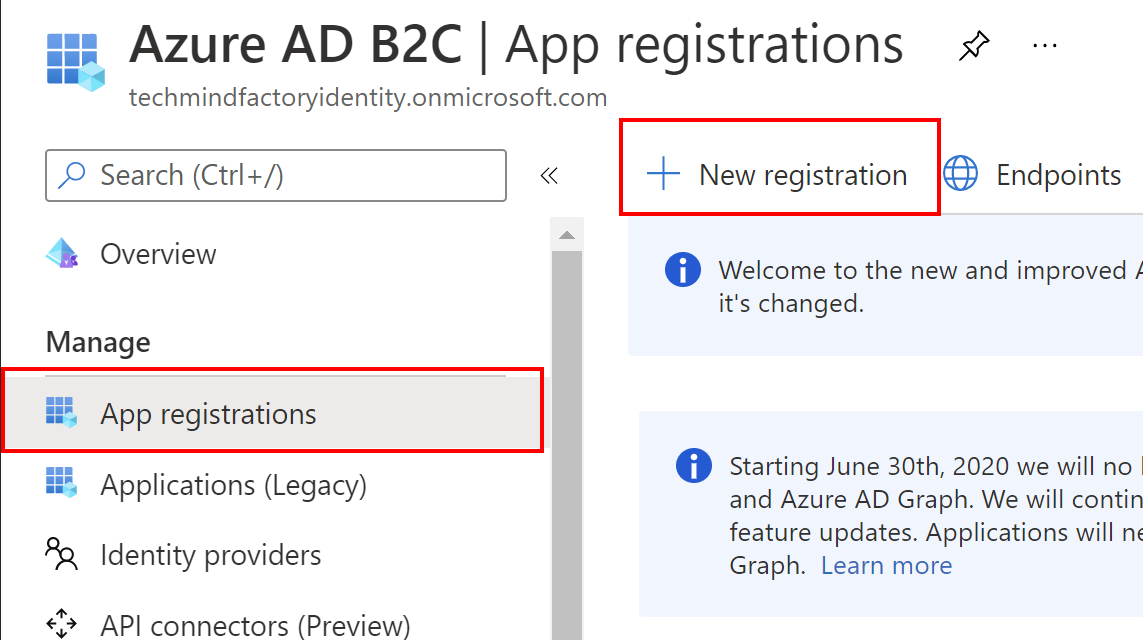
2. Then select + New registration:
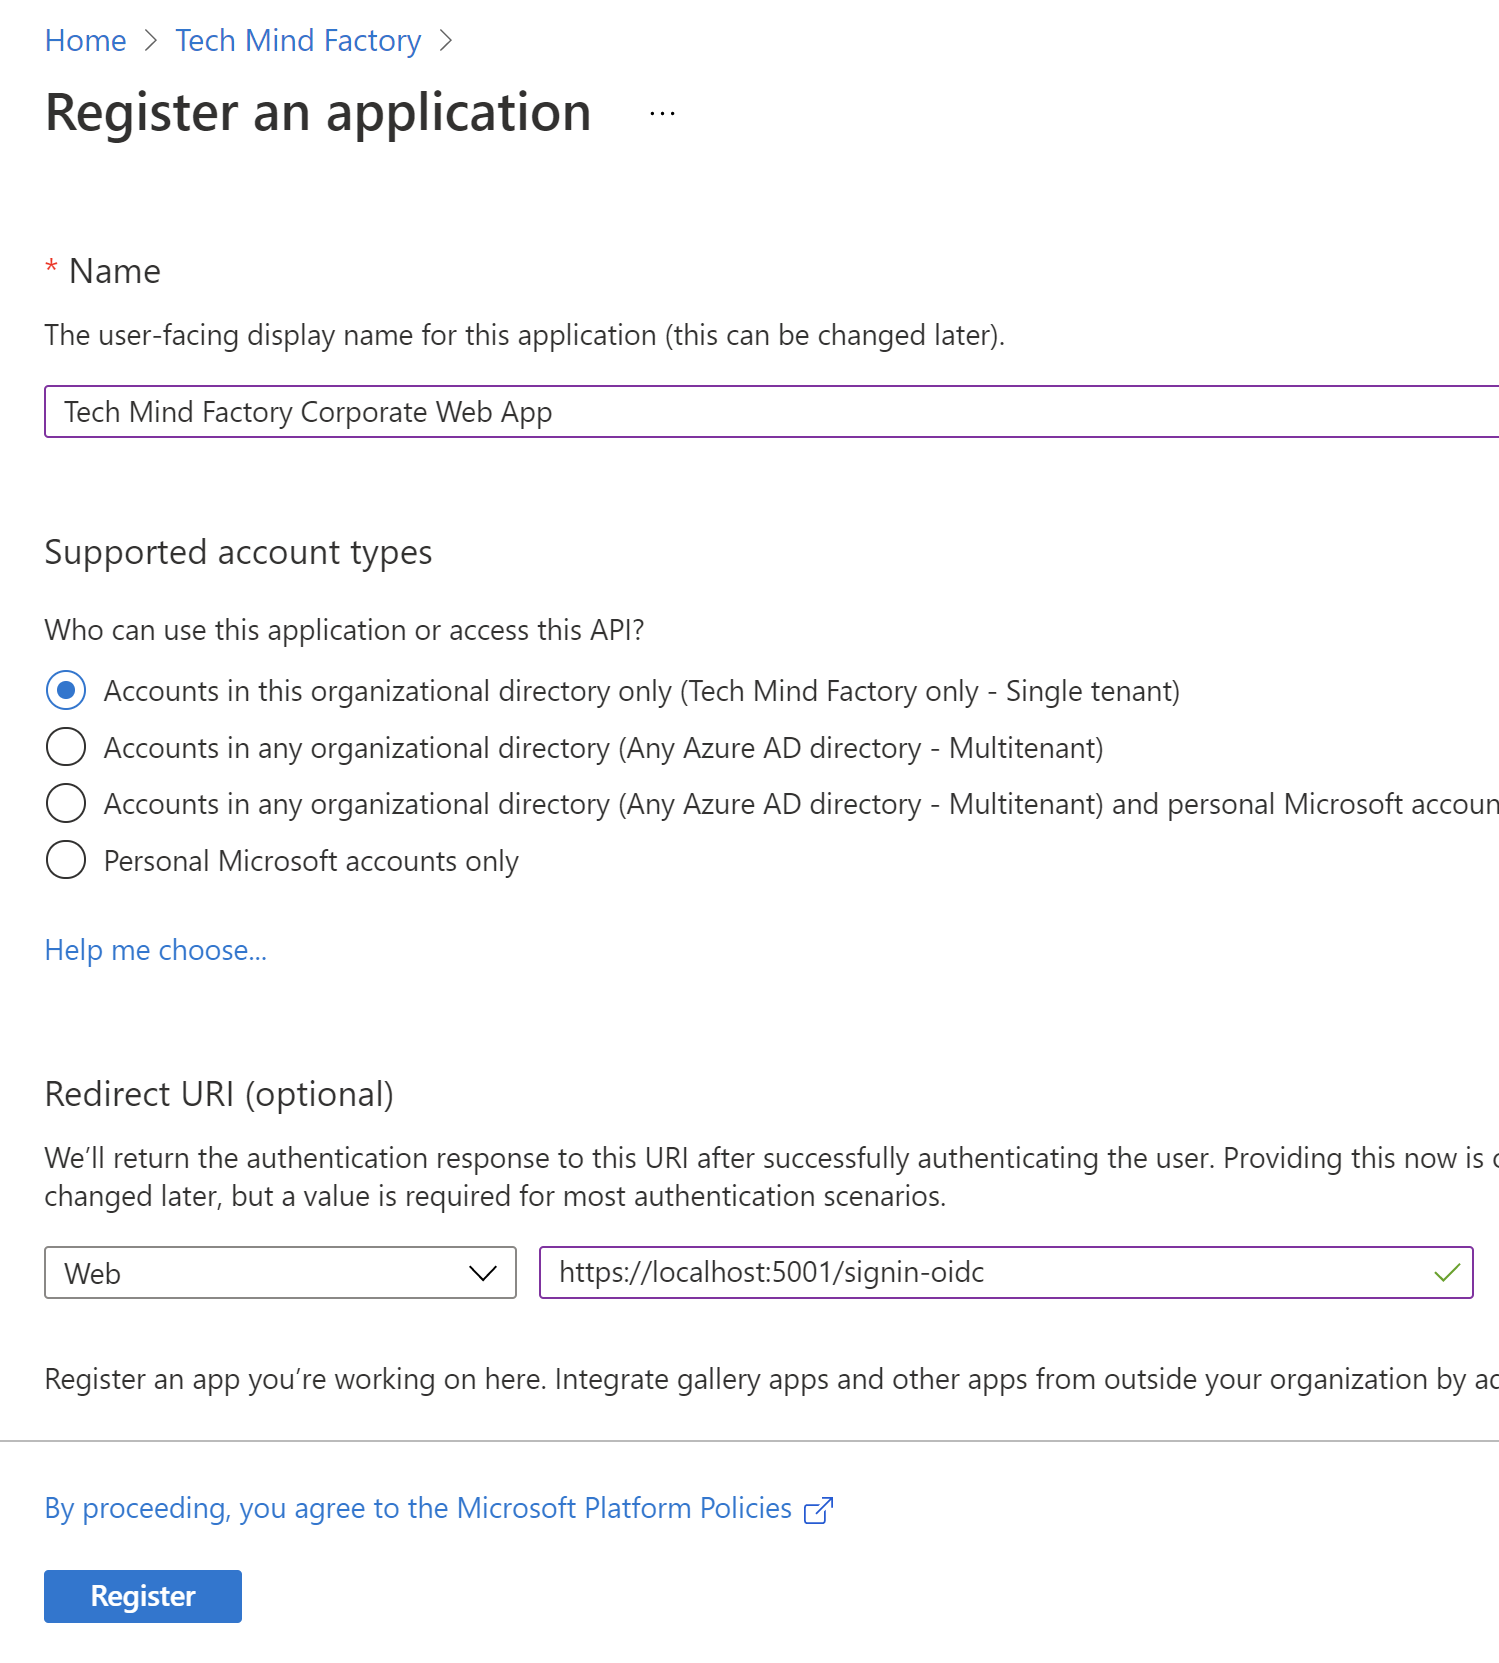
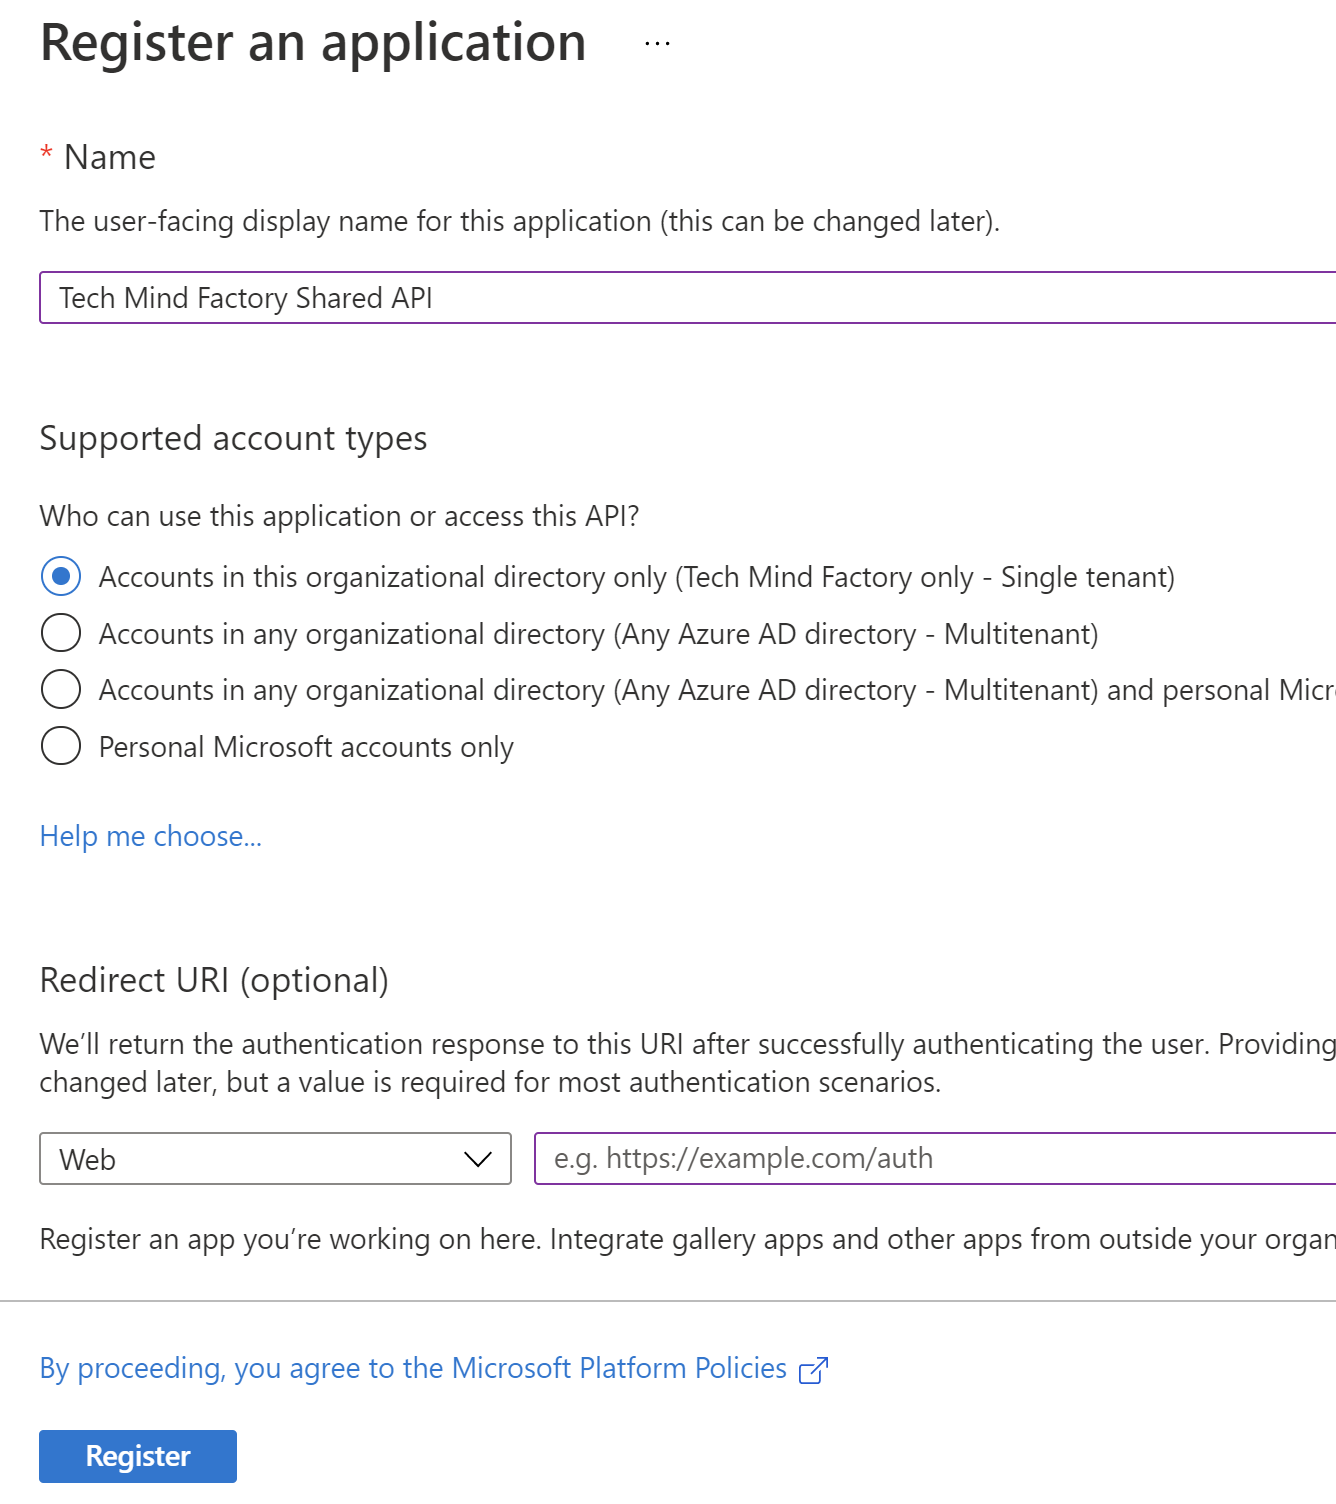
3. Provide the name for the application, select supported account types to be single tenant, and provide redirect URL (I provided the one from the localhost for tests), then click Register button:
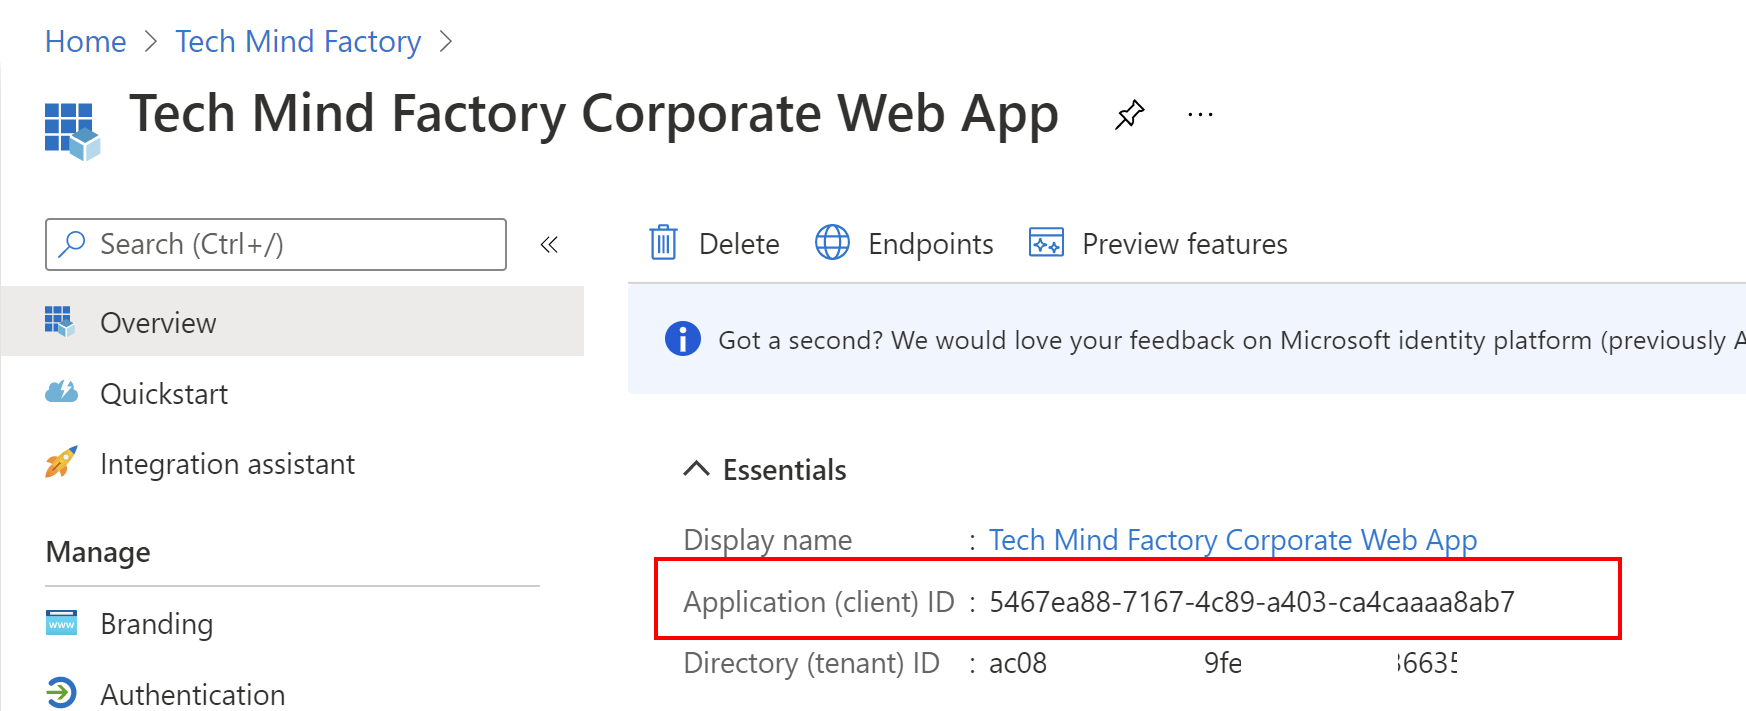
4. Once application is created, you can see its ID (client ID) - copy it because we will use it in the app configuration in the source code:
5. Switch to the Authentication section and make sure that configuration is exactly like presented below:

Great, that’s it. Now we have to create some corporate user accounts.
Register corporate user account
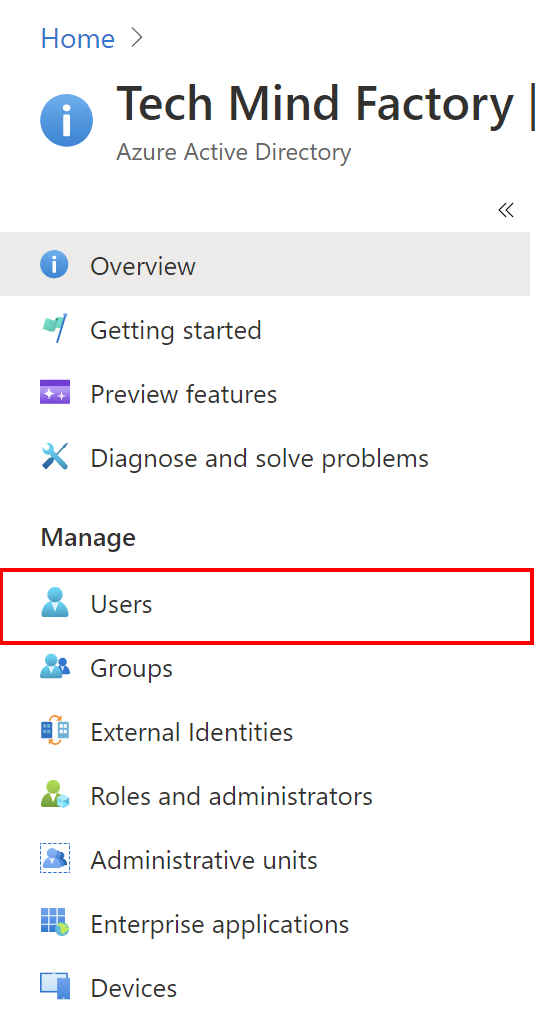
In this section we will see how to create user account in the Azure AD tenant so we can authenticate in the TMF Corporate Web App. From the management blade of the Azure AD, select Users:
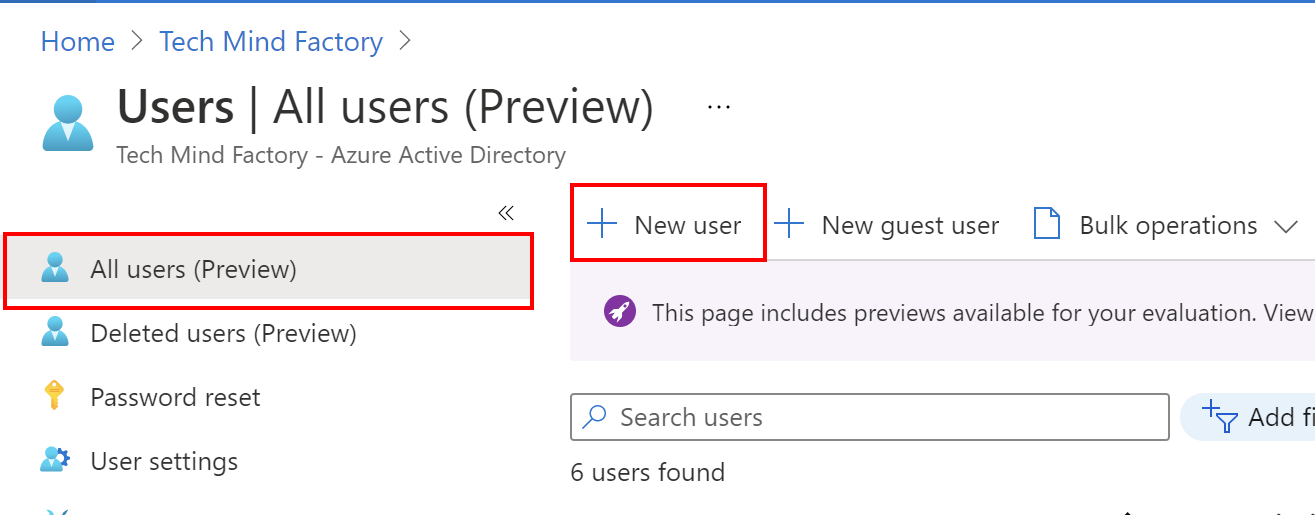
1. Select All users and then + New user:
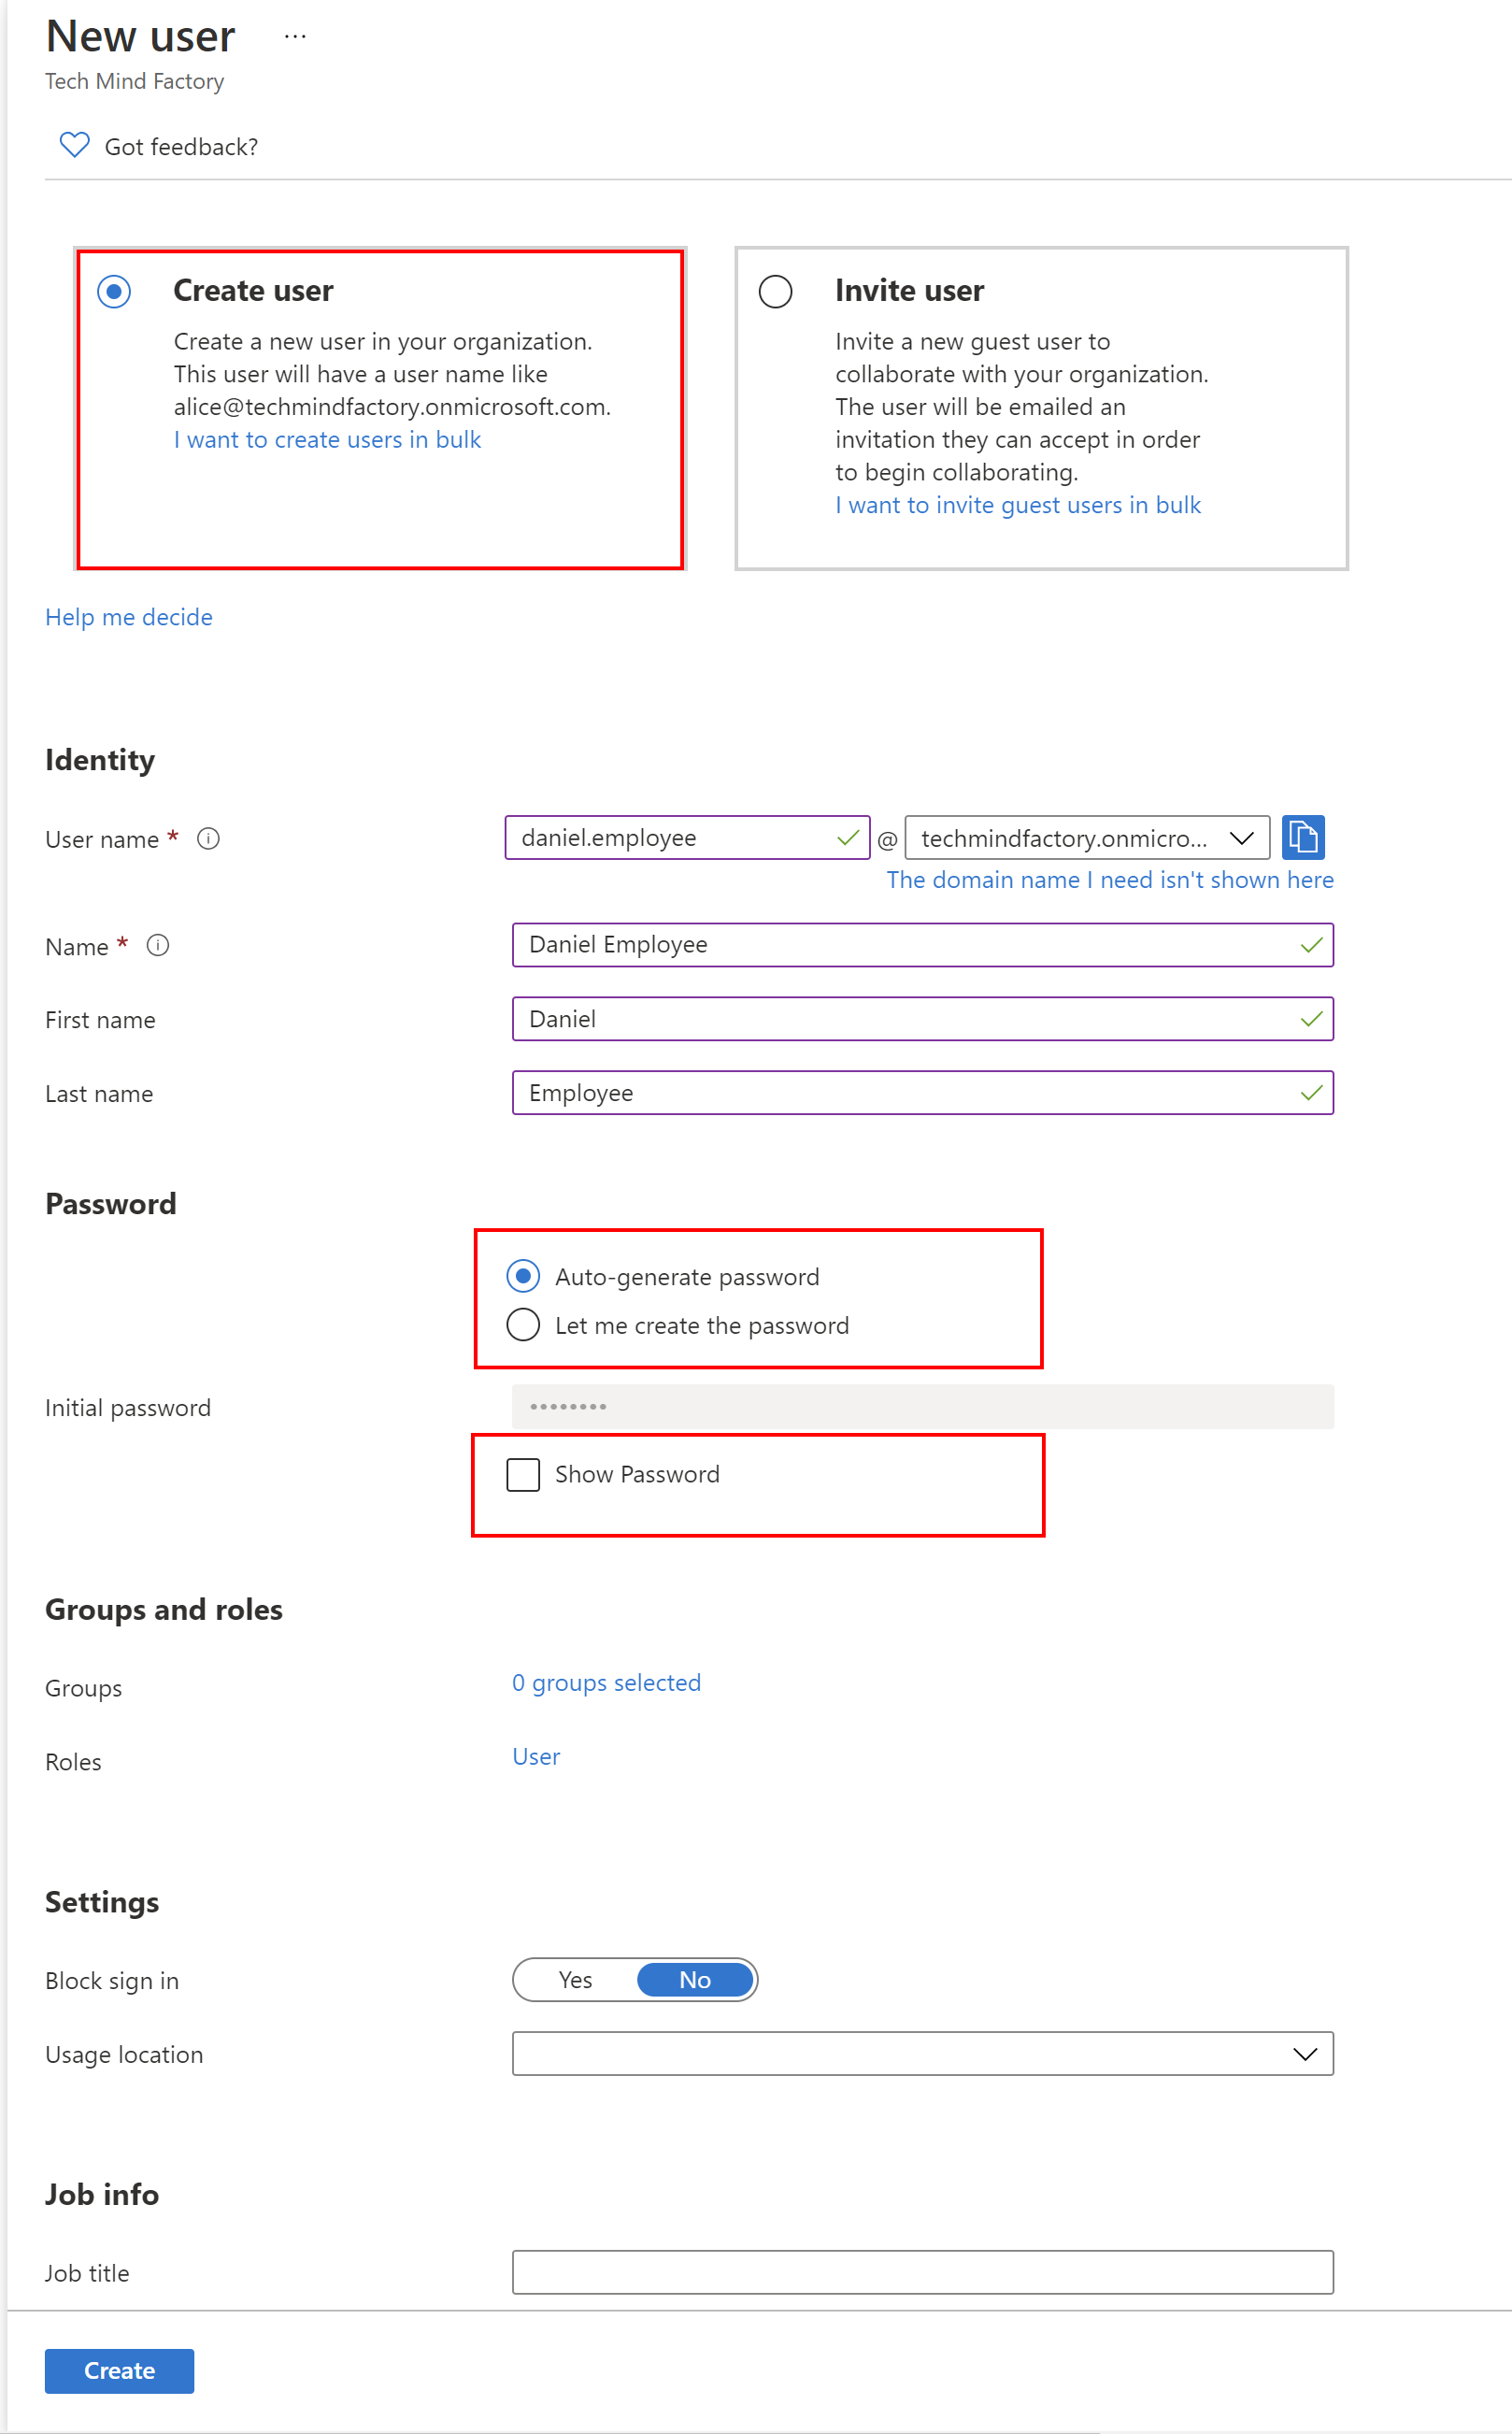
2. Provide details for the new user, like presented below. Click show password to get initial password - this has to be changed after first login:
Create another account like presented below:
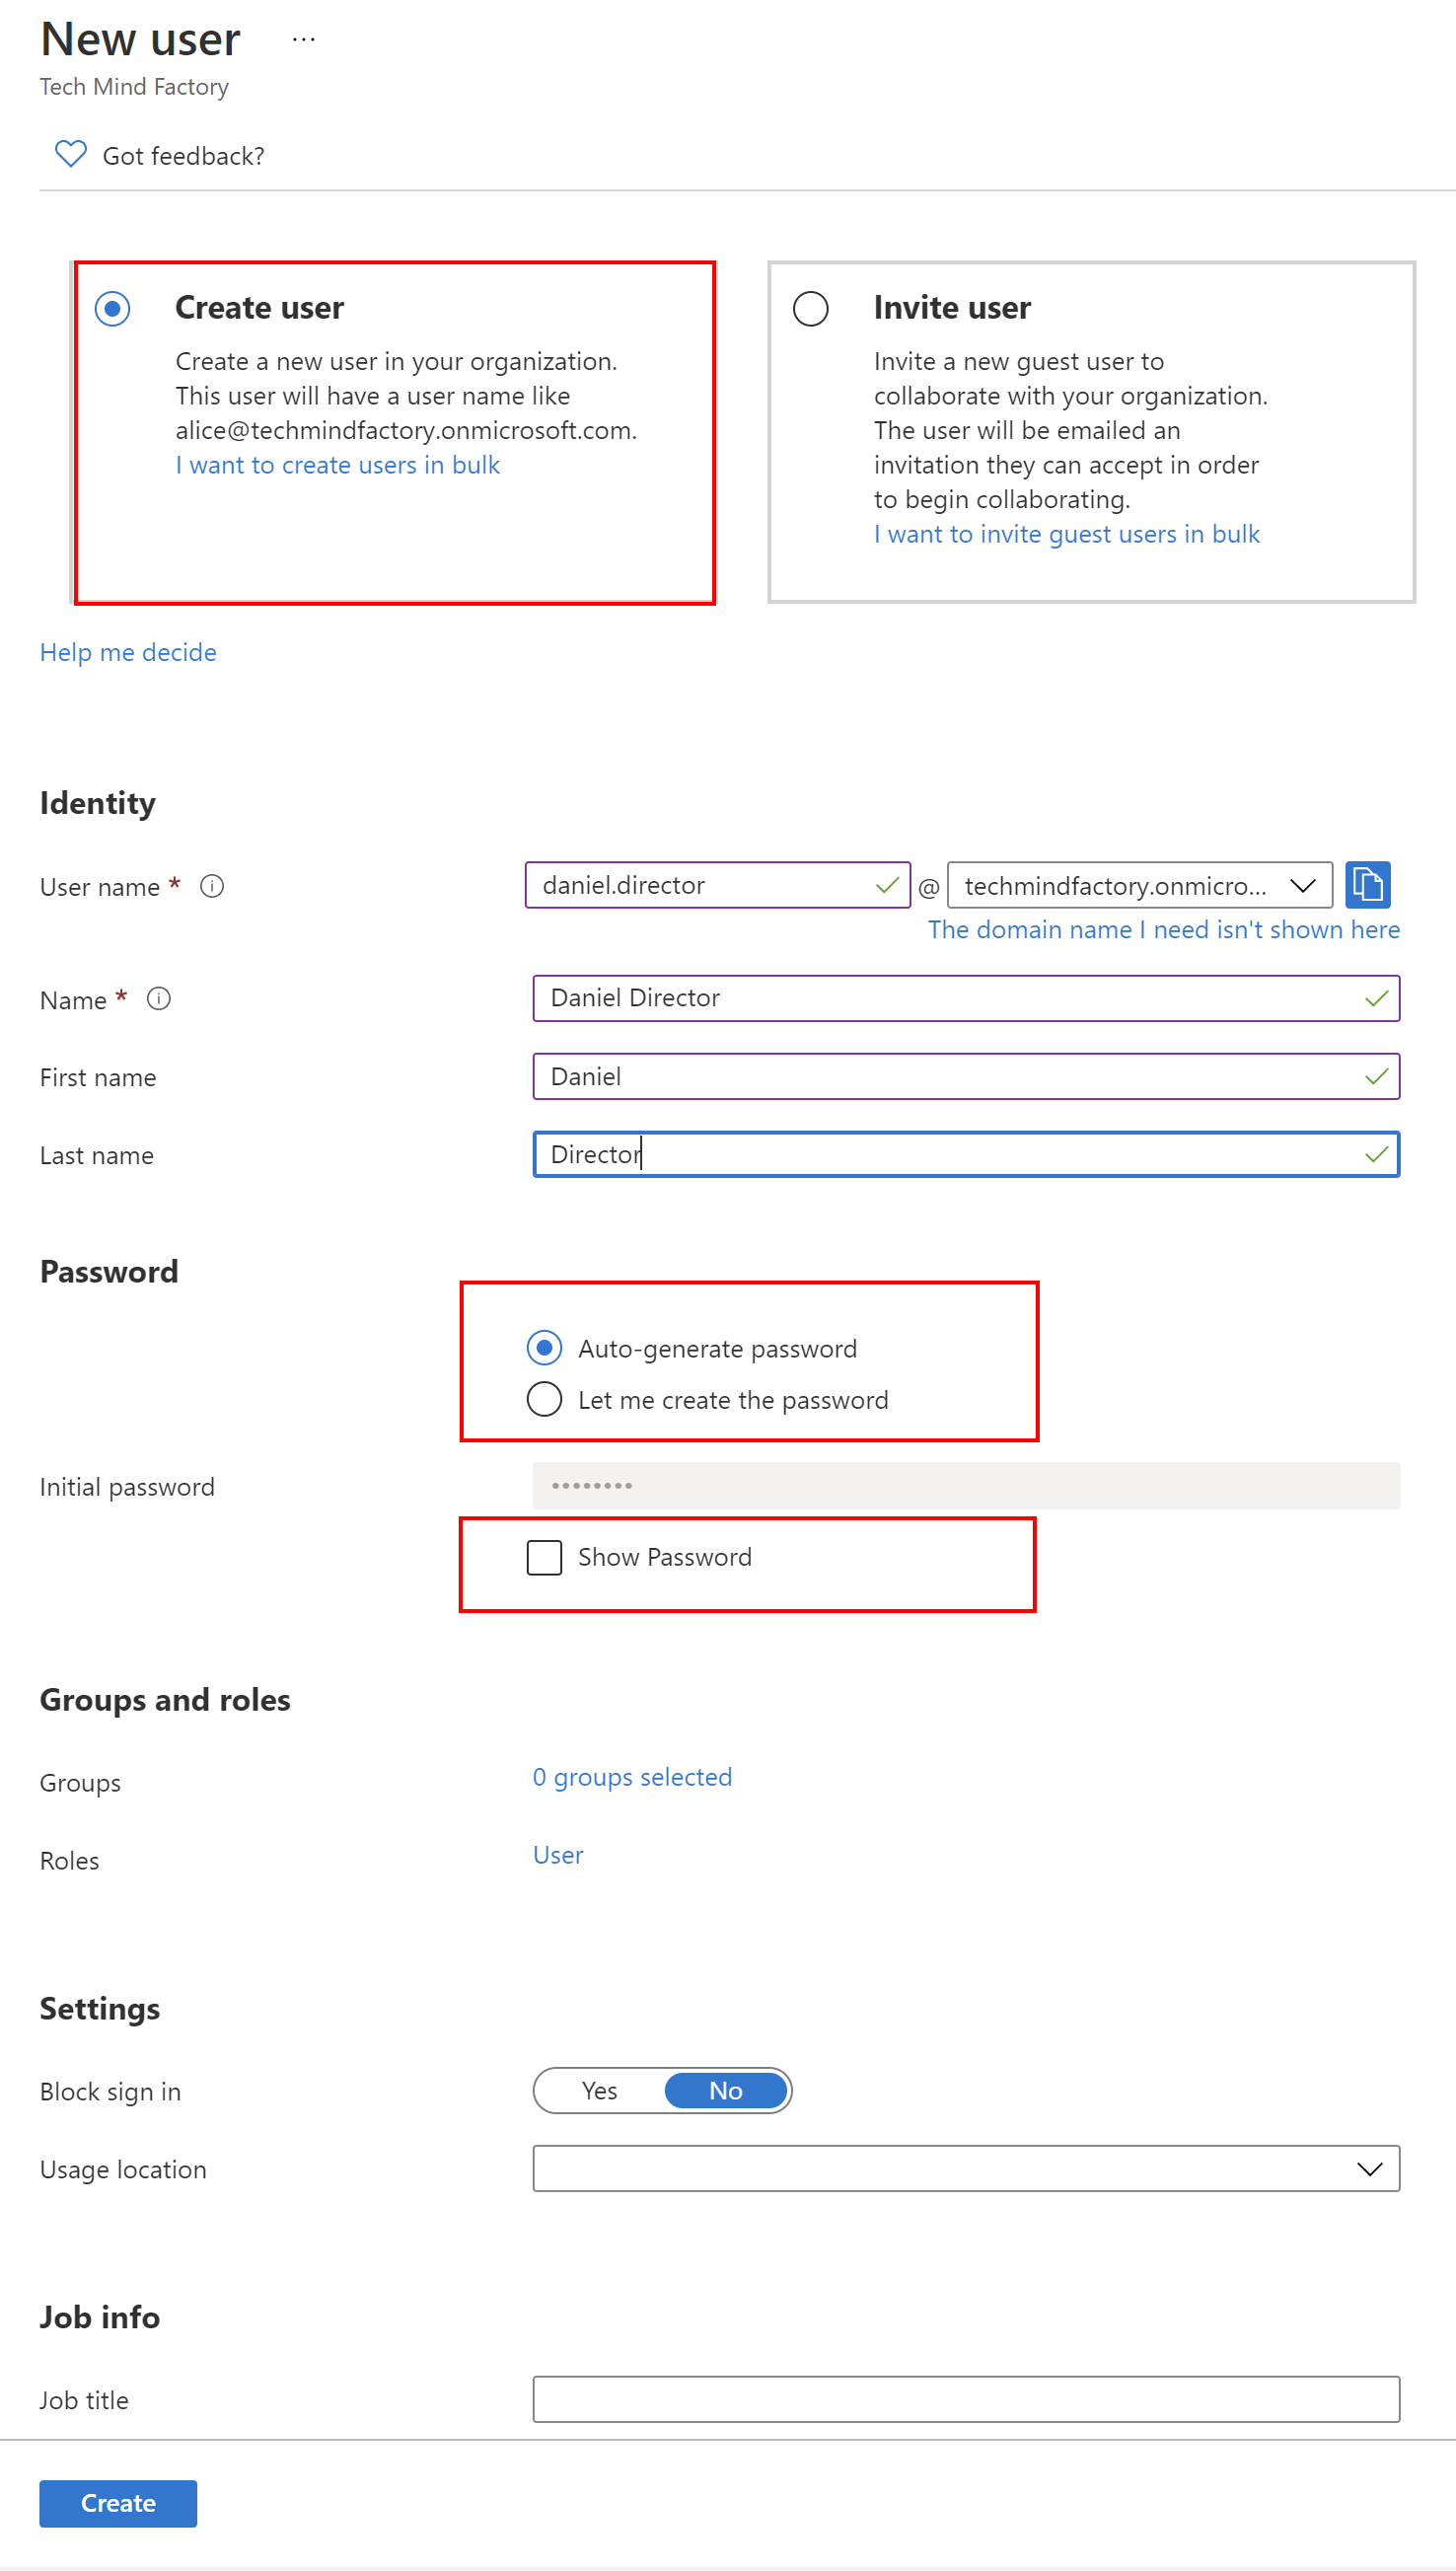
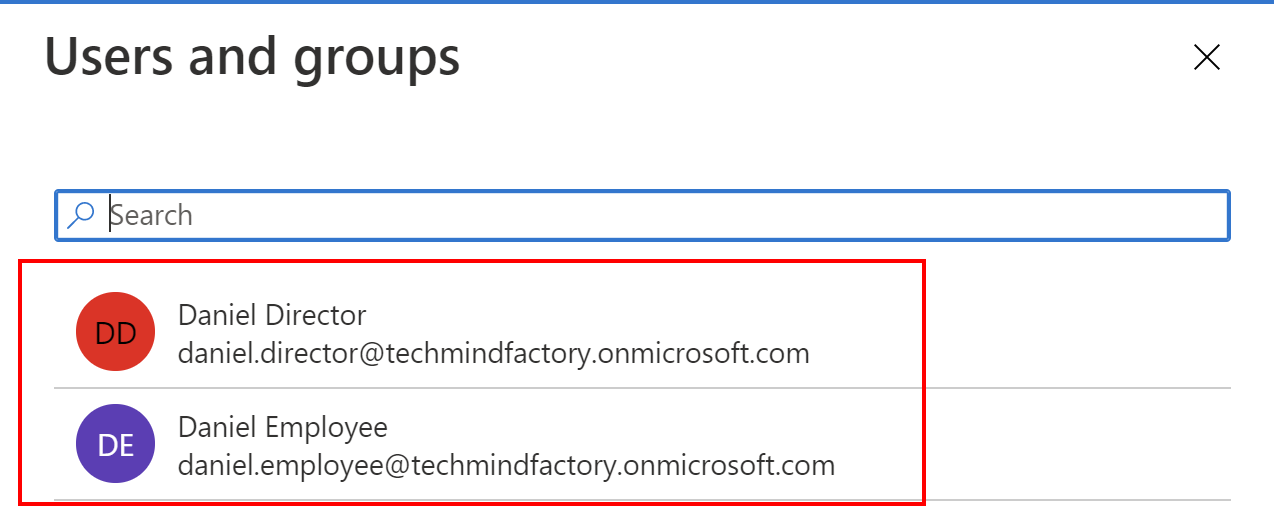
Great, so now we have two corporate accounts created - daniel.employee and daniel.director. It is time to configure Tech Mind Factory Corporate Blazor App.
Assign users to the corporate application
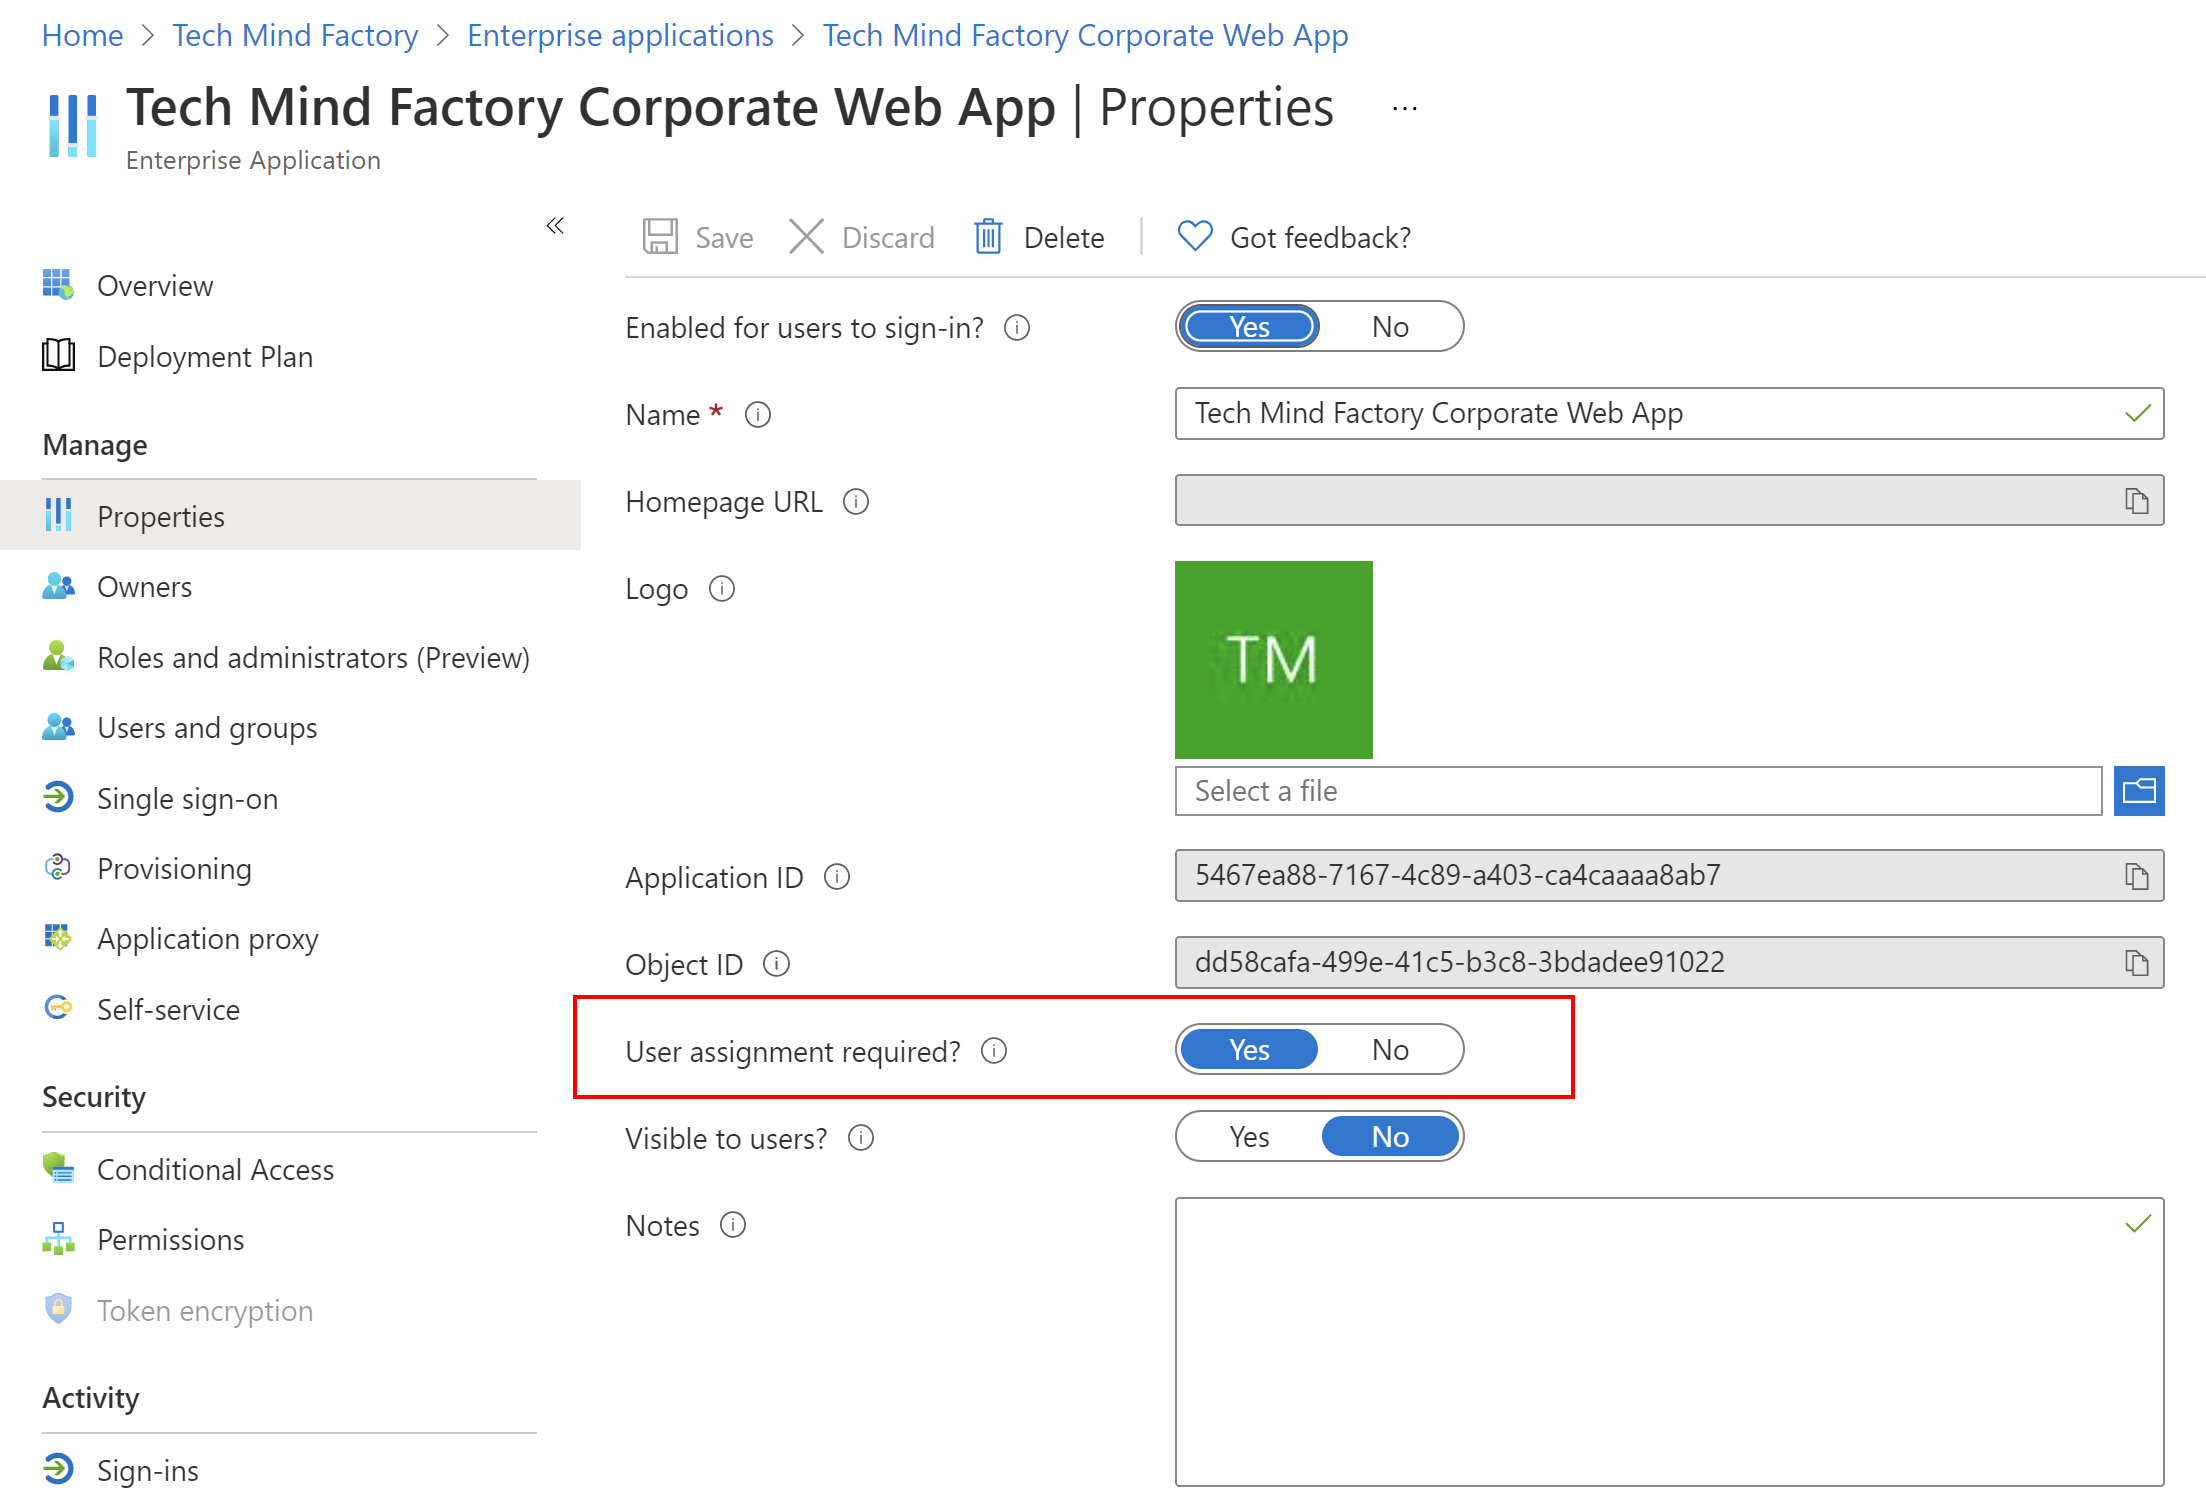
We want to make the TMF Corporate Web App available only to users assigned to it in the Azure AD tenant. We want to prevent accessing it by anyone in the organization. In this case, we have to set up user assignment requirement:
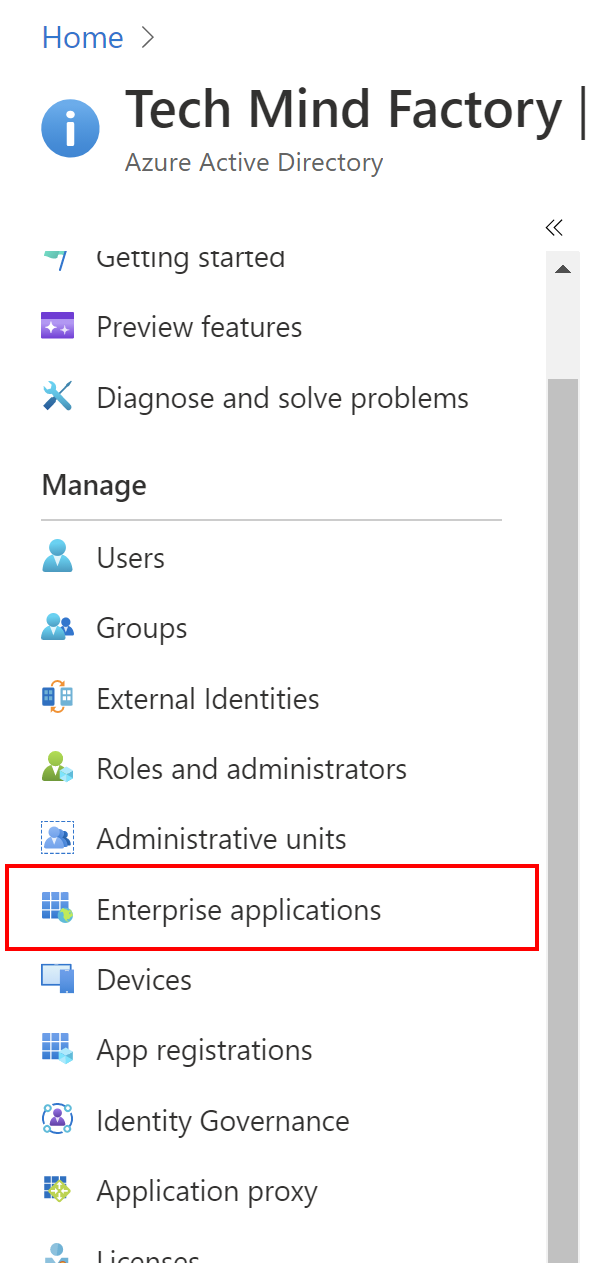
1. From the Azure AD management blade on the left side, select Enterprise applications:
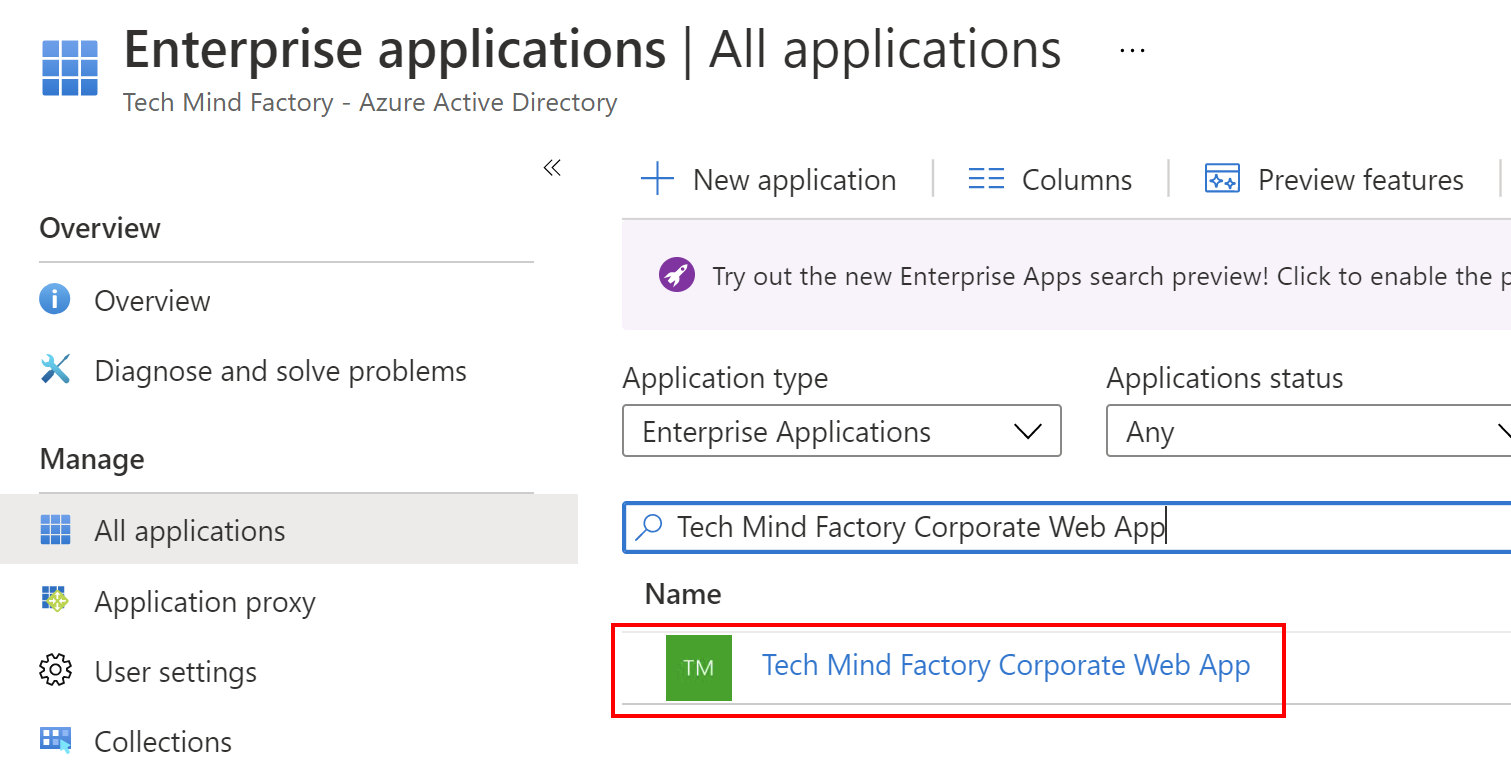
2. Select previously created application from the list:
3. Enable user assignment requirement:
Great, now only assigned users will have access to our corporate application. We have to assign previously created users. To do it, we have to select Users and groups and click + Add user/group button and follow below steps:
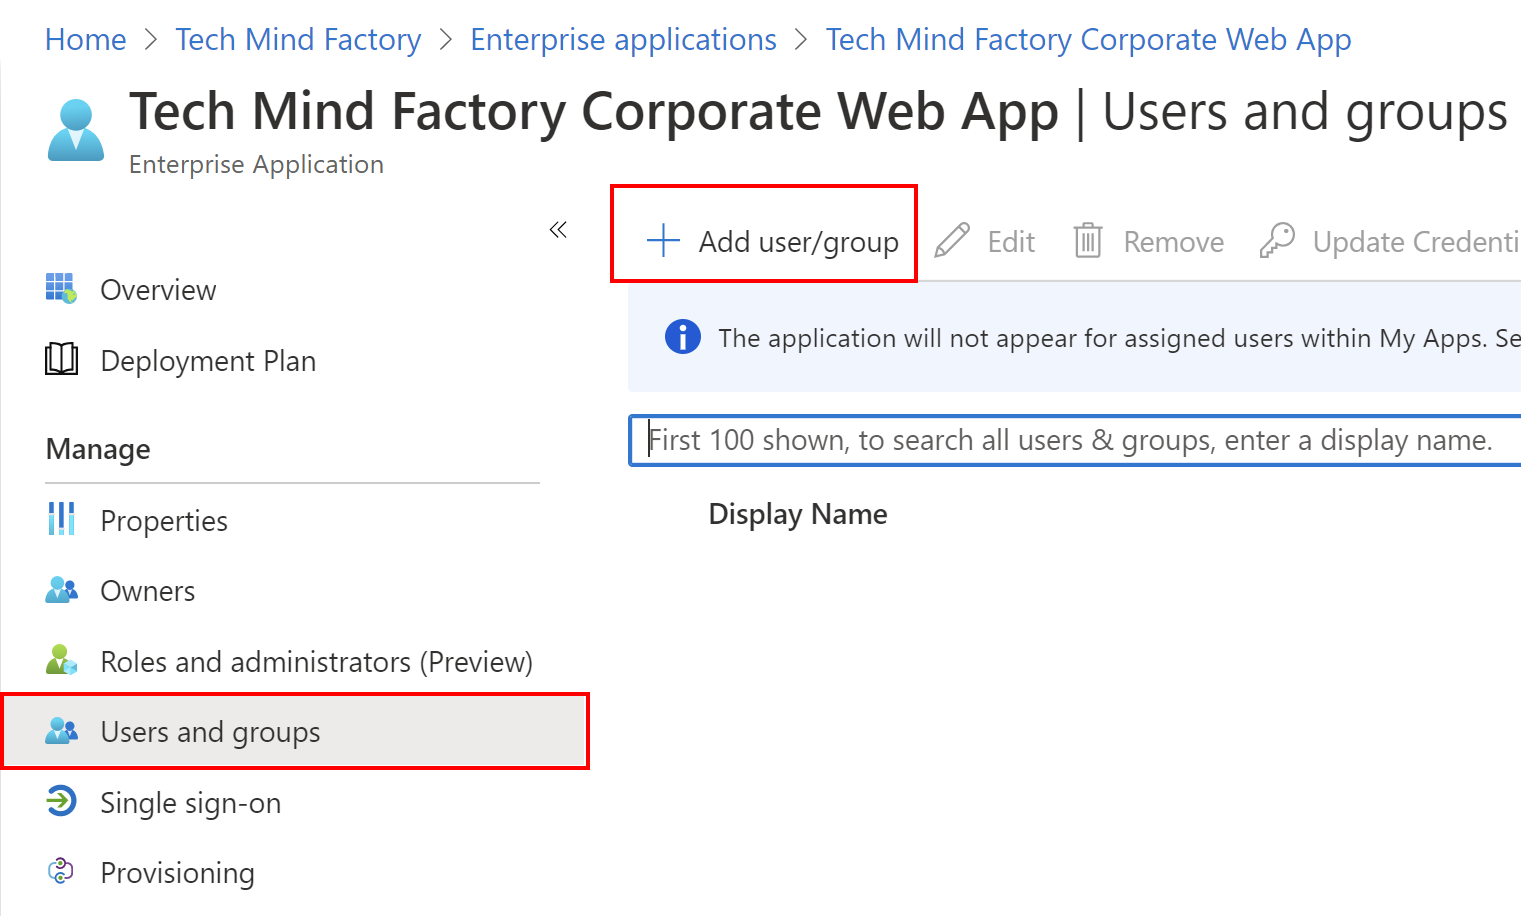
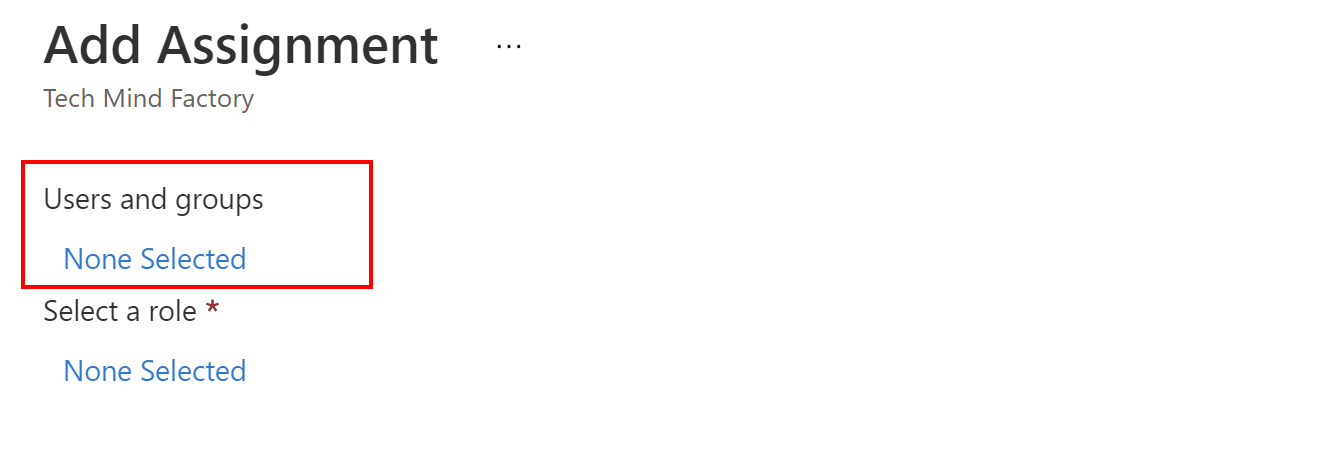
Once users are assigned to the Tech Mind Factory Corporate Web App, they can sign in and use it.
Now it is time to register Tech Mind Factory Shared API application. Follow below steps to do it:
1. From the Azure AD management blade on the left side, select App registrations, then select + New registration:
2. Provide the name for the application, select supported account types to be single tenant, leaveredirect URL empty, then click Register button:
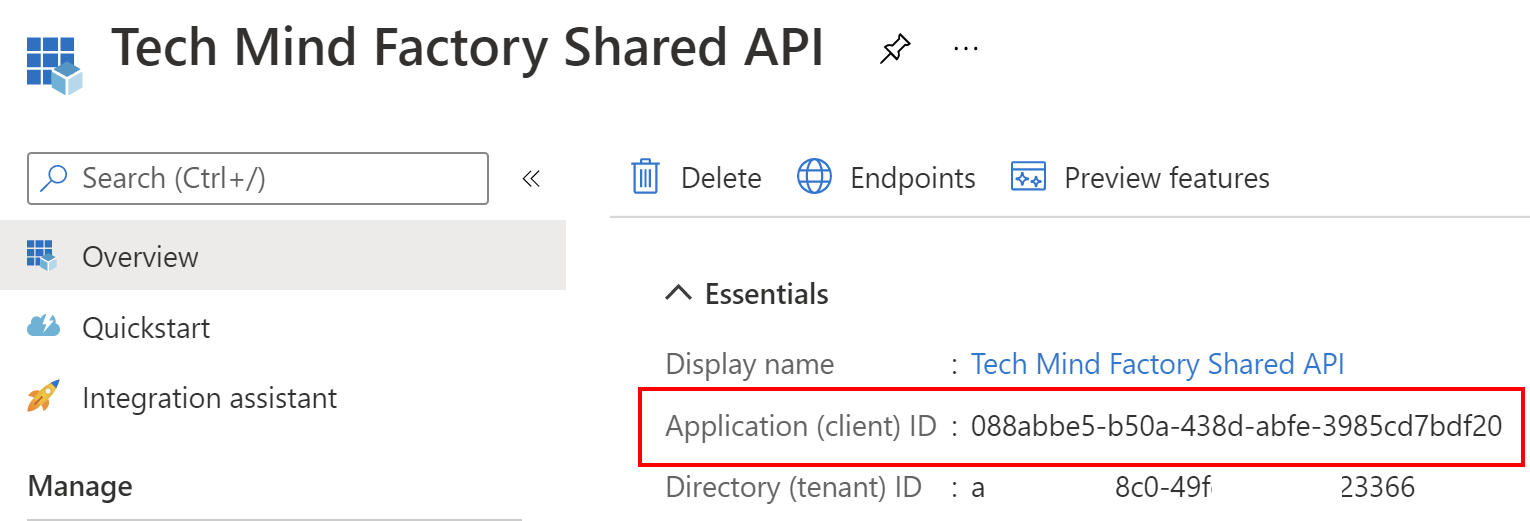
3. Once application is created, you can see its ID (client ID) - copy it because we will use it in the app configuration in the source code:
Now to make it possible to request access tokens to access this TMF Shared API, we have to expose it under the specific scope. This scope is required to obtain an access token during user authentication. We will use this scope in the Blazor app configuration described below.
To expose an API, follow below steps:
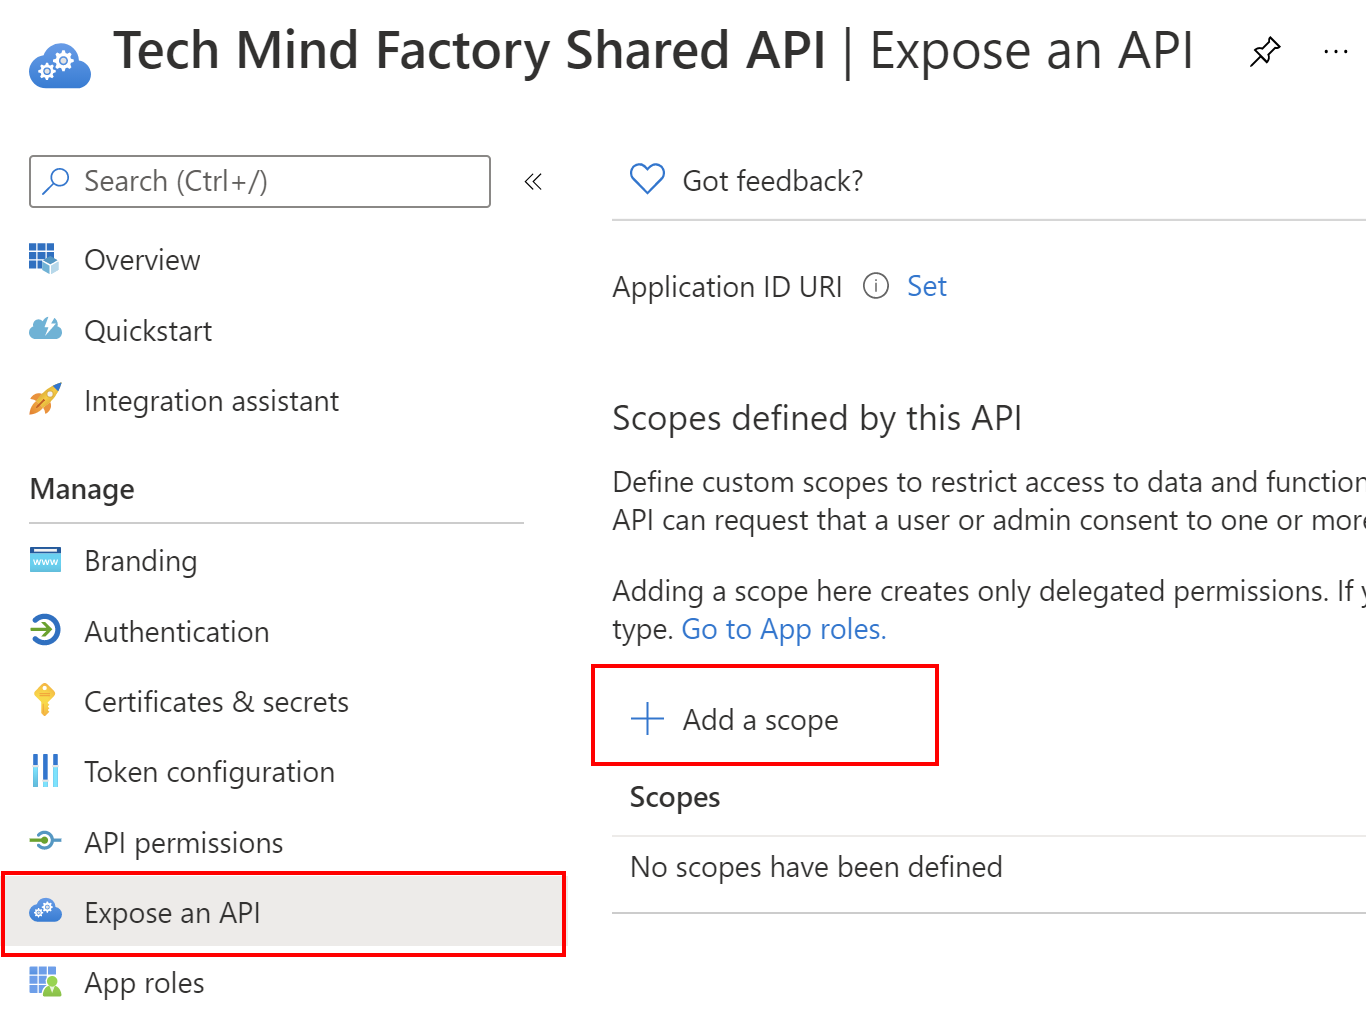
1. From the left bar, select Expose an API and then click + Add a scope button:
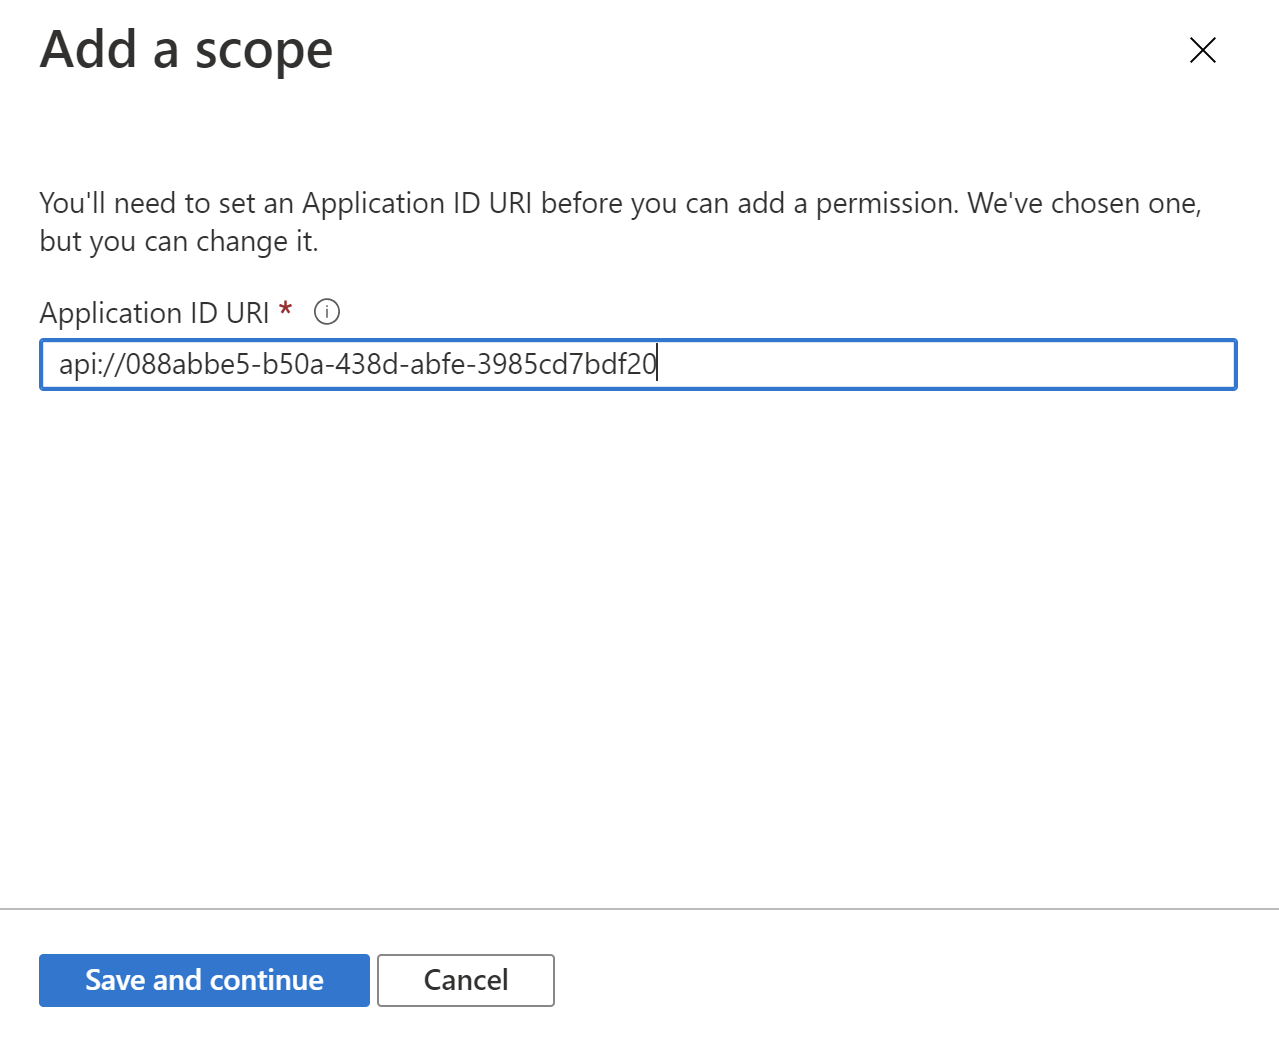
2. Then click Save and continue button with proposed scope:
3. Provide the scope name. A best practice is to use resource.operation.constraint as a pattern to generate the name:
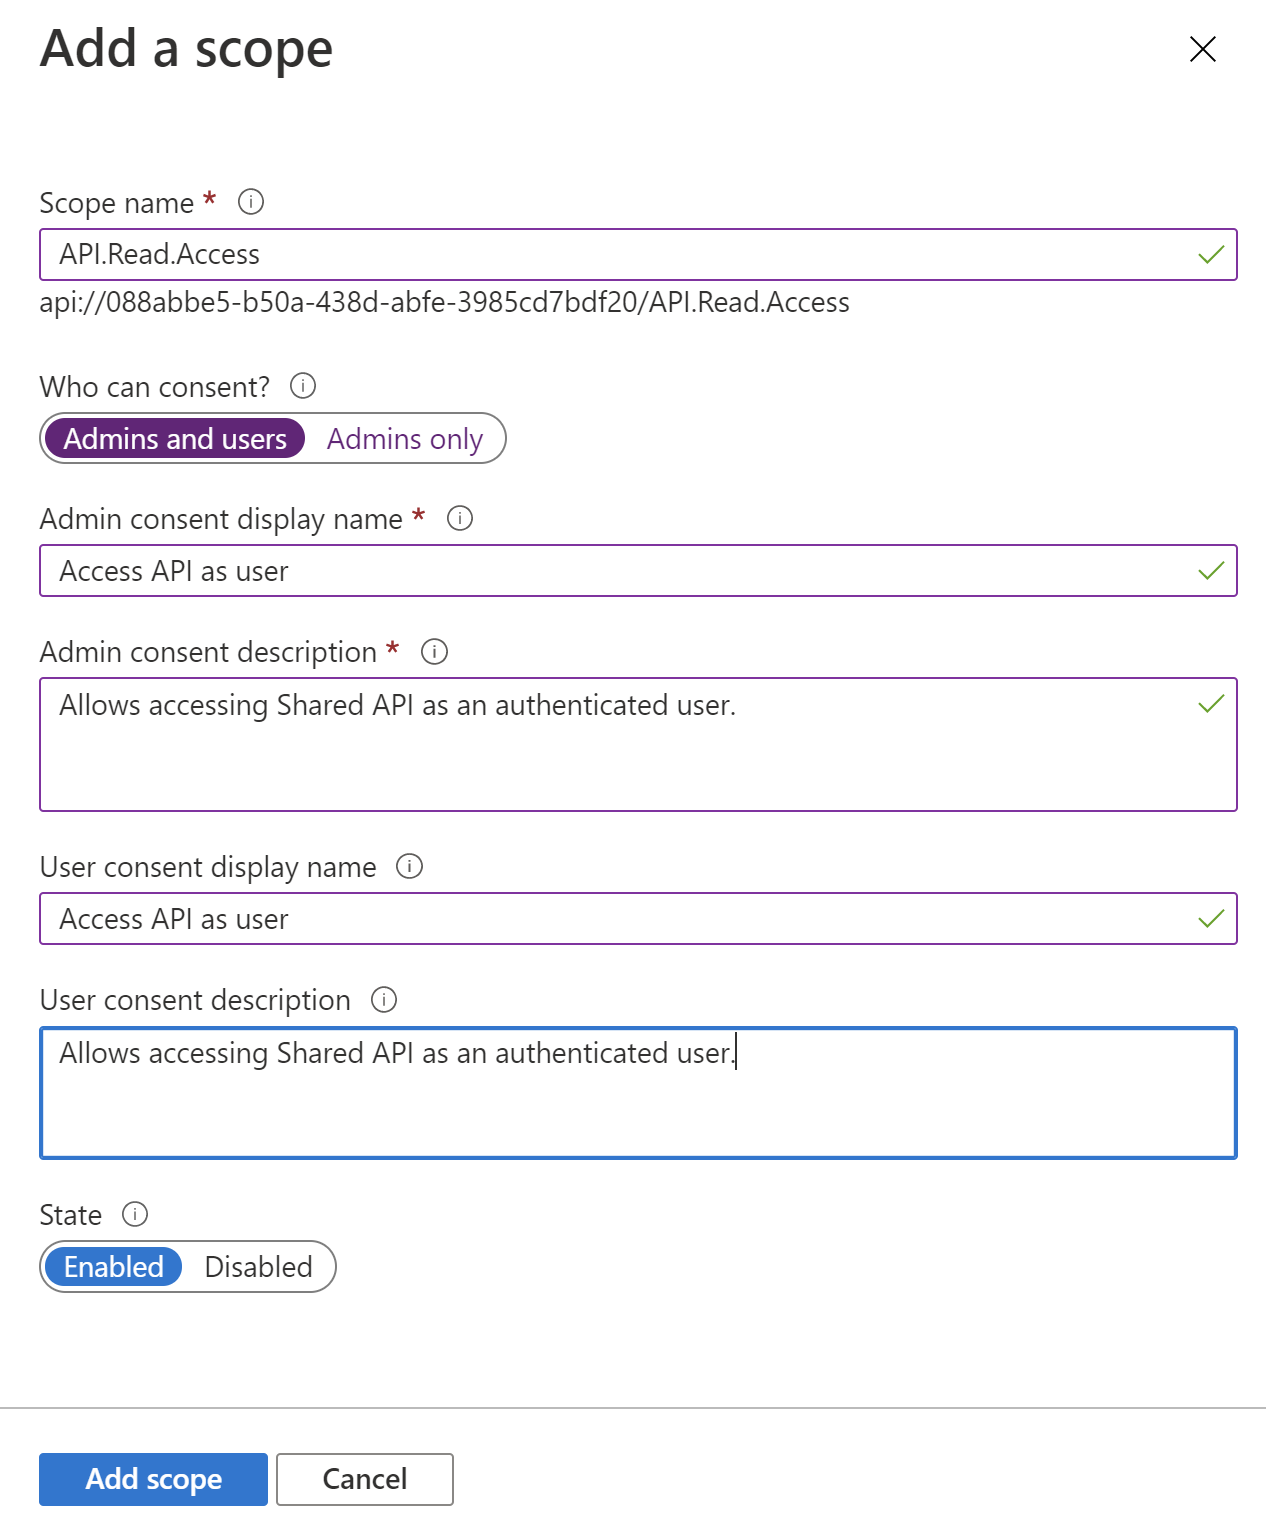
Please note that above you have to also provide consent display name and description. You can read more about consents in the Azure Active Directory under this link. To make it easier I will shortly explain the concept of consent. Probably you have already seen the consent screen in the past. This is the screen displayed after you signed in, with information that the application would like to read your basic profile data. This is an example of consents screen:
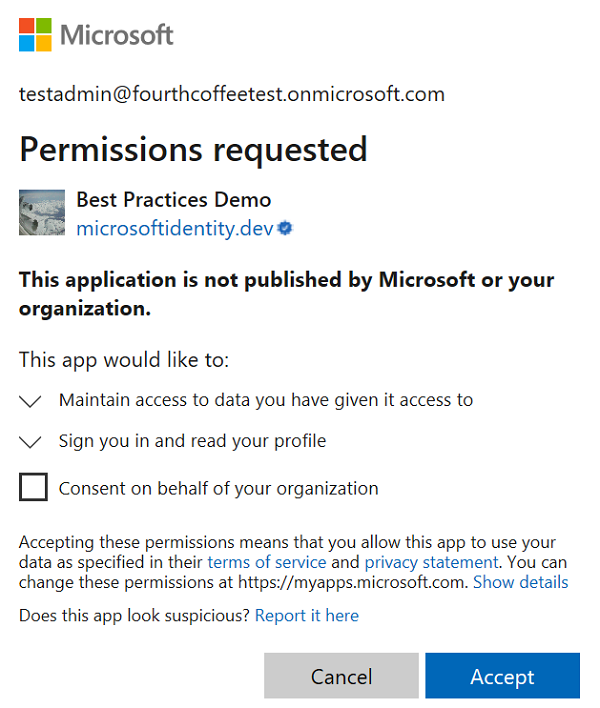
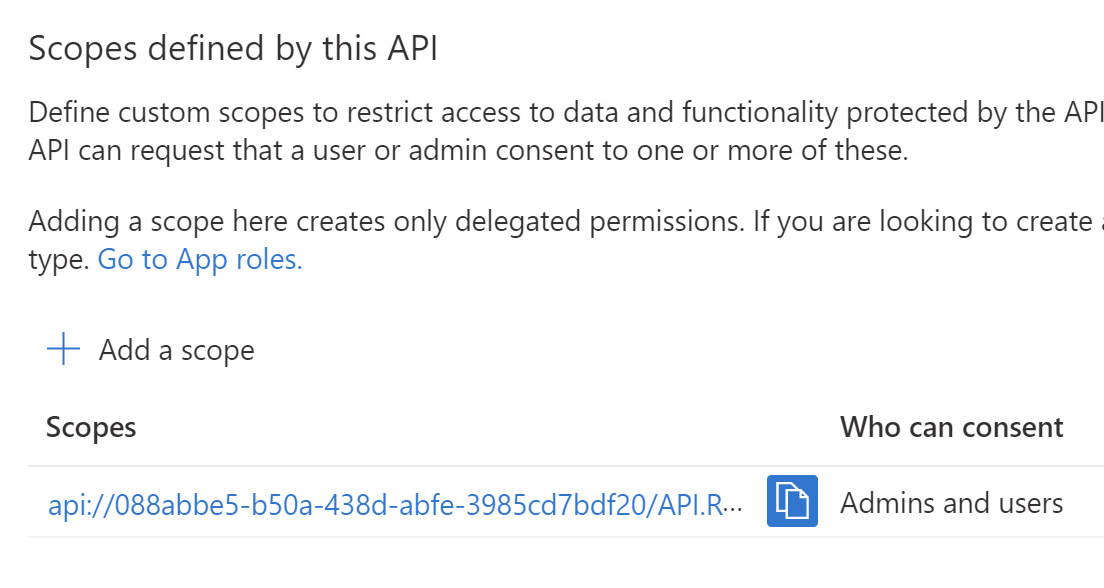
Once you click Add scope button, it will be displayed on the list:
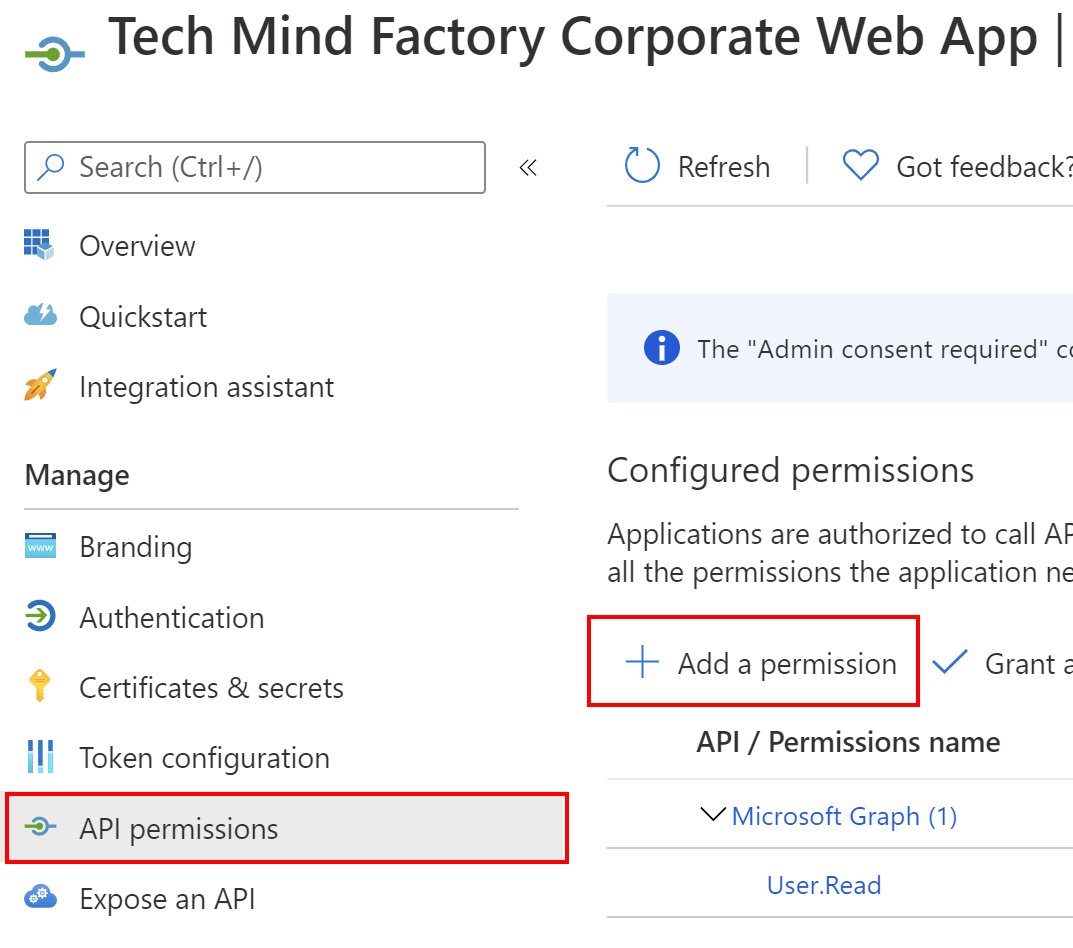
Great. Now it is time to add permission for TMF Corpotate App to obtain access tokens to call TMF Shared API. To do it, we have to get back to the Tech Mind Factory Corporate Web Application management blade and follow below steps:
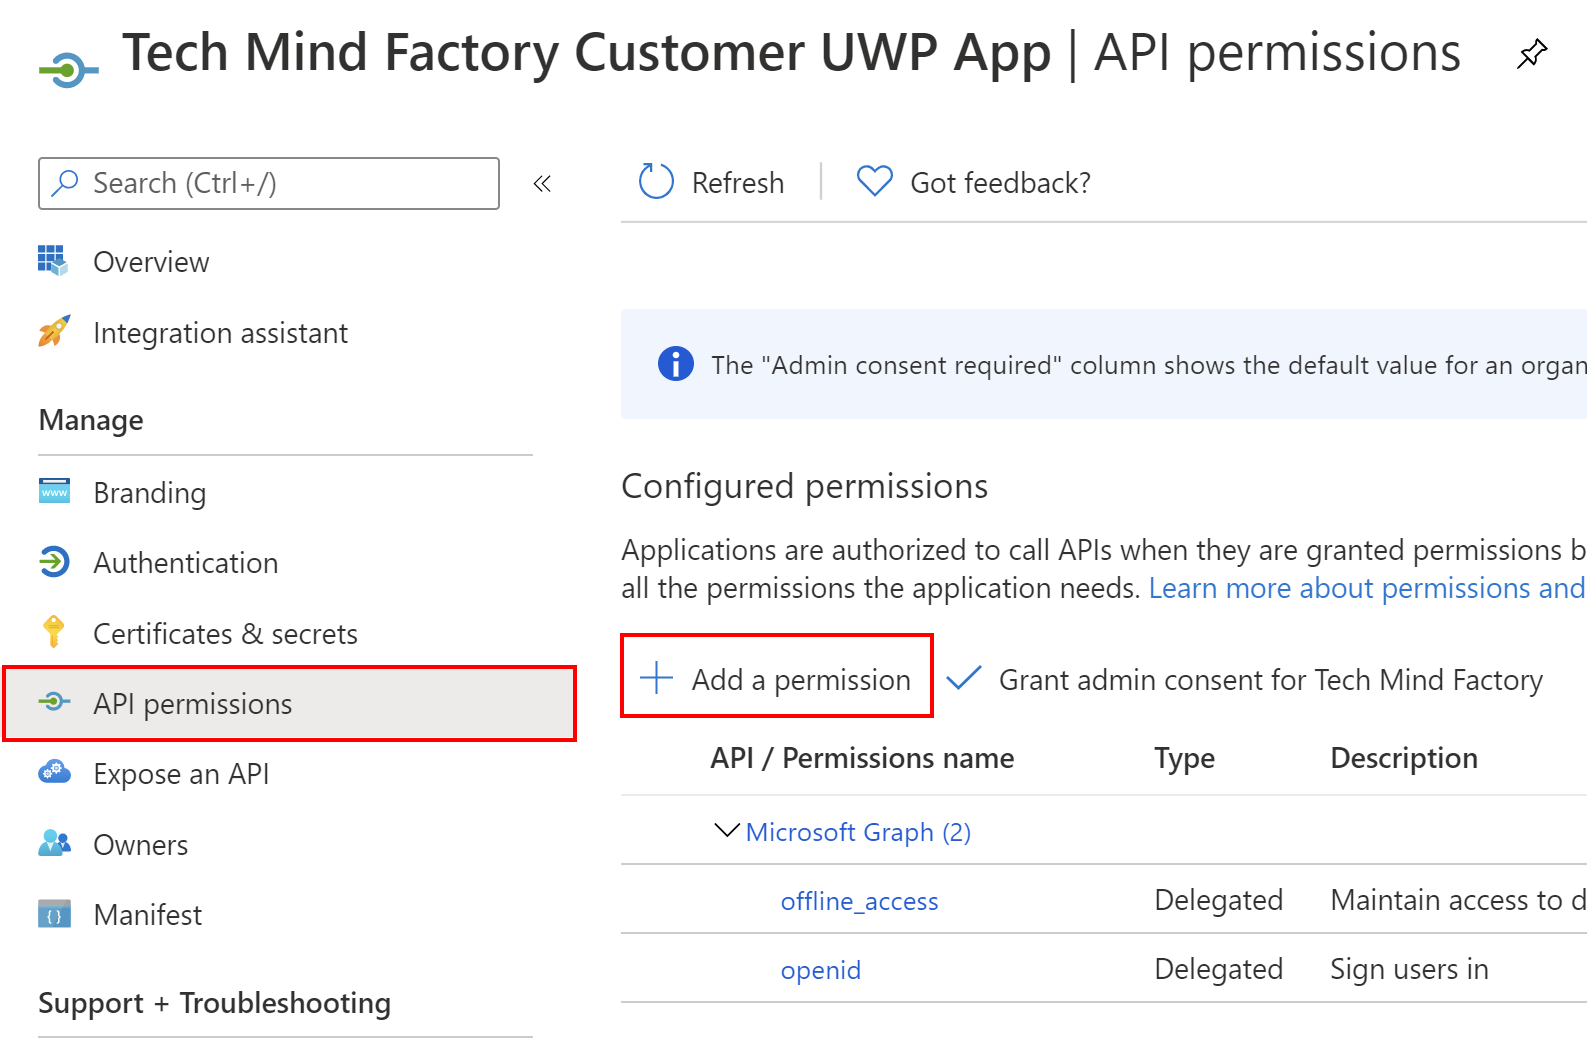
1. From the left bar, select API permissions, then click + Add a permission:
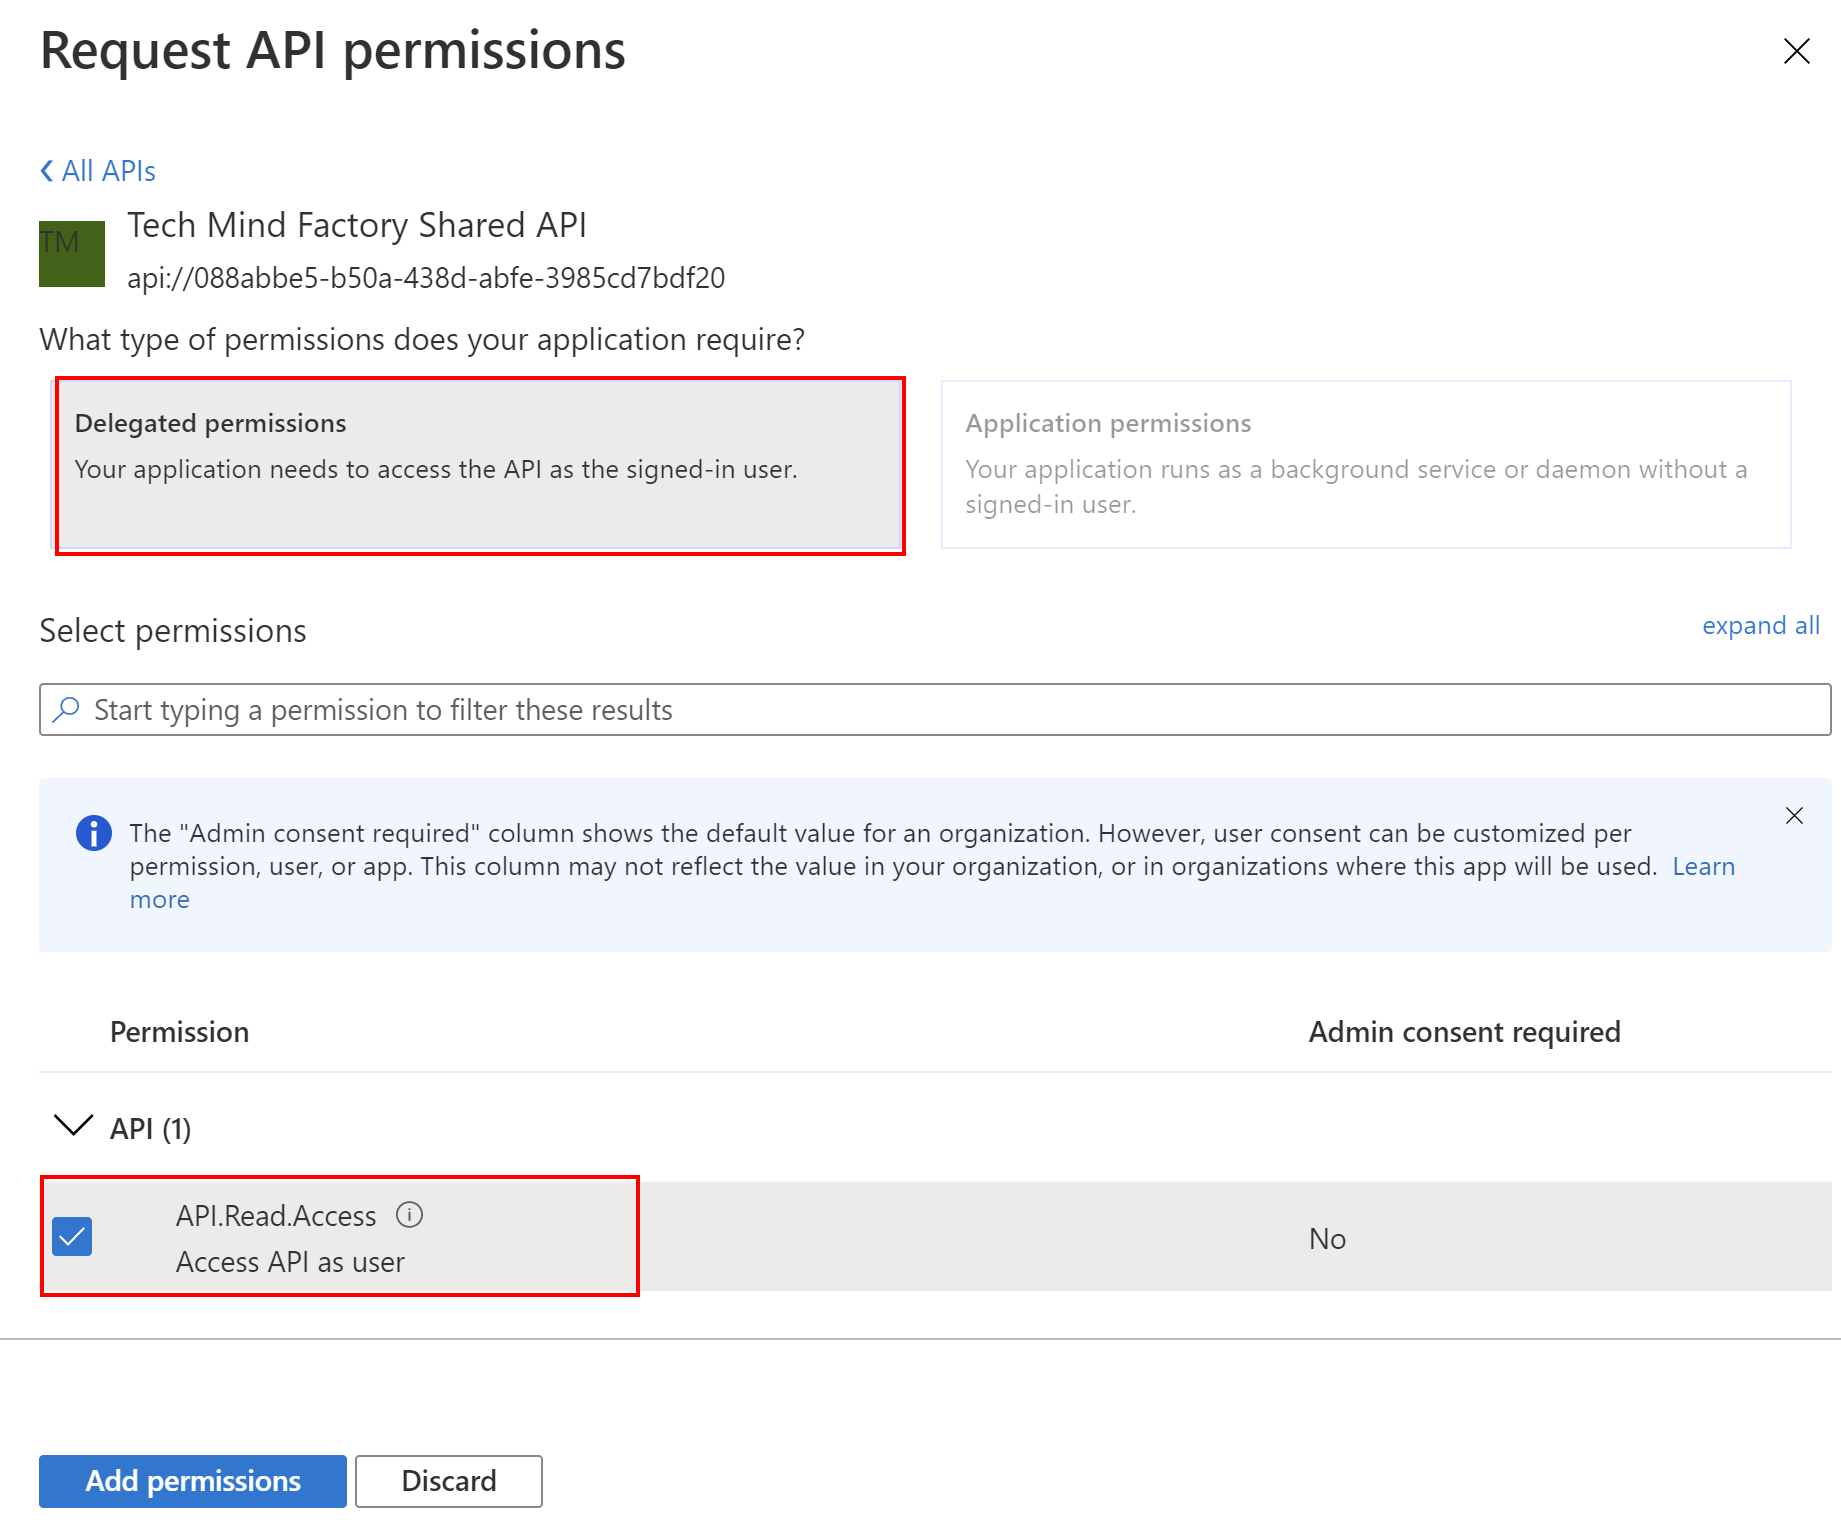
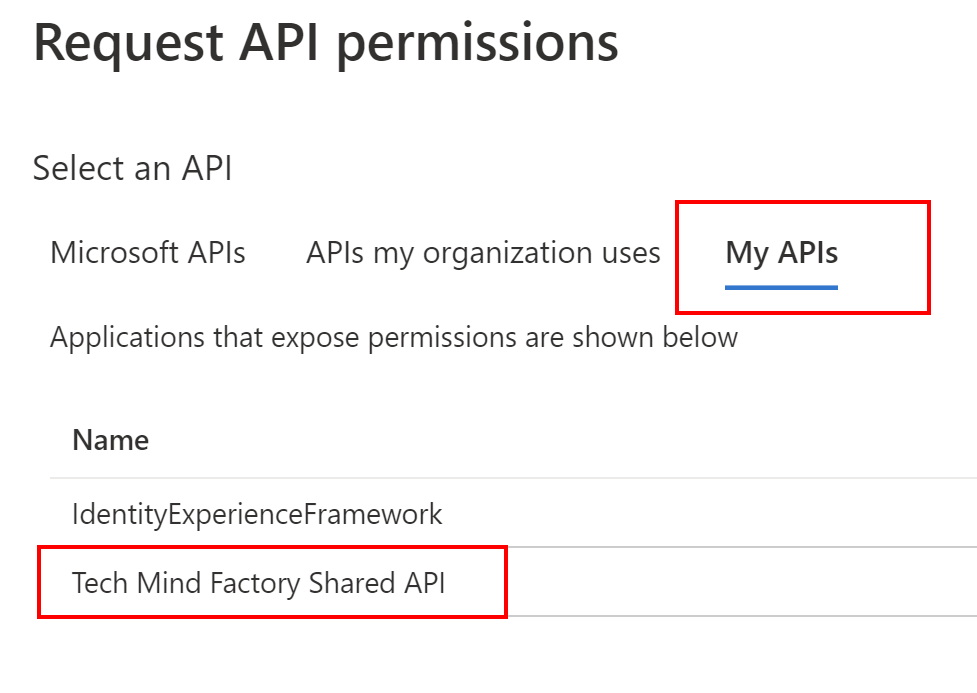
2. Switch to My APIs tab and select Tech Mind Factory Shared API from the list:

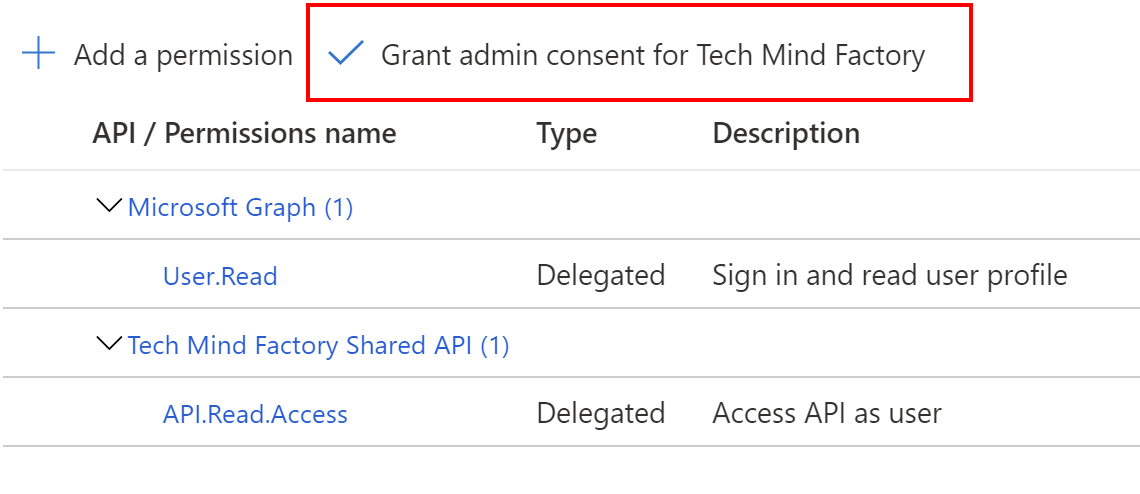
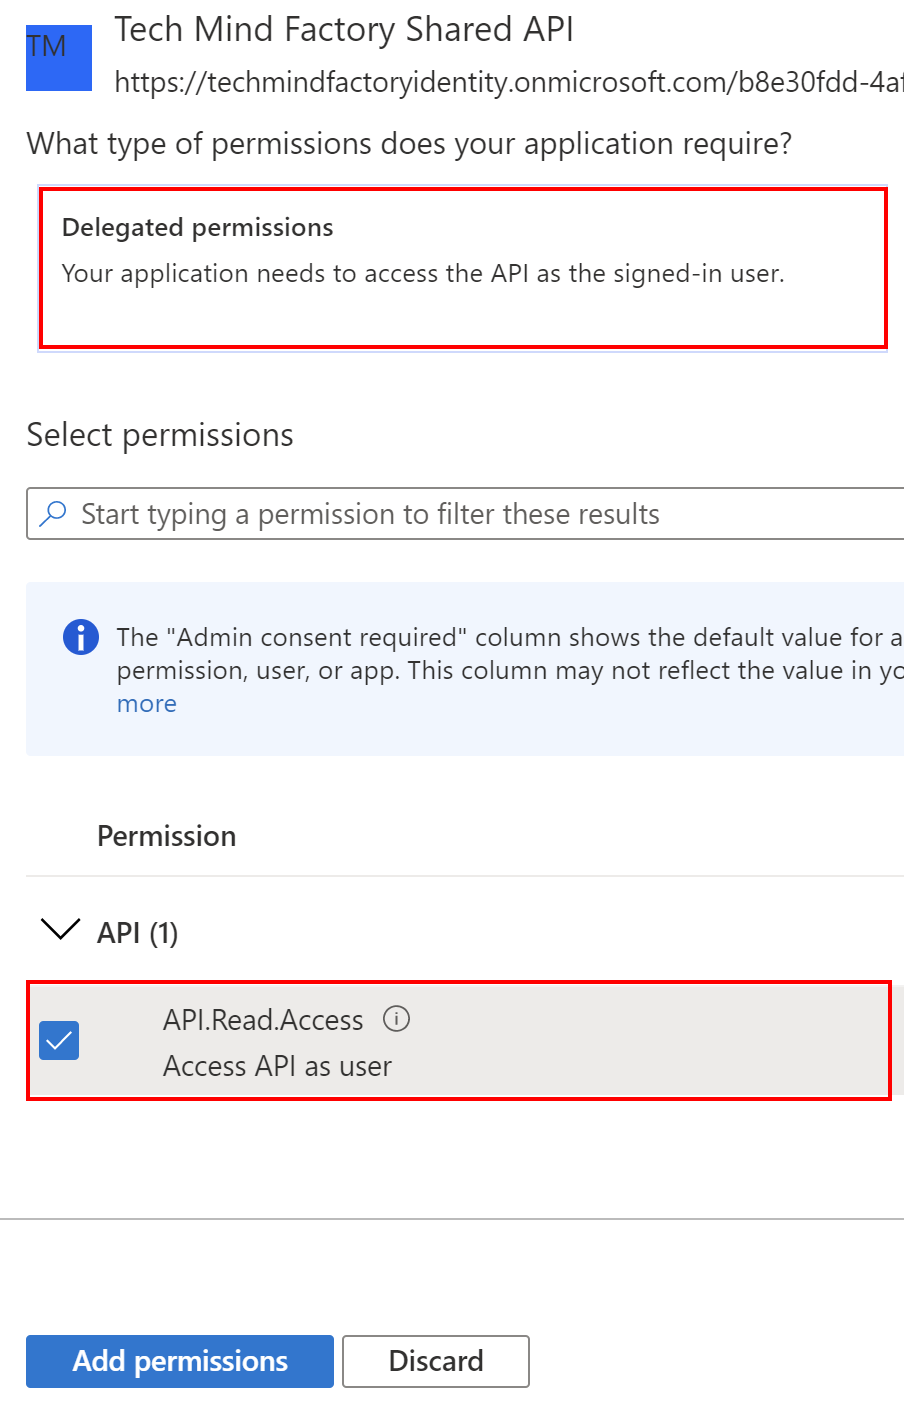
3. Select below permission (please note that the scope we created above is presented on the list):
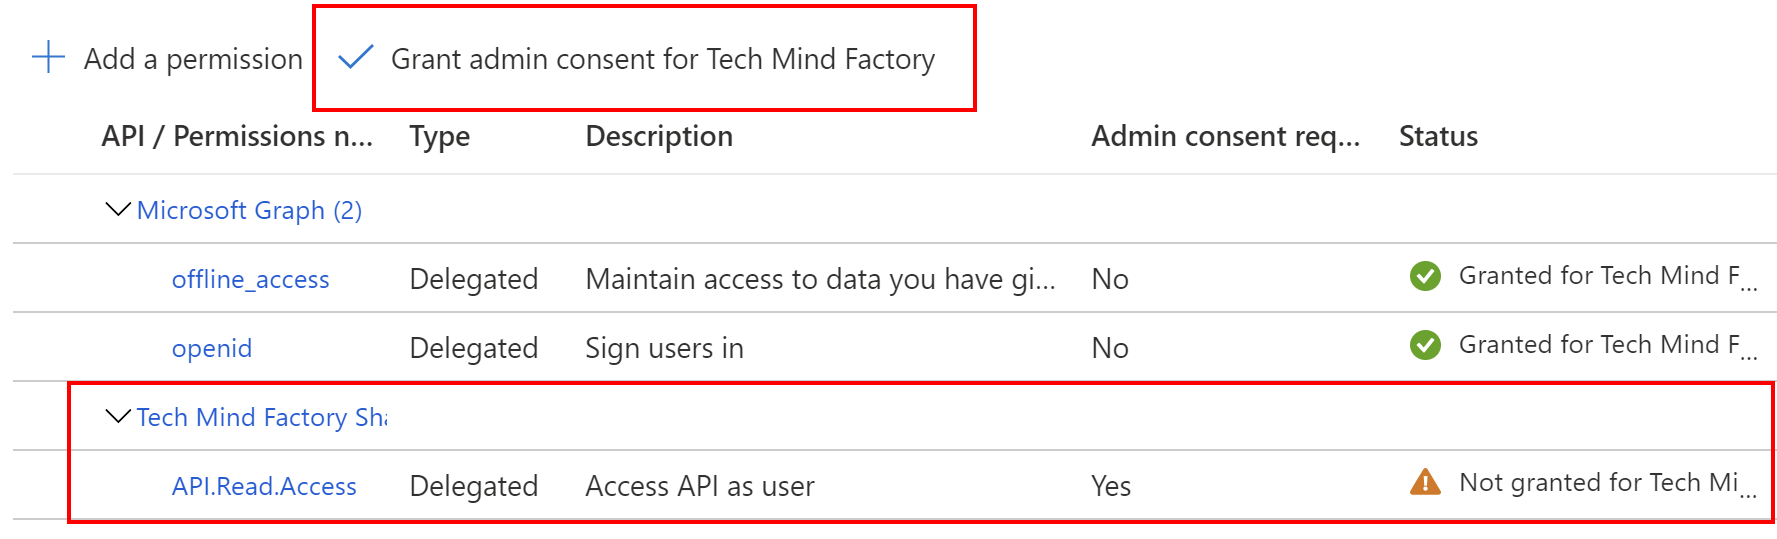
4. To avoid displaying consent window during user authentication, you can select Grant admin consent button:
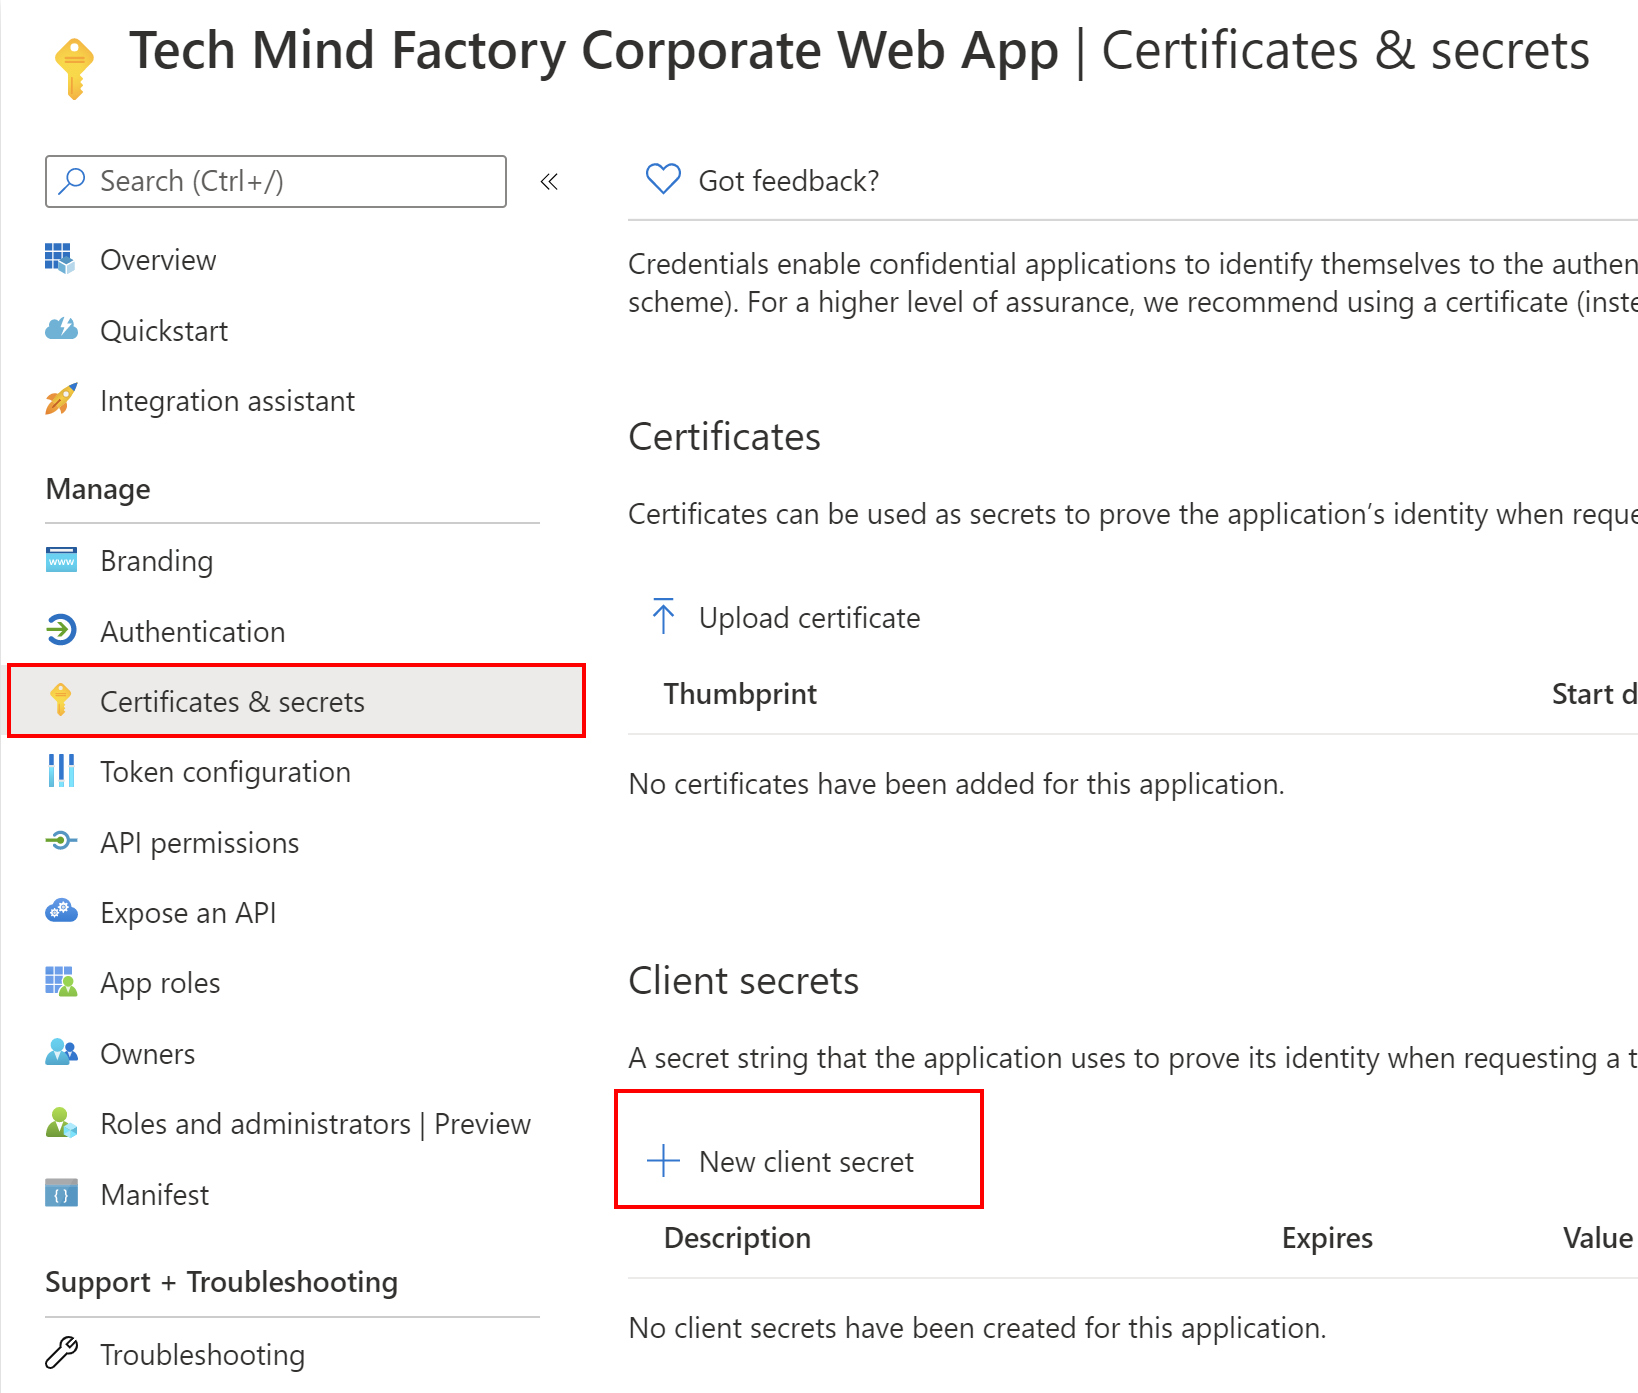
The last thing we have to do - generate application secret that will be required by Microsoft Identity Web configuration. Follow below steps to generate app secret:
1. From the left bar, select Certificates and secrets, then click + New client secret:
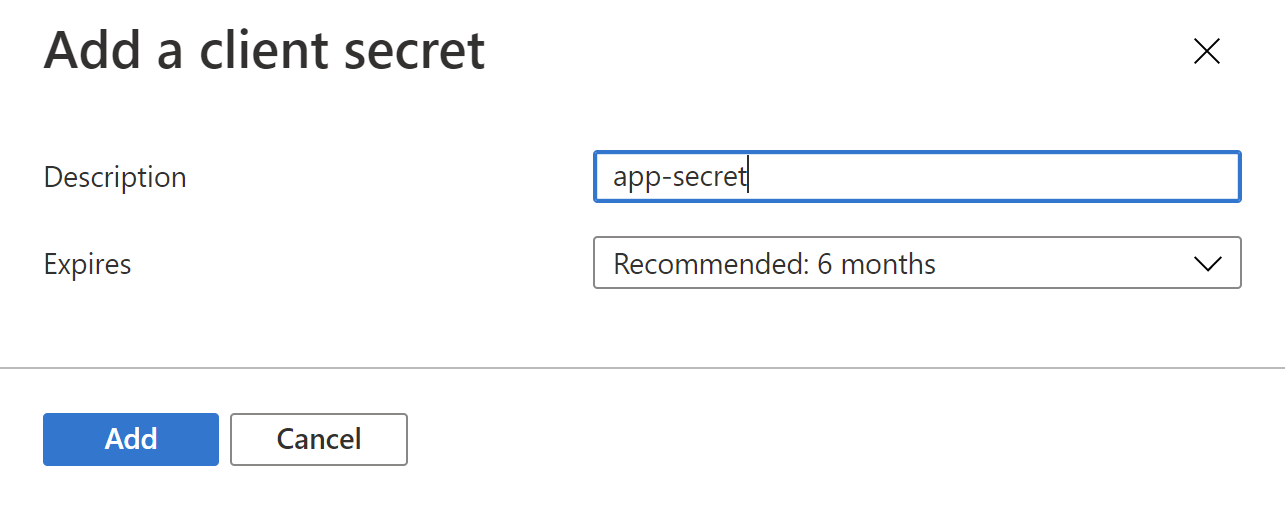
2. Provide the name for the secret and select its expiration time - can be 6 months:
2. Copy the value of generated secret, we will need it for the TMF Corporate Web App configuration:

We will use secret for the demo purpose in this case but the recommended approach is to use certificates. Now it is time to jump into the source code.
Integrate Blazor server app with Azure AD using Microsoft Identity Web library
First of all - source code. You can find it here.
In this application project, I used Microsoft Identity Web library. This library provides classes and methods to simplify the process of securing the application with Azure Active Directory and Azure Active Directory B2C.
To secure Blazor Server application with Azure AD, add Microsoft Identity Web NuGet package together with Microsoft.Identity.Web.UI. Then, in the appsettings.json file include below section:
  "AzureAd": {
    "Instance": "https://login.microsoftonline.com/",
    "Domain": "<<azure-ad-tenant-name>>.onmicrosoft.com",
    "TenantId": "",
    "ClientId": "",
    "ClientSecret": "",
    "CallbackPath": "/signin-oidc",
    "Scope": "api://<<api-application-id-from-azure-ad>>/API.Read.Access"
  }
- Instance - URL of your Azure AD B2C public instance
- Domain - name of your Azure AD tenant, in my case this is techmindfactory.onmicrosoft.com
- TenantId - ID of your Azure AD tenant, it can be found under Overview tab for Azure AD in the Azure portal
- ClientId - ID of the TMF Corporate Web application we registered before in the Azure portal
- ClientSecret - the client secret we have generated in the Azure portal
- CallbackPath - endpoint where tokens should be returned after successful authentication
- Scope - this is the scope we have to add to obtain an access token to access Tech Mind Factory Shared API. You have to place the Client ID of the TMF Shared API application you registered in the Azure AD
We have to also include URL address of the TMF Shared API:
  "WebApi": {
    "Url": "https://localhost:5005/"
  }
Now in the Startup.cs file we have to add below lines in the ConfigureServices method:
            services.AddMicrosoftIdentityWebAppAuthentication(Configuration)
                    .EnableTokenAcquisitionToCallDownstreamApi()
                    .AddInMemoryTokenCaches();

            services.AddControllersWithViews()
                    .AddMicrosoftIdentityUI();
As you can see, AddMicrosoftIdentityWebAppAuthentication method will add a mechanism to enable user authentication with Azure AD. EnableTokenAcquisitionToCallDownstreamApi line is used to configure access token acquisition to call TMF Shared API. As you can see, the configuration is taken from the appsettings.json file. AddMicrosoftIdentityUI method enables using login UI provided by Microsoft.Identity.Web.UI library.
The method called AddInMemoryTokenCaches, enables in-memory token cache serialization. This implementation is great in samples. It’s also good in production applications provided you don’t mind if the token cache is lost when the web app is restarted. You can read more about token serialization here.
In the Configure method in the Startup.cs file below two methods have to be invoked:
            app.UseAuthentication();
            app.UseAuthorization();
The above lines ensure that the app attempts to parse and validate tokens on incoming requests and any request attempting to access a protected resource without proper credentials fails.
There is also ApiService class registered in the dependency injection container. Inside this class you can see how access token is obtained to call TMF Shared API:
    internal class ApiService : IApiService
    {
        private readonly ITokenAcquisition _tokenAcquisition;
        private readonly IConfiguration _configuration;
        private readonly HttpClient _httpClient;

        public ApiService(ITokenAcquisition tokenAcquisition,
                          IConfiguration configuration,
                          HttpClient httpClient)
        {
            _tokenAcquisition = tokenAcquisition;
            _configuration = configuration;
            _httpClient = httpClient;
        }

        private async Task GetAndAddApiAccessTokenToAuthorizationHeaderAsync()
        {
            string[] scopes = new[] { _configuration["AzureAd:Scope"] };
            string accessToken = await _tokenAcquisition.GetAccessTokenForUserAsync(scopes);
            _httpClient.DefaultRequestHeaders.Authorization = new AuthenticationHeaderValue("Bearer", accessToken);
        }

        public async Task<string> GetGreetingFromApiAsync()
        {
            await GetAndAddApiAccessTokenToAuthorizationHeaderAsync();
            var response = await _httpClient.GetAsync($"{_configuration["WebApi:Url"]}/user");
            if (response.IsSuccessStatusCode)
            {
                var apiResponseJson = await response.Content.ReadAsStringAsync();
                var deserializedResponse = JsonSerializer.Deserialize<ApiResponse>(apiResponseJson);
                return deserializedResponse.GreetingFromApi;
            }

            else
            {
                System.Diagnostics.Debug.WriteLine($"API returned status code: {response.StatusCode}");
                return null;
            }
        }
    }
You can see above that I use ITokenAcquisition interface provided by the Microsoft Identity Web library. With this interface, we can easily obtain access tokens to call different APIs. As you can see I call GetAccessTokenForUserAsync(scopes) method and as a parameter, I have to pass the scopes - in this case, the scope for TMF Shared API. This scope is taken from the appsettings.json file.
Once we got the access token, we can call TMF Shared API with this token added to the Authorization header.
When it comes to user interface, there is a LoginDisplay.razor file in the Shared folder:
@using Microsoft.Identity.Web
@using Microsoft.Extensions.Options
@inject IOptionsMonitor<MicrosoftIdentityOptions> microsoftIdentityOptions

<AuthorizeView>
    <Authorized>
        @if (canEditProfile)
        {
            <a href="MicrosoftIdentity/Account/EditProfile">Hello, @context.User.Identity.Name</a>
        }
        else
        {
            <text>Hello, @context.User.Identity.Name</text>
        }
        <a href="MicrosoftIdentity/Account/SignOut">SIGN OUT</a>
    </Authorized>
    <NotAuthorized>
        <a href="MicrosoftIdentity/Account/SignIn">SIGN IN</a>
    </NotAuthorized>
</AuthorizeView>

@code {
    private bool canEditProfile;

    protected override void OnInitialized()
    {
        var options = microsoftIdentityOptions.CurrentValue;
        canEditProfile = !string.IsNullOrEmpty(options.EditProfilePolicyId);
    }
}
As you can see, if user is not authenticated, SIGN IN button is displayed. To restrict anonymous access to some of the pages, we have modify App.razor content as presented below:
<CascadingAuthenticationState>
    <Router AppAssembly="@typeof(Program).Assembly">
        <Found Context="routeData">
            <AuthorizeRouteView RouteData="@routeData" DefaultLayout="@typeof(MainLayout)">
                <NotAuthorized>
                    <h1>Sorry</h1>
                    <p>You're not authorized to reach this page.</p>
                    <p>Please sign in first.</p>
                </NotAuthorized>
                <Authorizing>
                    <h1>Authentication in progress</h1>
                </Authorizing>
            </AuthorizeRouteView>
        </Found>
        <NotFound>
            <LayoutView Layout="@typeof(MainLayout)">
                <p>Sorry, there's nothing at this address.</p>
            </LayoutView>
        </NotFound>
    </Router>
</CascadingAuthenticationState>
I encourage you to go through the whole source code on my GitHub to check the implementation details. Please note that there is also additional code related to authorization and user roles but this topic we are going to discuss in the next article.
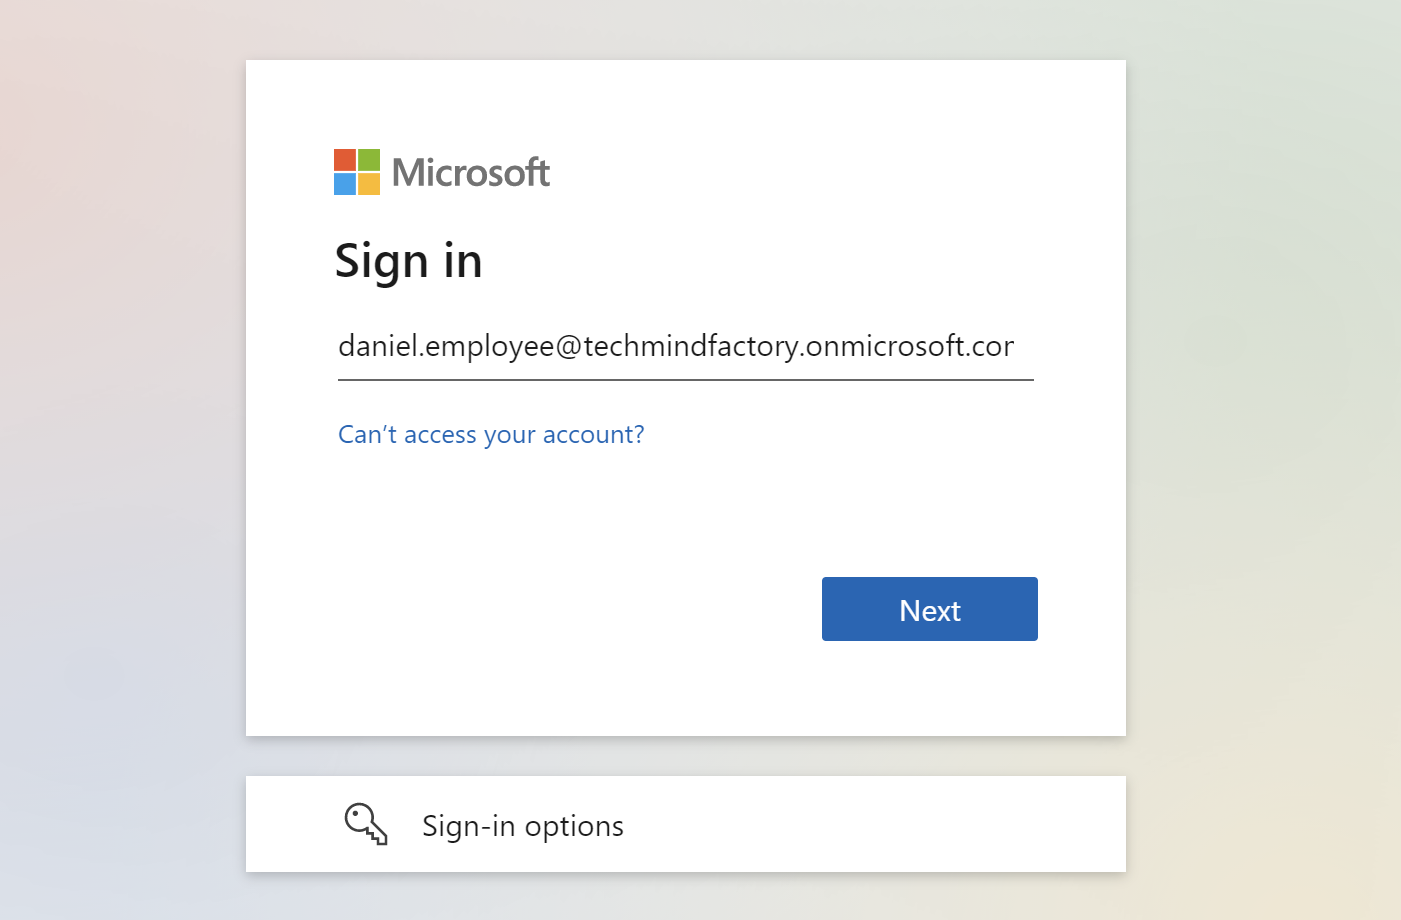
Once user clicks SIGN IN button, below page is displayed so user can authenticate:
Integrate ASP .NET Core Web API app with Azure AD using Microsoft Identity Web library
First of all - source code. You can find it here.
To secure ASP .NET Core Web API, we have to also use Microsoft Identity Web library.
Then, in the appsettings.json file include below section:
  "AzureAd": {
    "Instance": "https://login.microsoftonline.com/",
    "Audience": "api://<<api-application-id-from-azure-ad>>",
    "ClientId": "<<api-application-id-from-azure-ad>>",
    "Domain": "<<azure-ad-tenant-name>>.onmicrosoft.com",
    "TenantId": ""
  }
- Instance - URL of your Azure AD B2C public instance
- Audience - ID of the TMF Shared API application we registered before in the Azure portal
- ClientId - ID of the TMF Shared API application we registered before in the Azure portal
- Domain - name of your Azure AD tenant, in my case this is techmindfactory.onmicrosoft.com
- TenantId - ID of your Azure AD tenant, it can be found under Overview tab for Azure AD in the Azure portal
You probably noticed that in the appsettings.json there is also configuration for the Azure AD B2C - yes, we are going to secure this API with Azure AD, and Azure AD B2C. As I mentioned at the beginning, we want to access TMF Shared API from the Corporate Web application (which is secured by Azure AD), and from the Customer UWP desktop application (secured by the Azure AD B2C).
Now in the Startup.cs file in the ConfigureServices method we have to add below code:
            services.AddMicrosoftIdentityWebApiAuthentication(Configuration, "AzureAdB2C", "AADB2C", false);
            services.AddMicrosoftIdentityWebApiAuthentication(Configuration, "AzureAd", "AAD", false);

            services
                    .AddAuthorization(options =>
                    {
                        options.DefaultPolicy = new AuthorizationPolicyBuilder()
                            .RequireAuthenticatedUser()
                            .AddAuthenticationSchemes("AAD", "AADB2C")
                            .Build();
                    });
With the above code we add two authentication schemes: AAD for the Azure Active Directory tokens and AADB2C for the Azure Active Directory B2C tokens. We have to also add below two lines in the Configure method:
            app.UseAuthentication();
            app.UseAuthorization();
Now to restrict anonymous access to the UserController we have to add Authorize attribute:
    [Authorize]
    [ApiController]
    [Route("[controller]")]
    public class UserController : ControllerBase
    {

        private readonly ILogger<UserController> _logger;

        public UserController(ILogger<UserController> logger)
        {
            _logger = logger;
        }

        [HttpGet]
        public IActionResult GetGreeting()
        {
            string userDisplayName = User.FindFirst(c => c.Type == "name")?.Value;
            var apiResponse = new ApiResponse
            {
                GreetingFromApi = $"Hello {userDisplayName}!"
            };
            return Ok(apiResponse);
        }
    }
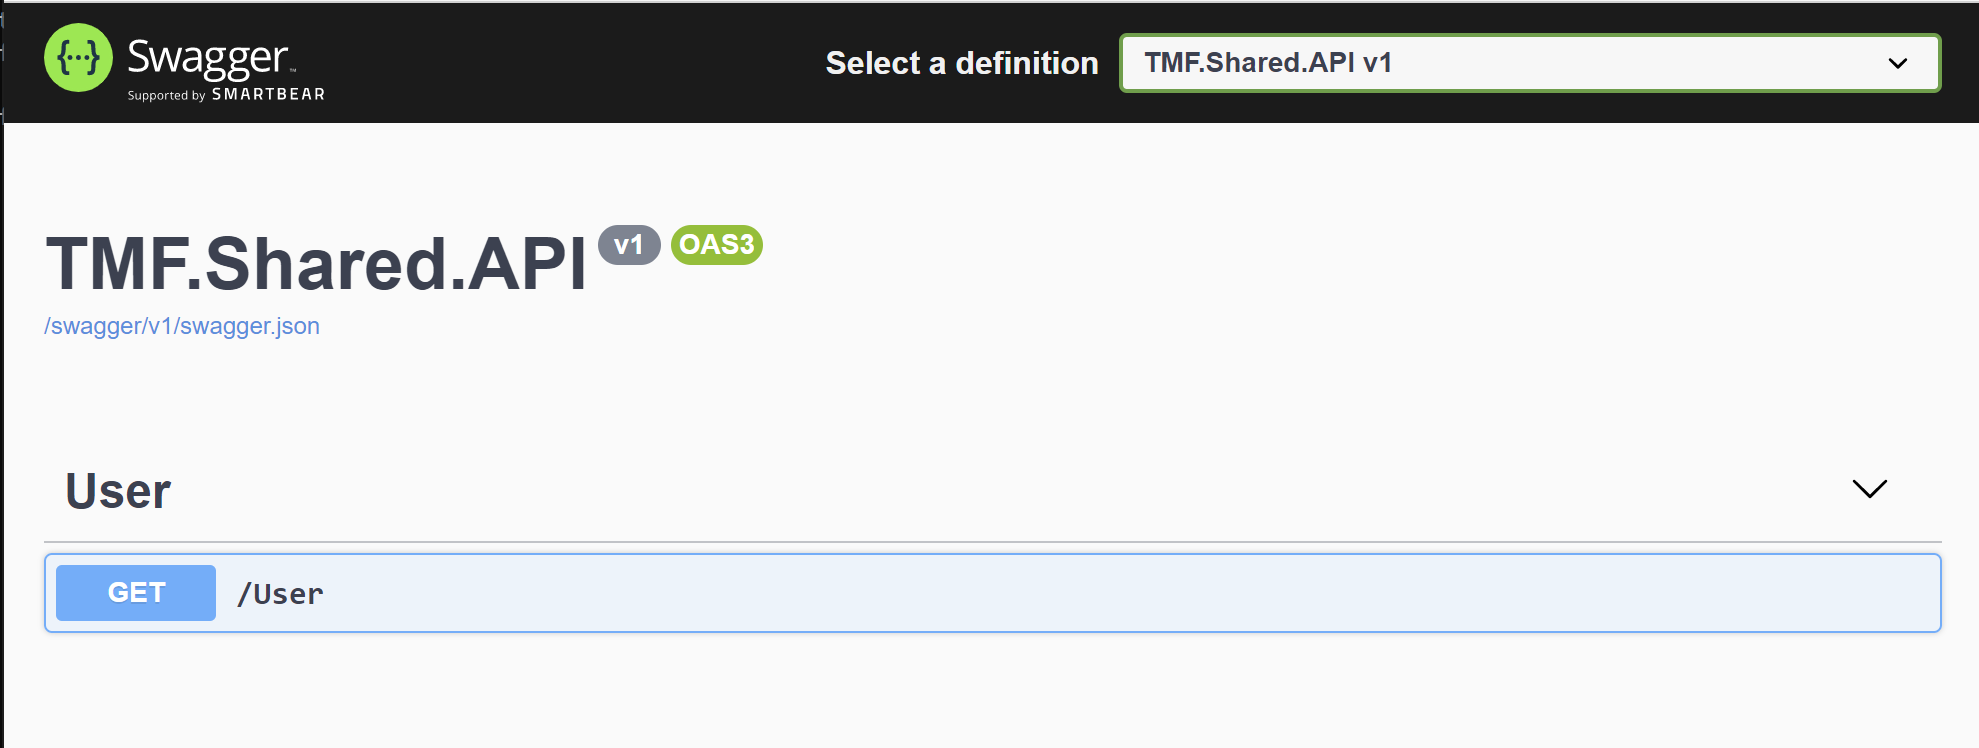
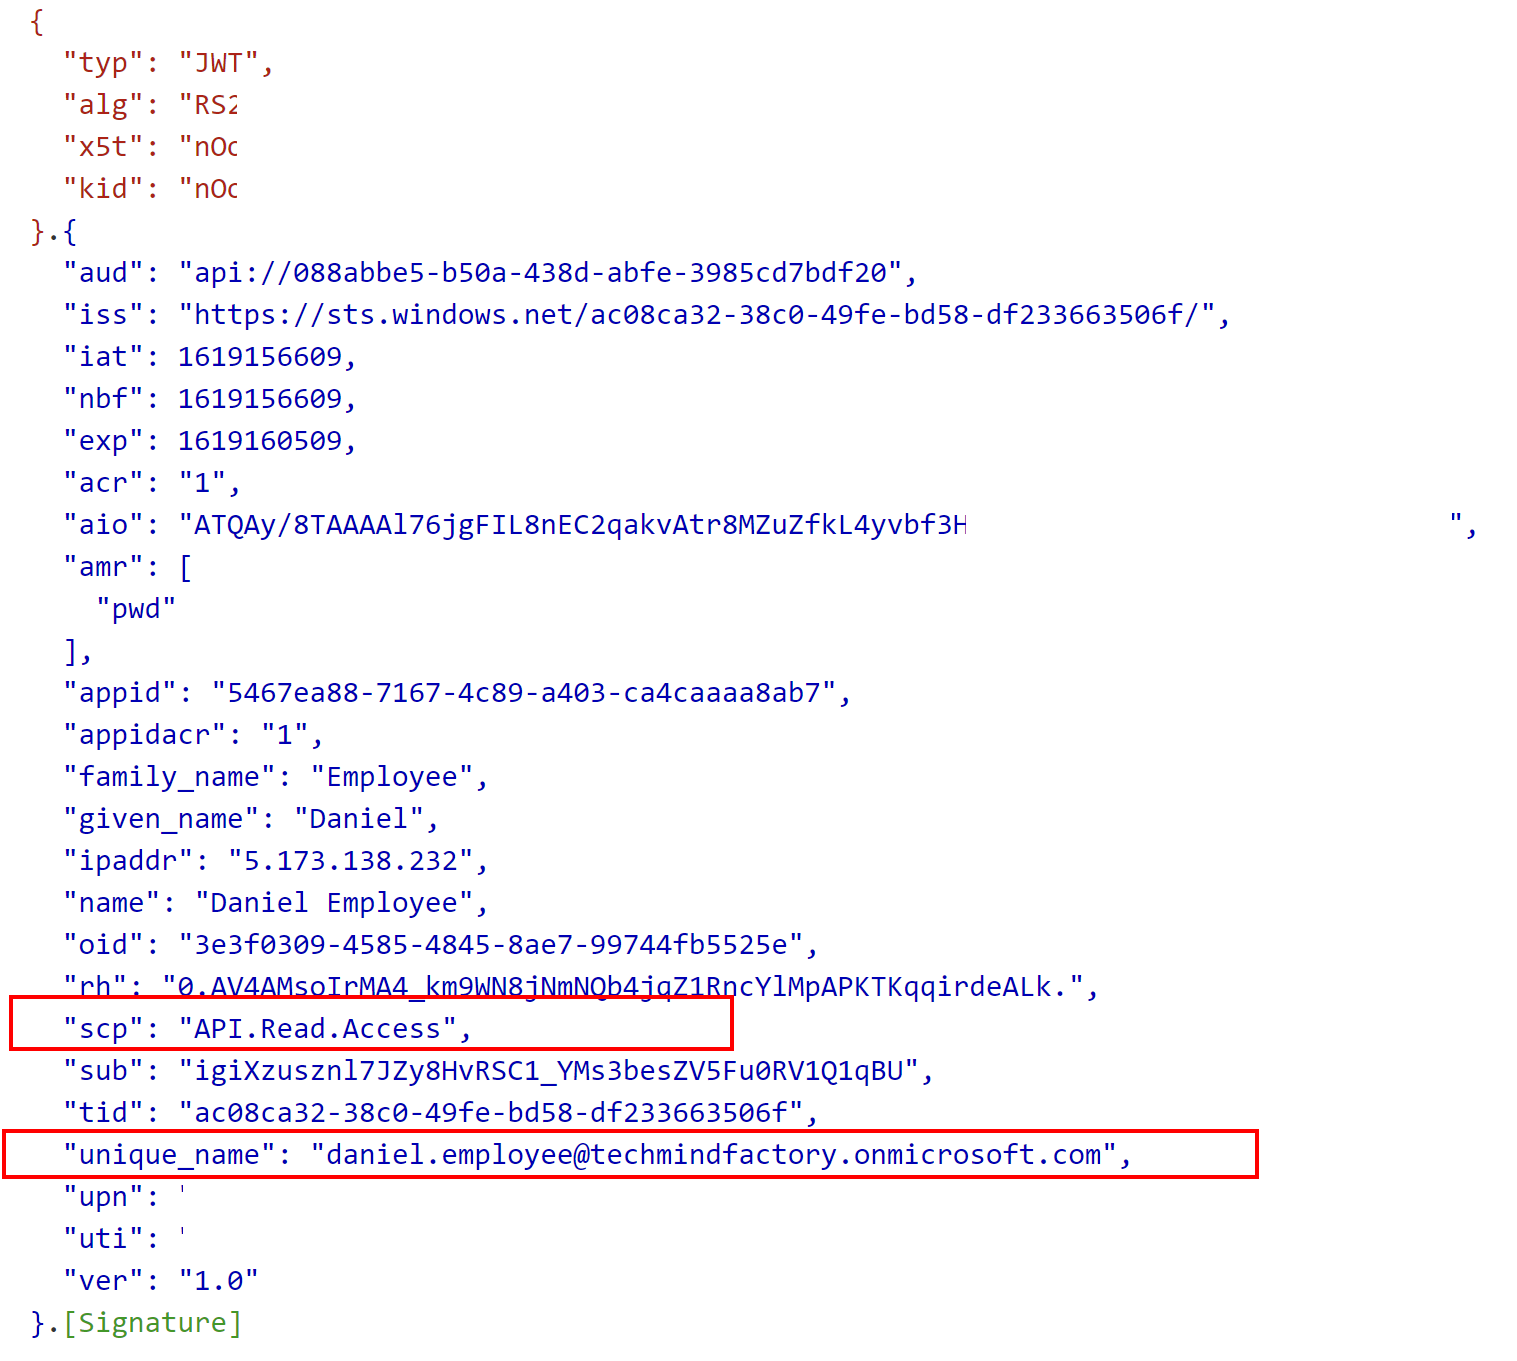
As you can see, in the GetGreeting method we get the name of the user from the access token and then we return the greeting. Below you can see the content of decoded access token. Please note that there is information about the user and requested scope:
Secure applications with Azure Active Directory B2C
Once we discussed integration with Azure Active Directory it is time to see how to integrate Customer UWP application with Azure Active Directory B2C, and how to register TMF Shared API to be able to call it with the obtained access token in the UWP application.
Prerequisites and assumptions
In this article, I do not describe how to setup Azure AD B2C tenant and custom policies. Under this link you can learn how to create Azure AD B2C tenant. You can find all required configuration details in the official documentation. If you want to learn more, please also check this link to understand the difference between user flows and custom policies.
Application registration in the Azure Active Directory B2C tenant
To secure an application with Azure AD B2C, we have to first register it. Below I present how to register TMF Customer UWP application in the Azure AD B2C tenant and then how to register Tech Mind Factory Shared API application.
Let’s start with TMF Shared API registration.
Follow below steps to do it:
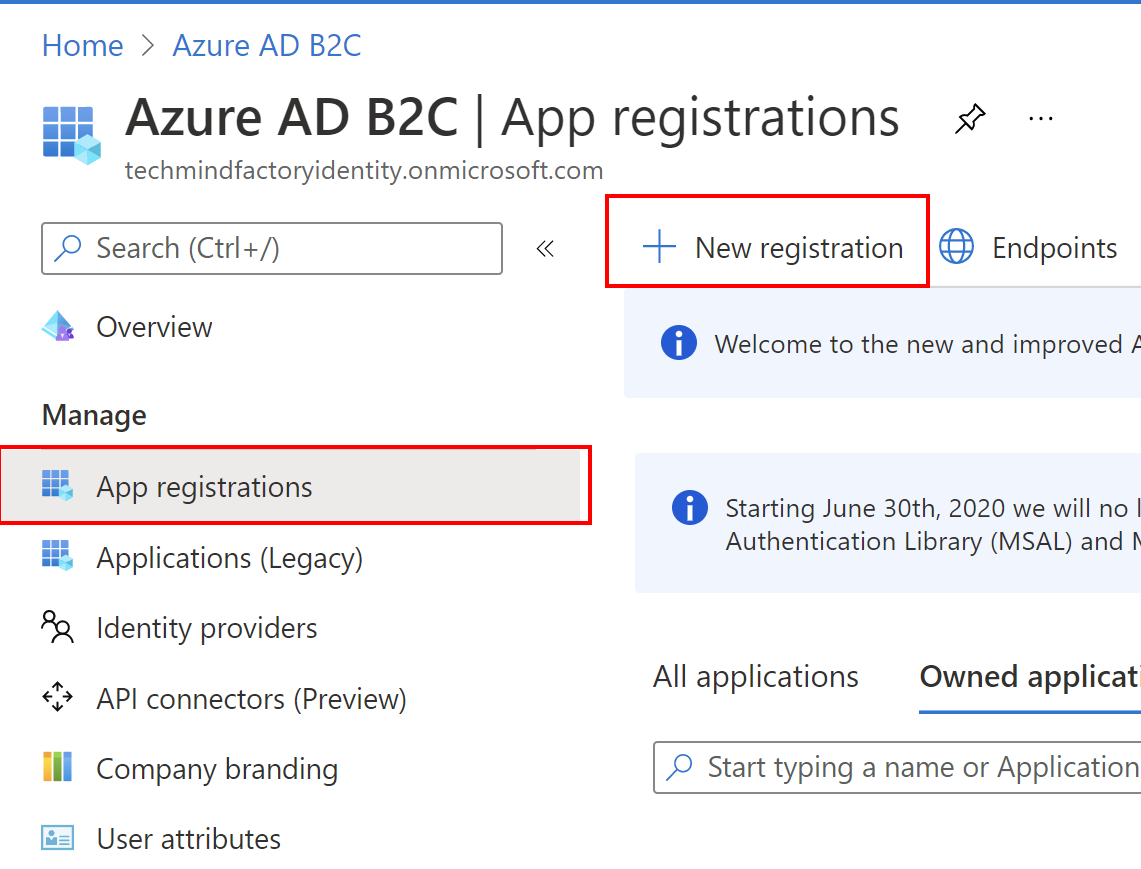
1. From the Azure AD B2C management blade on the left side, select App registrations, then select + New registration:
2. Provide the name for the application, select accounts in any identity provider or organization directory, then click Register button:
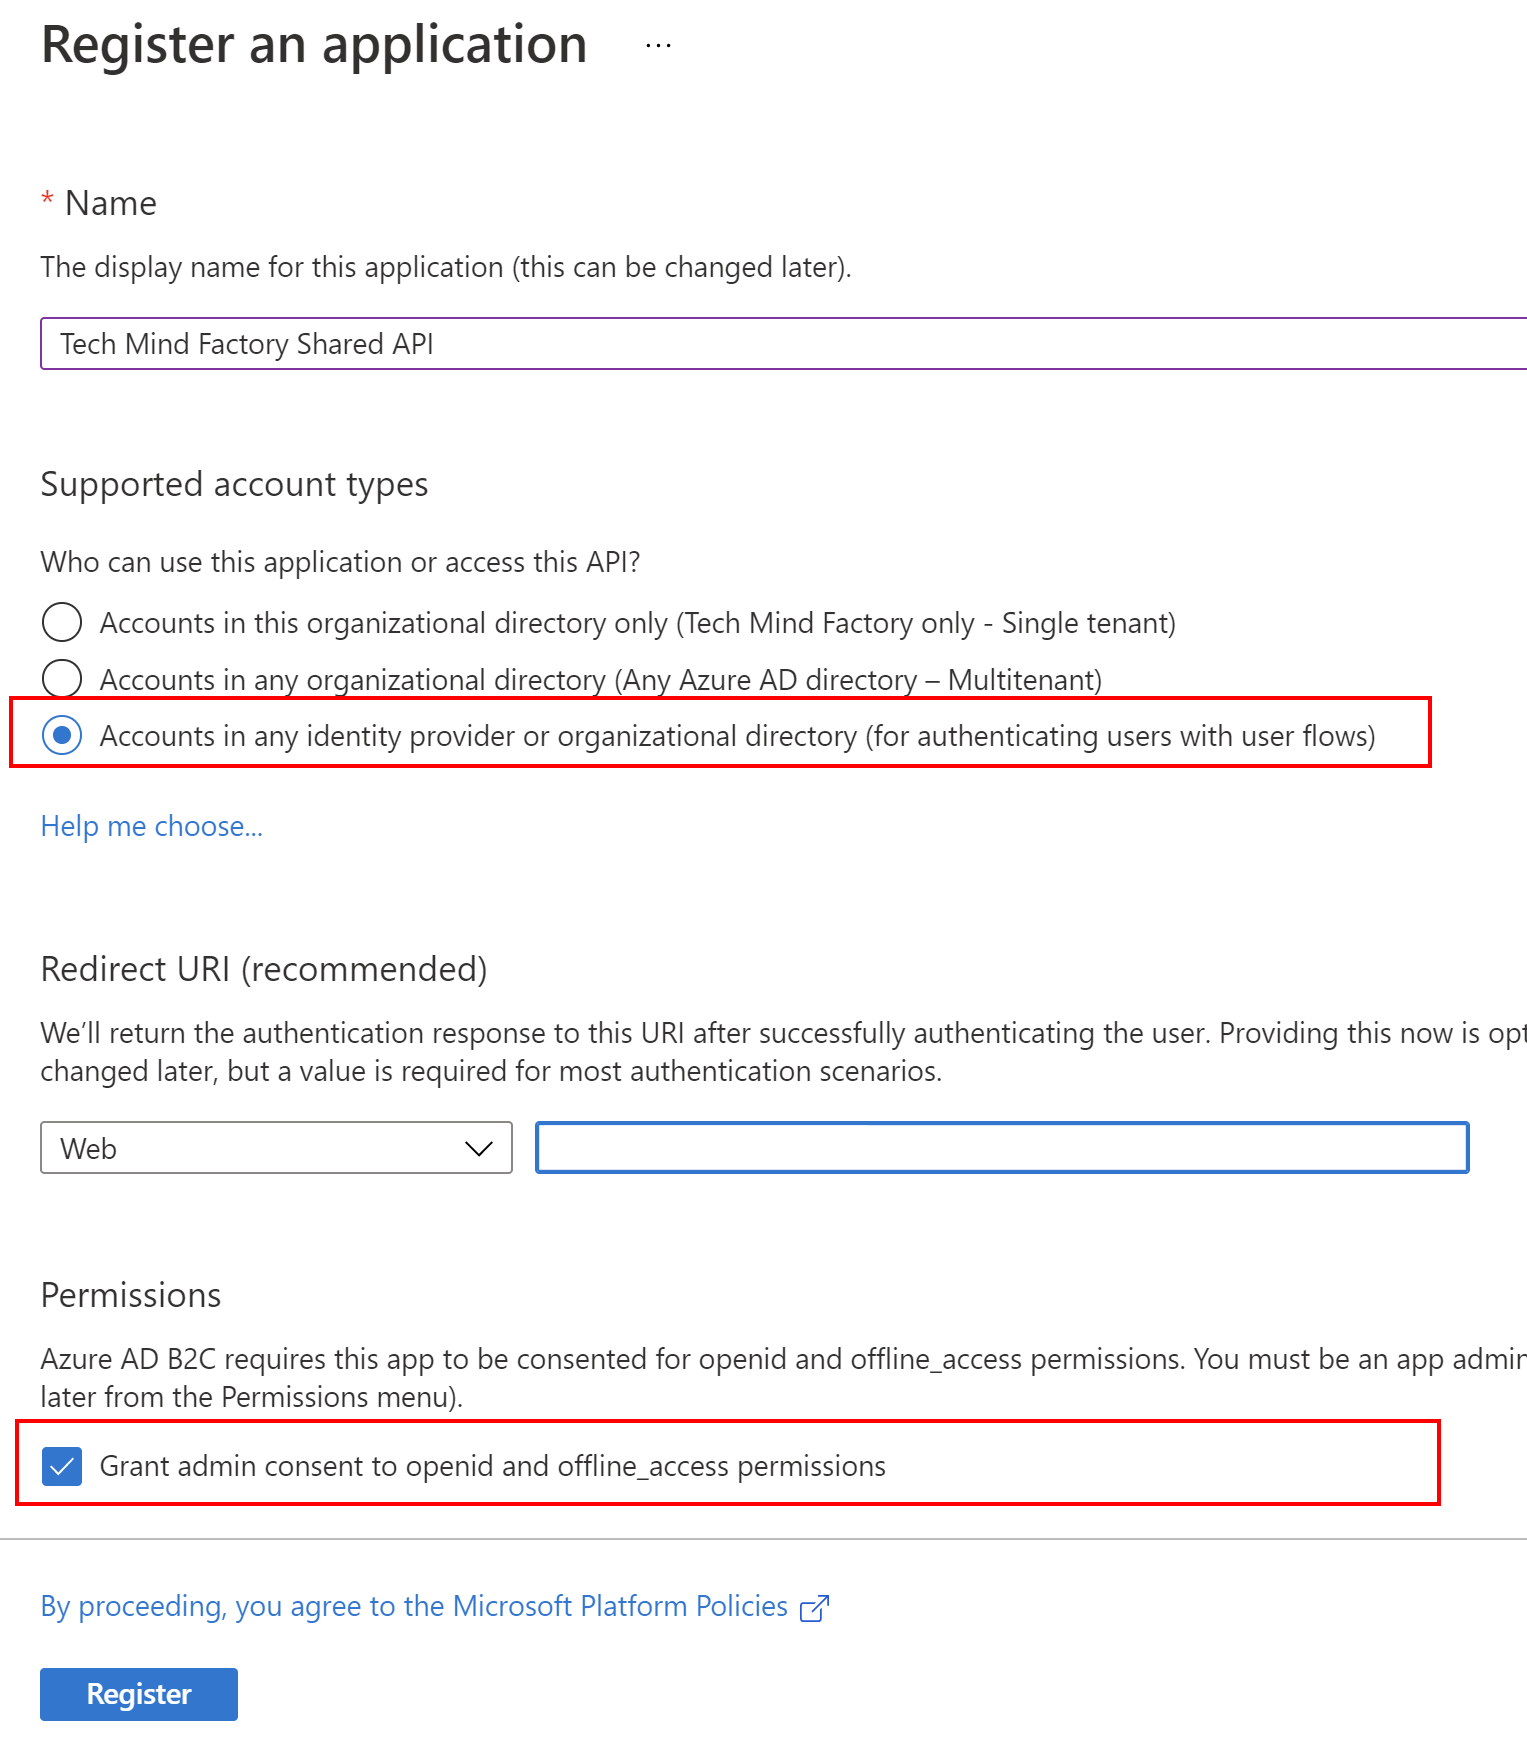
3. Once application is created, you can see its ID (client ID) - copy it because we will use it in the app configuration in the source code:

Now to make it possible to request access tokens to access this TMF Shared API, we have to expose it under the specific scope. This scope is required to obtain an access token during user authentication. We will use this scope in the UWP app configuration described below.
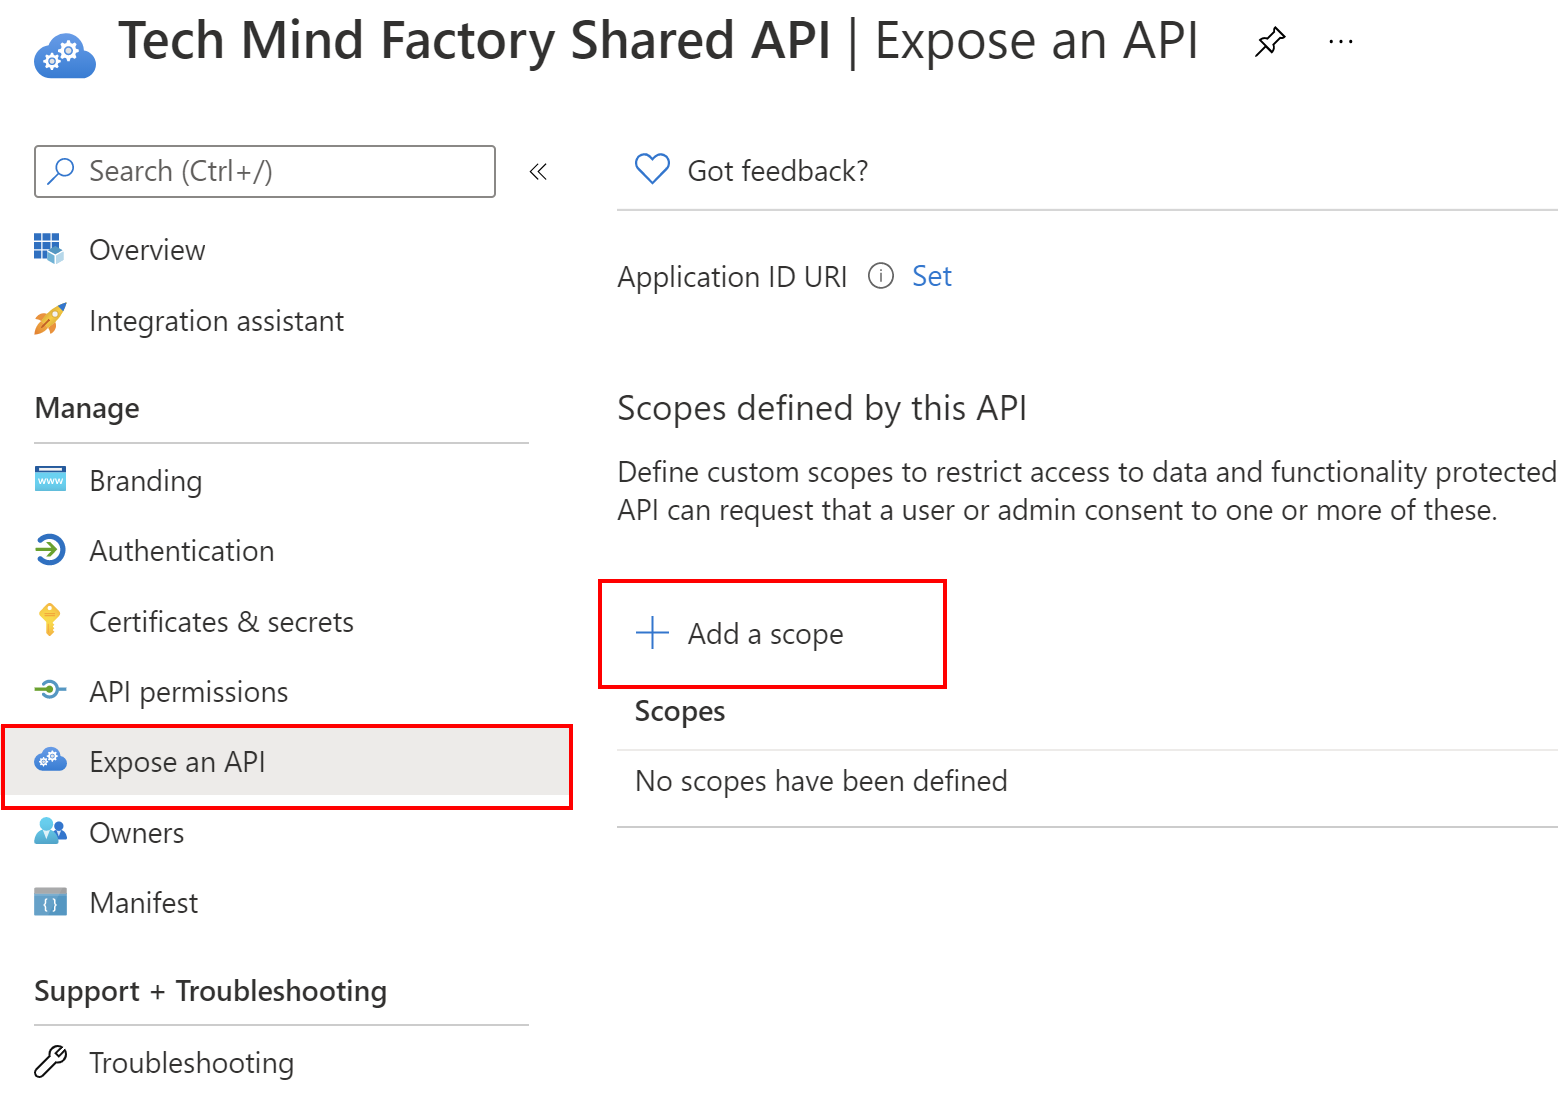
To expose an API, follow below steps:
1. From the left bar, select Expose an API and then click + Add a scope button:
2. Then click Save and continue button with proposed scope:

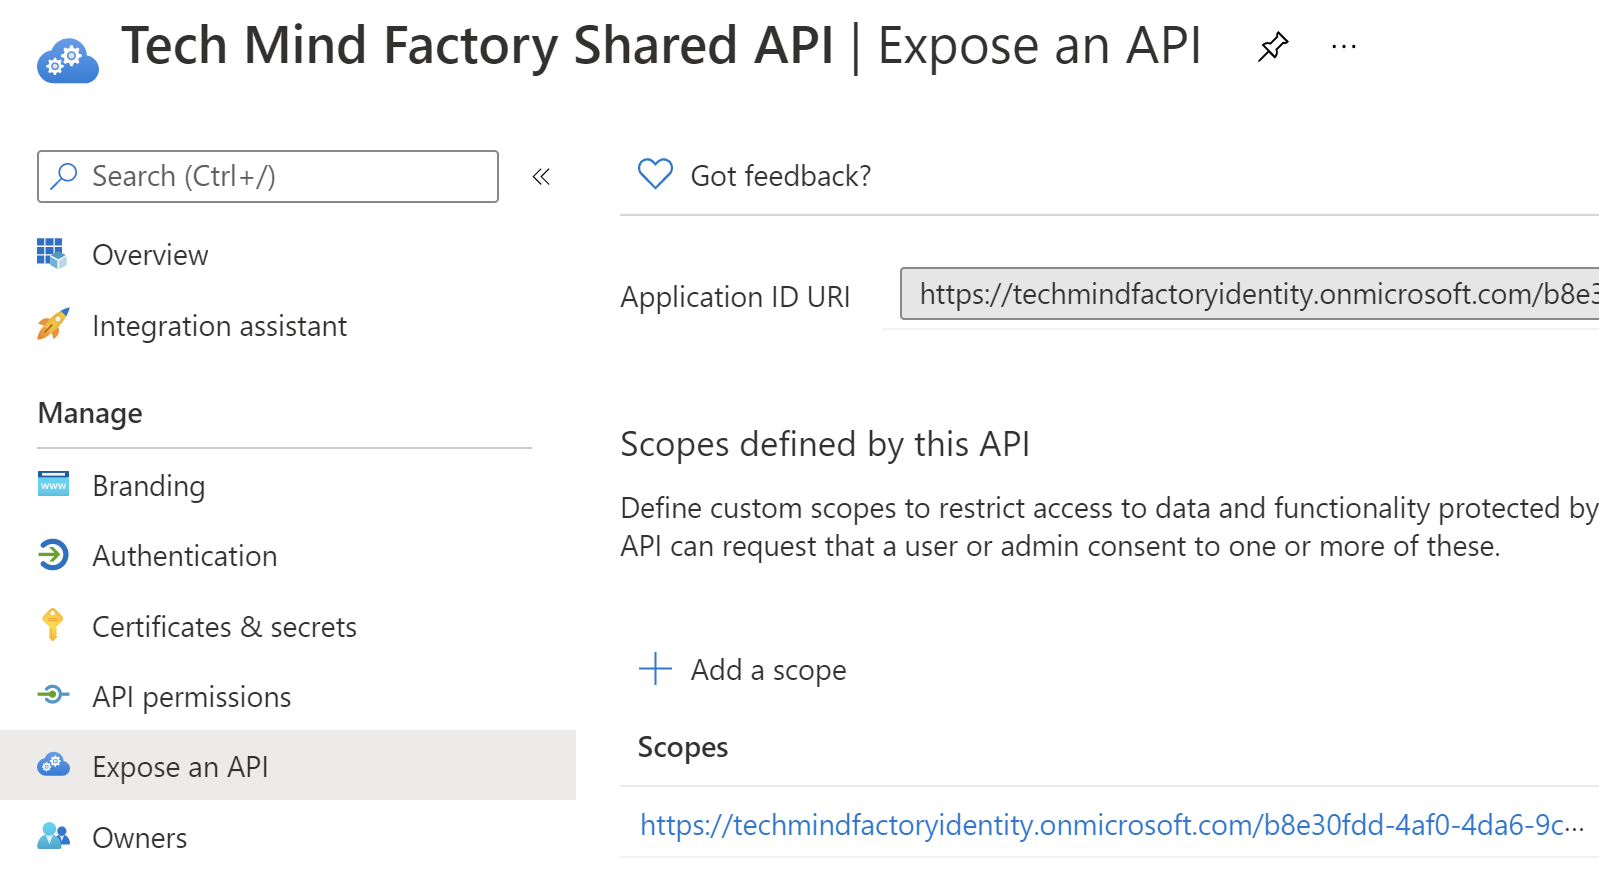
3. Provide the scope name. A best practice is to use resource.operation.constraint as a pattern to generate the name:

Please note that above you have to also provide consent display name and description. In the Azure AD B2C (at the time of writing this article) there is no consent concept for users. Each newly added scope has to be granted by the tenant administrator first.
Once you click Add scope button, it will be displayed on the list:
Now it is time to register Tech Mind Factory Customer UWP application. To do it, follow the below steps.
1. From the Azure AD B2C management blade on the left side, select App registrations, then select + New registration:
2. Provide the name for the application, select accounts in any identity provider or organization directory, select Public cient/native under Redirect URI, then click Register button:

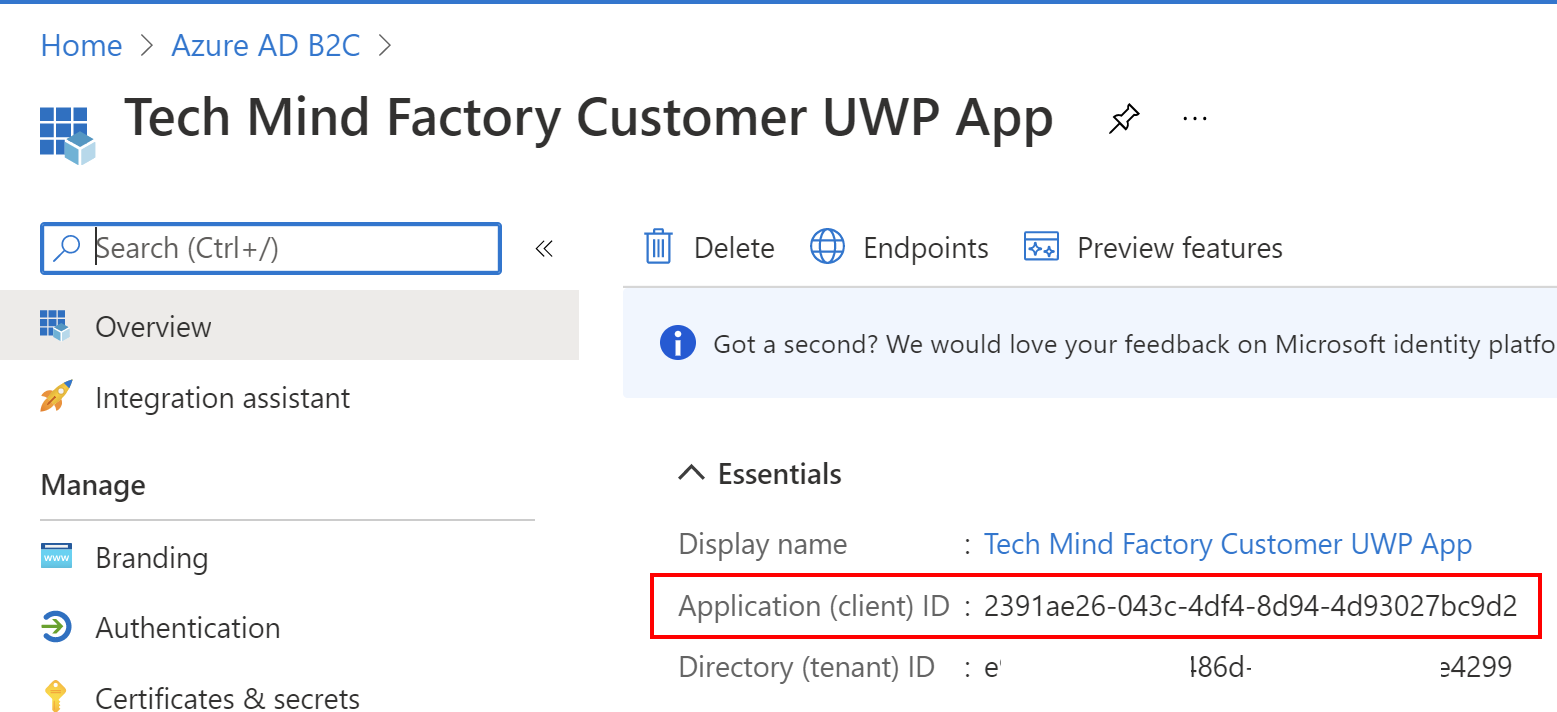
3. Once application is created, you can see its ID (client ID) - copy it because we will use it in the app configuration in the source code:
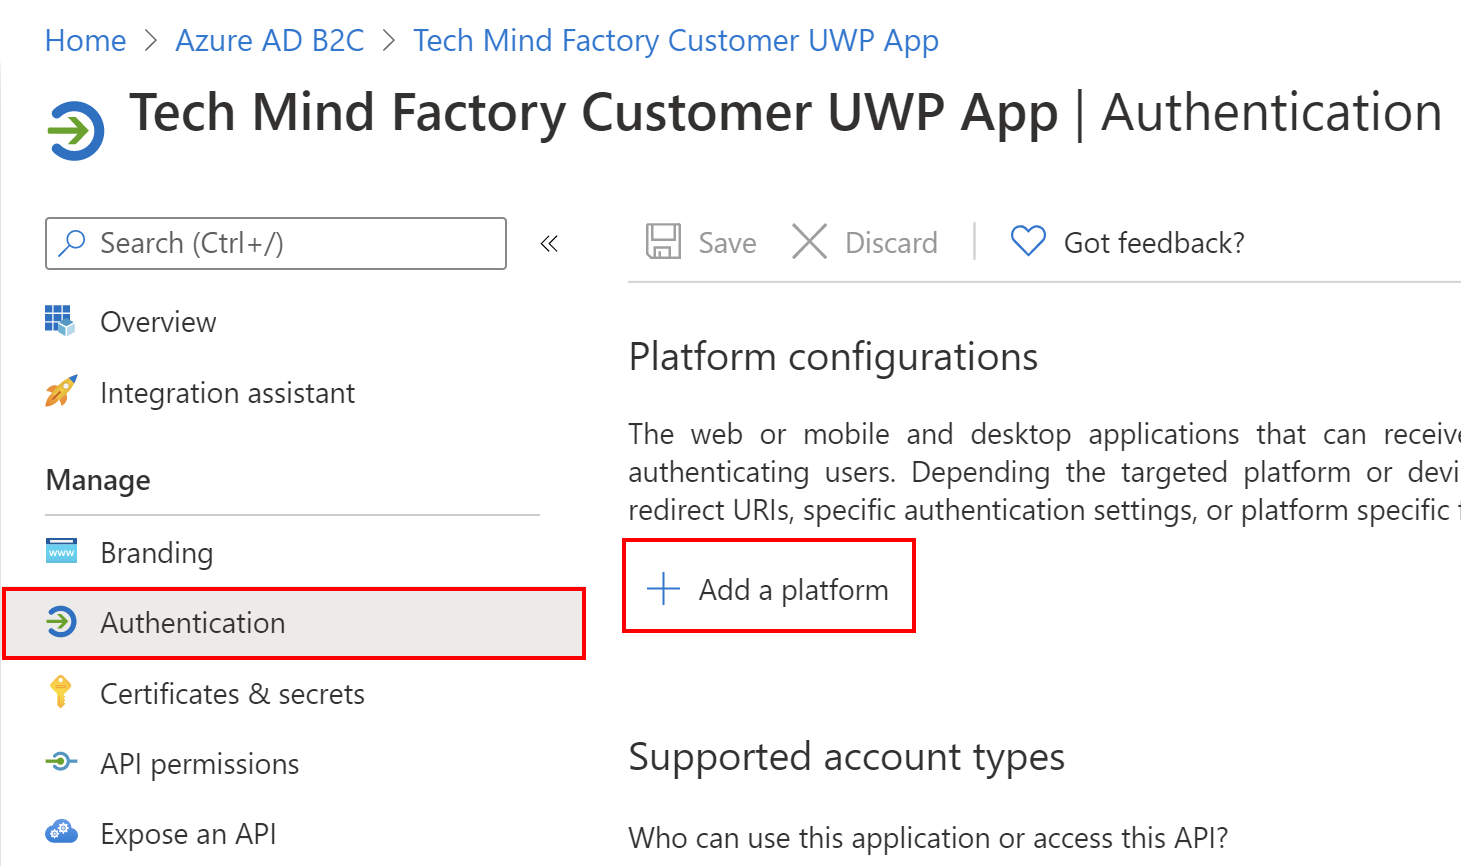
4. Switch to the Authentication section and select + Add a platform button:
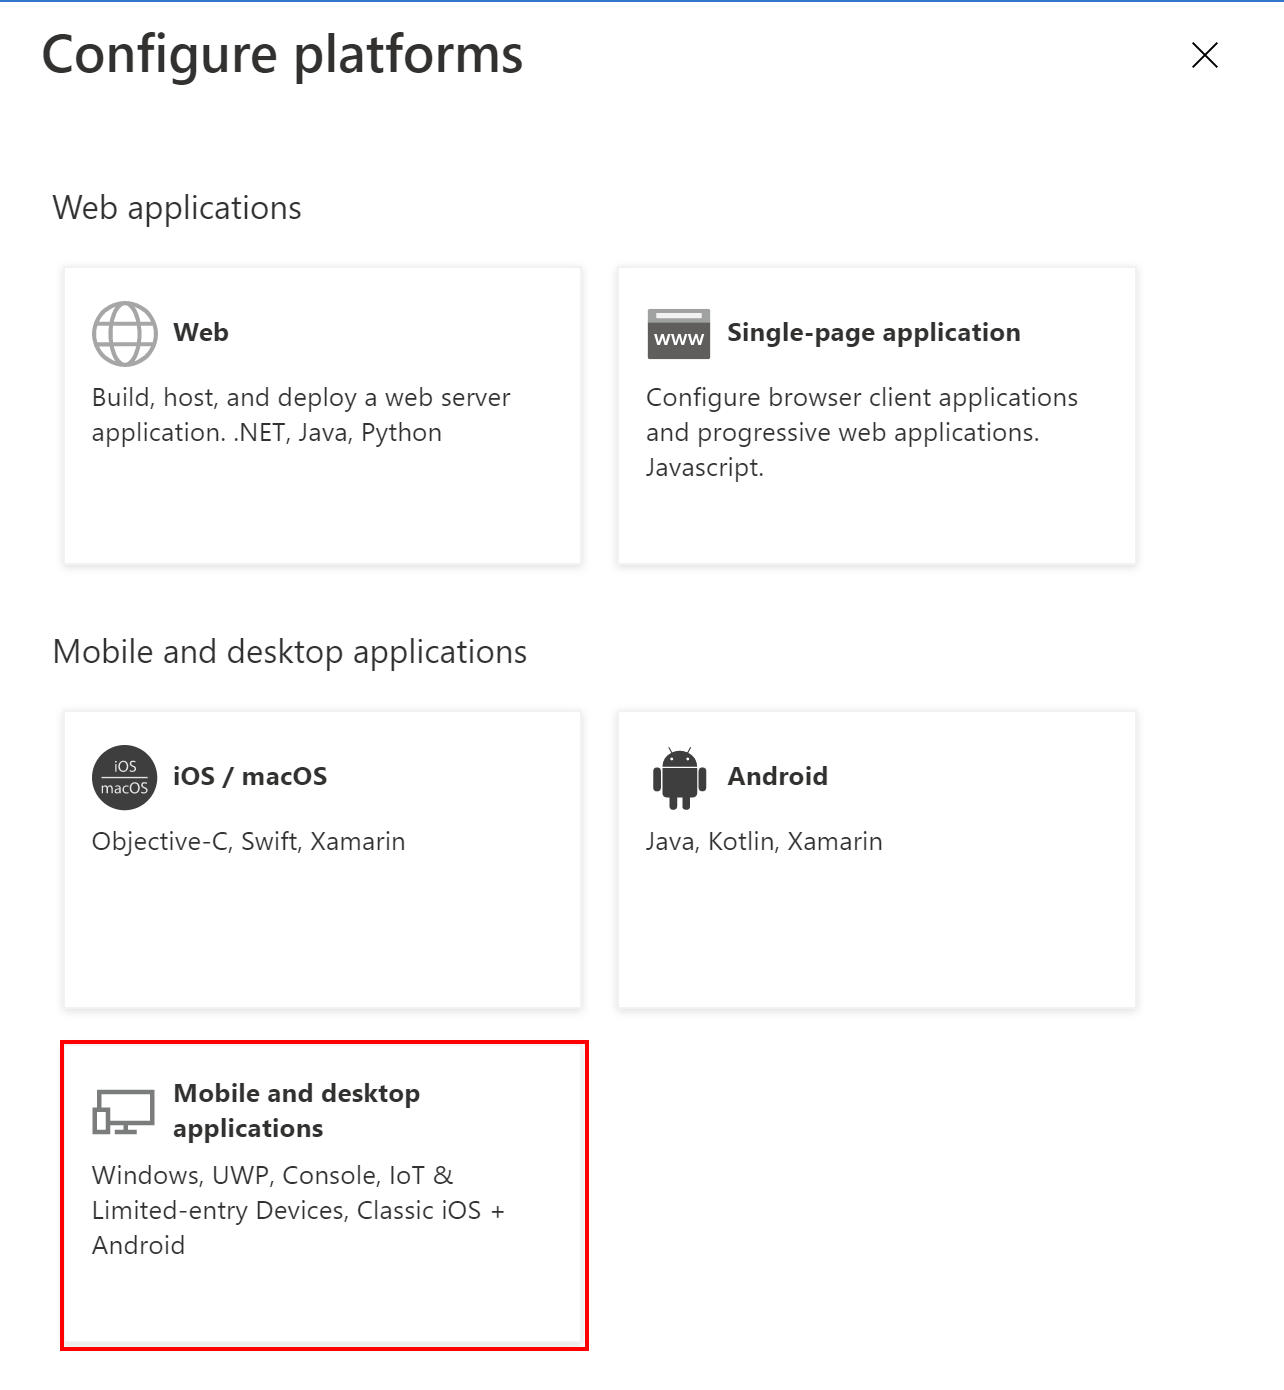
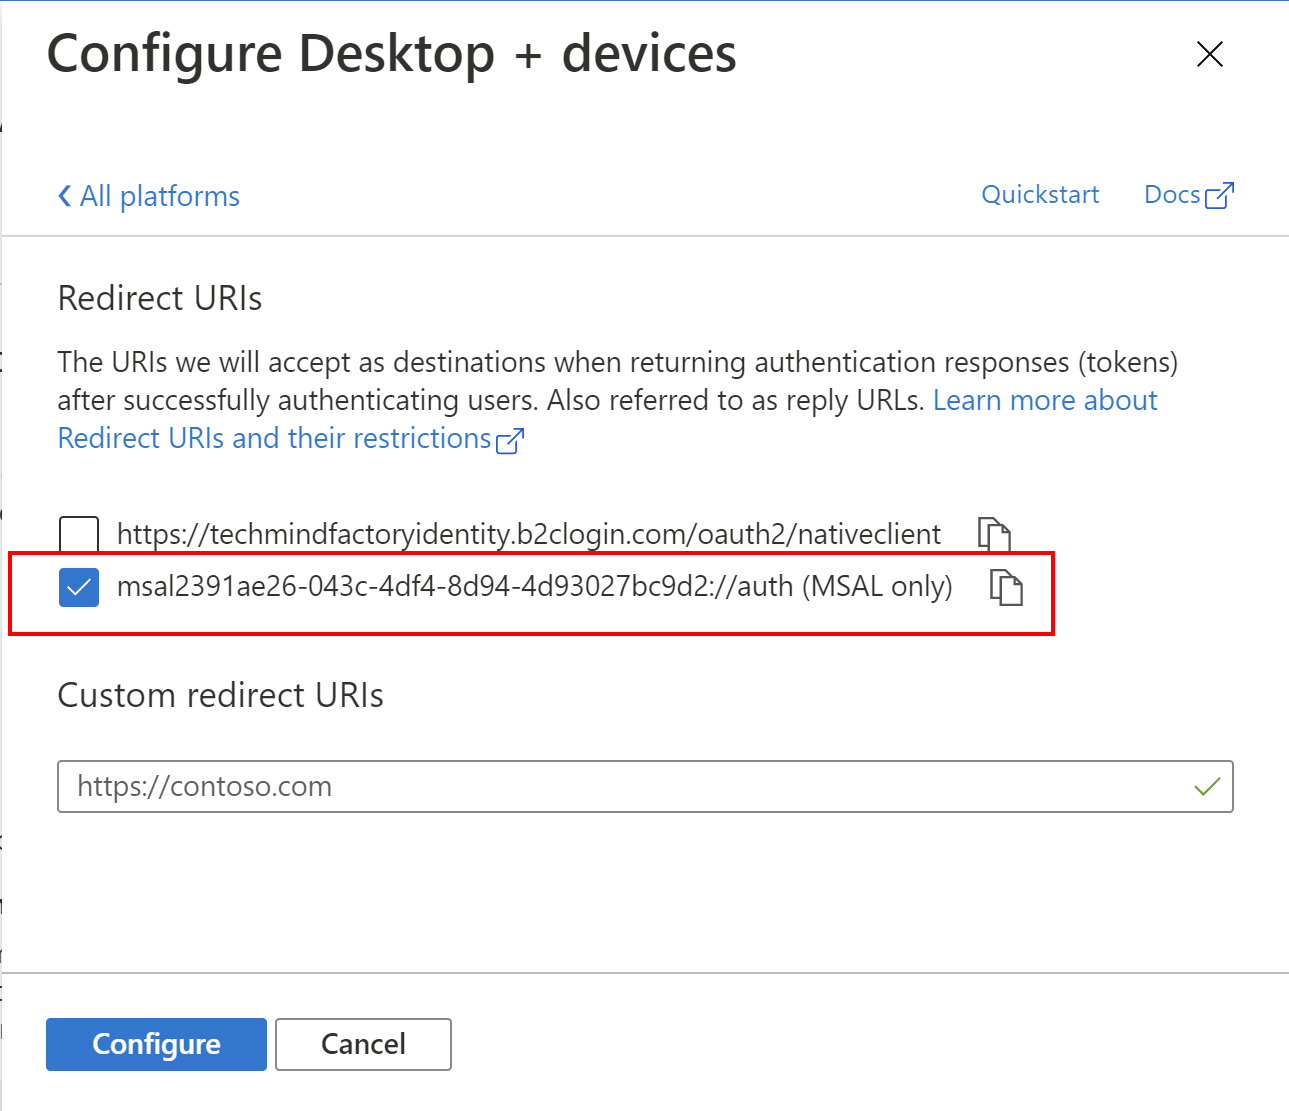
5. Select Mobile and desktop applications, then select below redirect URI:
Great. Now it is time to add permission for TMF Customer UWP app to obtain access tokens to call TMF Shared API. To do it, we have to get back to the Tech Mind Factory Corporate Web Application management blade and follow below steps:
1. From the left bar, select API permissions, then click + Add a permission:
2. Switch to My APIs tab and select Tech Mind Factory Shared API from the list:
3. Select below permission (please note that the scope we created above is presented on the list):
4. Click Grant admin consent for Tech Mind Factory button:
Great, that’s it. Now it is time to see the application source code.
Integrate UWP desktop app with Azure AD B2C using Microsoft Identity Client library
First of all - source code. You can the UWP app source code here.
Custom policies used in this project can be found here.
To secure Universal Windows Platform (UWP) application we have to use Microsoft Identity Client library. Once it is added to the project, we can add implementation for handling user authentication and acquiring tokens.
AuthenticationServiceConfiguration class contains below configuration parameters:
    internal static class AuthenticationServiceConfiguration
    {
        public static string Tenant = "<<azure-ad-b2c-tenant-name>>";
        public static string ClientId = "";
        public static string PolicySignUpSignIn = "B2C_1A_SigninSignUp";
        public static string BaseAuthority = "https://{tenant}.b2clogin.com/tfp/{tenant}.onmicrosoft.com/{policy}/oauth2/v2.0/authorize";
        public static string Authority = BaseAuthority.Replace("{tenant}", Tenant).Replace("{policy}", PolicySignUpSignIn);
        public static readonly string RedirectUri = $"msal{ClientId}://auth";
        public static string[] ApiScopes = { $"openid offline_access https://{Tenant}.onmicrosoft.com/<<web-api-application-id-registered-in-the-azure-ad-b2c>>/API.Read.Access" };
    }
- Tenant - the name of your Azure AD B2C tenant, in my case this is techmindfactoryidentity
- ClientId - ID of the TMF Customer UWP application we registered before in the Azure portal
- PolicySignUpSignIn - name of the custom policy responsible for user authentication and registration
- BaseAuthority - this is the endpoint of the token issuer
- RedirectUri = URL where tokens should be returned after successful authentication
- ApiScopes - there are three scopes, openid to obtain ID Token with basic information about the user, offline_access to obtain refresh token, and API scope - this is the scope we have to add to obtain access token to access Tech Mind Factory Shared API. You have to place the Client ID of the TMF Shared API application you registered in the Azure AD
Once all the parameters above are properly added, we can check the AuthenticationService implementation.
First, let’s look at the constructor code:
        public AuthenticationService()
        {
            _publicClientApp = PublicClientApplicationBuilder.Create(AuthenticationServiceConfiguration.ClientId)
                .WithB2CAuthority(AuthenticationServiceConfiguration.Authority)
                .WithRedirectUri(AuthenticationServiceConfiguration.RedirectUri)
                .Build();
        }
We have to create instance which implements IPublicClientApplication interface. As you can see, we have to pass parameters from the AuthenticationServiceConfiguration class described above. Then there is AuthenticateAsync method:
        public async Task<AuthenticationData> AuthenticateAsync()
        {
            AuthenticationResult authResult = null;
            IEnumerable<IAccount> accounts = await _publicClientApp.GetAccountsAsync();
            try
            {
                IAccount currentUserAccount = GetAccountByPolicy(accounts, AuthenticationServiceConfiguration.PolicySignUpSignIn);
                authResult = await _publicClientApp.AcquireTokenSilent(AuthenticationServiceConfiguration.ApiScopes, currentUserAccount)
                    .ExecuteAsync();
                return new AuthenticationData
                {
                    AccessToken = authResult.AccessToken
                };

            }
            catch (MsalUiRequiredException msalUiRequiredException)
            {
                if (msalUiRequiredException.Message.Equals("No account or login hint was passed to the AcquireTokenSilent call."))
                {
                    authResult = await HandleFirstTimeAuthentication(accounts);
                    if (authResult != null)
                    {
                        return new AuthenticationData
                        {
                            AccessToken = authResult.AccessToken
                        };
                    }
                }

                else
                {
                    System.Diagnostics.Debug.WriteLine(nameof(MsalUiRequiredException) + msalUiRequiredException.Message);
                }
            }

            return null;
        }
Please note that first time we call _publicClientApp.AcquireTokenSilent method. This is because MSAL caches tokens so once the user is authenticated, ID token, access token and refresh tokens are cached automatically. You can read more about token cache handling on different platforms in the official documentation.
If there is an access token in the cache but it is expired, MSAL will use refresh token to obtain a new access token and will update it in the cache. If there are no tokens in a cache, MsalUiRequiredException is handled and we have to call HandleFirstTimeAuthenticationAsync method then:
        private async Task<AuthenticationResult> HandleFirstTimeAuthenticationAsync(IEnumerable<IAccount> accounts)
        {
            try
            {
                AuthenticationResult authResult = await _publicClientApp.AcquireTokenInteractive(AuthenticationServiceConfiguration.ApiScopes)
                     .WithAccount(GetAccountByPolicy(accounts, AuthenticationServiceConfiguration.PolicySignUpSignIn))
                     .WithPrompt(Prompt.SelectAccount)
                     .ExecuteAsync();
                return authResult;
            }
            catch (MsalException msalClientException)
            {
                if (!msalClientException.ErrorCode.Equals("authentication_canceled"))
                {
                    System.Diagnostics.Debug.WriteLine(nameof(MsalClientException) + msalClientException.Message);
                }

                return null;
            }
        }
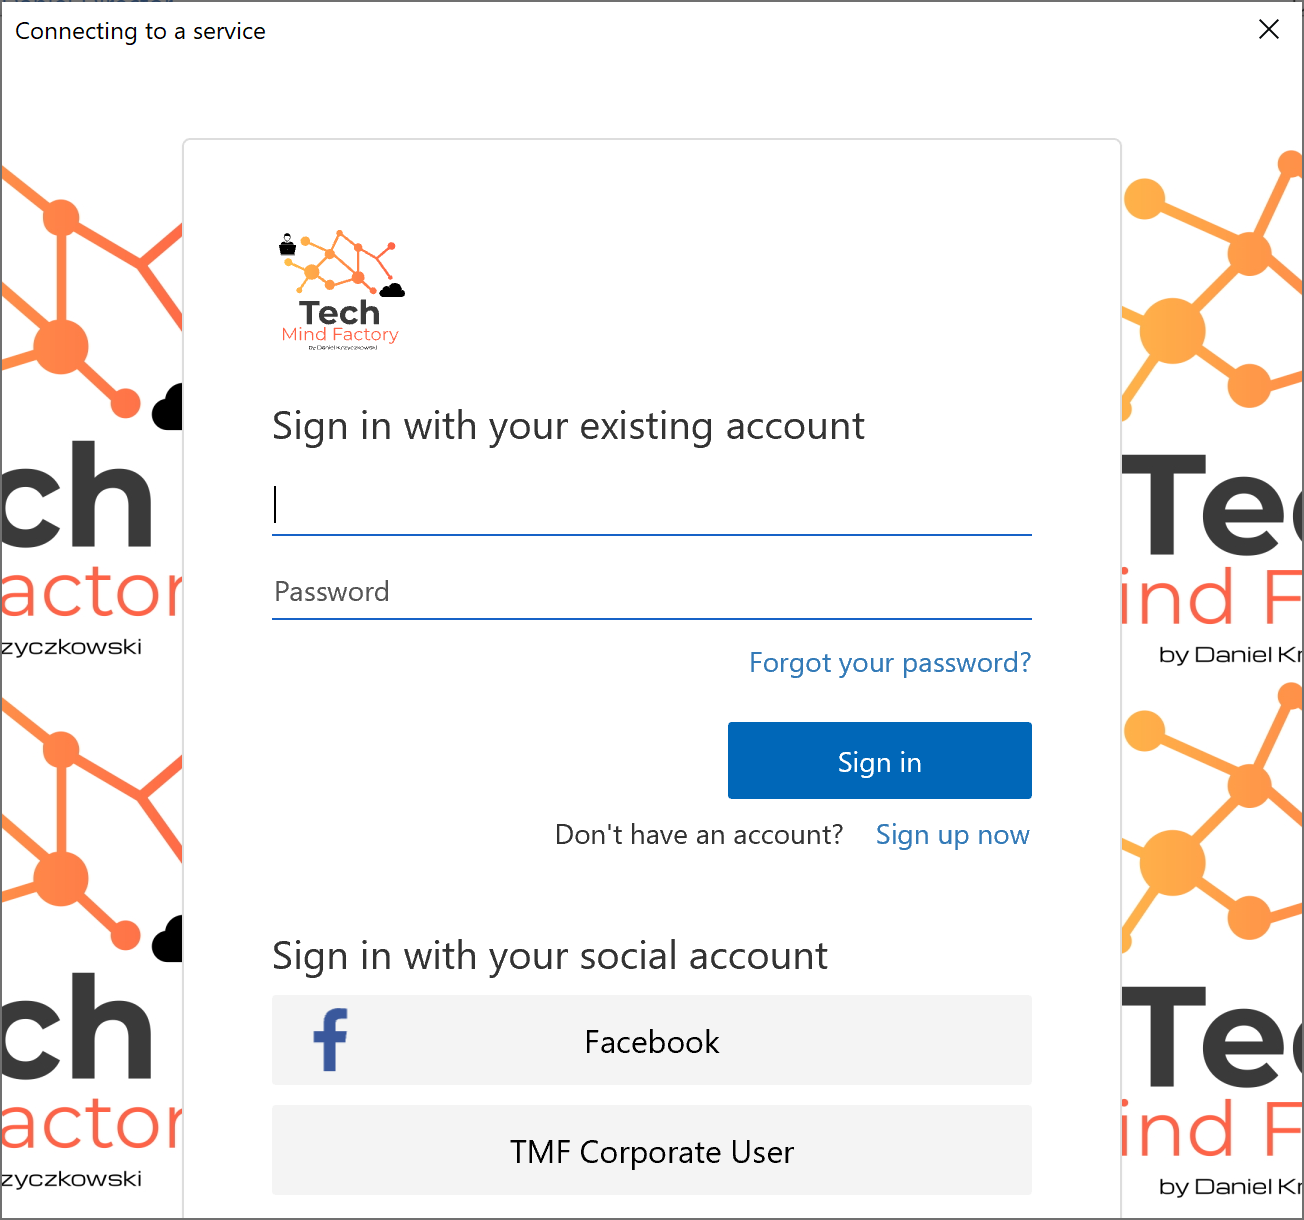
In this case when there are no tokens, we have to ask user to sign in. This is why _publicClientApp.AcquireTokenInteractive is invoked above. This will display the popup window where user can sign in:
If the user wants to sign out, there is _publicClientApp.RemoveAsync method invoked:
        public async Task SignOut()
        {
            IEnumerable<IAccount> accounts = await _publicClientApp
                                                    .GetAccountsAsync()
                                                    .ConfigureAwait(false);
            IAccount firstAccount = accounts.FirstOrDefault();

            try
            {
                await _publicClientApp.RemoveAsync(firstAccount).ConfigureAwait(false);
            }
            catch (MsalException ex)
            {
                System.Diagnostics.Debug.WriteLine(nameof(MsalUiRequiredException) + ex.Message);
            }
        }
Please notice that at the moment of writing this article, tokens are just removed from the cache. If you copied the token before, it is still valid before its expiration date.
Once we obtain access token after authentication, we can call TMF Shared API from the ApiService class:
    internal class ApiService : IApiService
    {
        public async Task<ApiResponse> GetGreetingFromApiAsync(AuthenticationData authenticationData)
        {
            HttpClient httpClient = new HttpClient();
            httpClient.DefaultRequestHeaders.Authorization = new AuthenticationHeaderValue("Bearer", authenticationData.AccessToken);
            var response = await httpClient.GetAsync($"{ApiServiceConfiguration.ApiUrl}/user");
            if (response.IsSuccessStatusCode)
            {
                var apiResponseJson = await response.Content.ReadAsStringAsync();
                return JsonConvert.DeserializeObject<ApiResponse>(apiResponseJson);
            }

            else
            {
                System.Diagnostics.Debug.WriteLine($"API returned status code: {response.StatusCode}");
                return null;
            }
        }
    }
As you can see above, the access token is passed in the Authorization header. If you do not add it, API will return 401 HTTP status code, unauthorized.
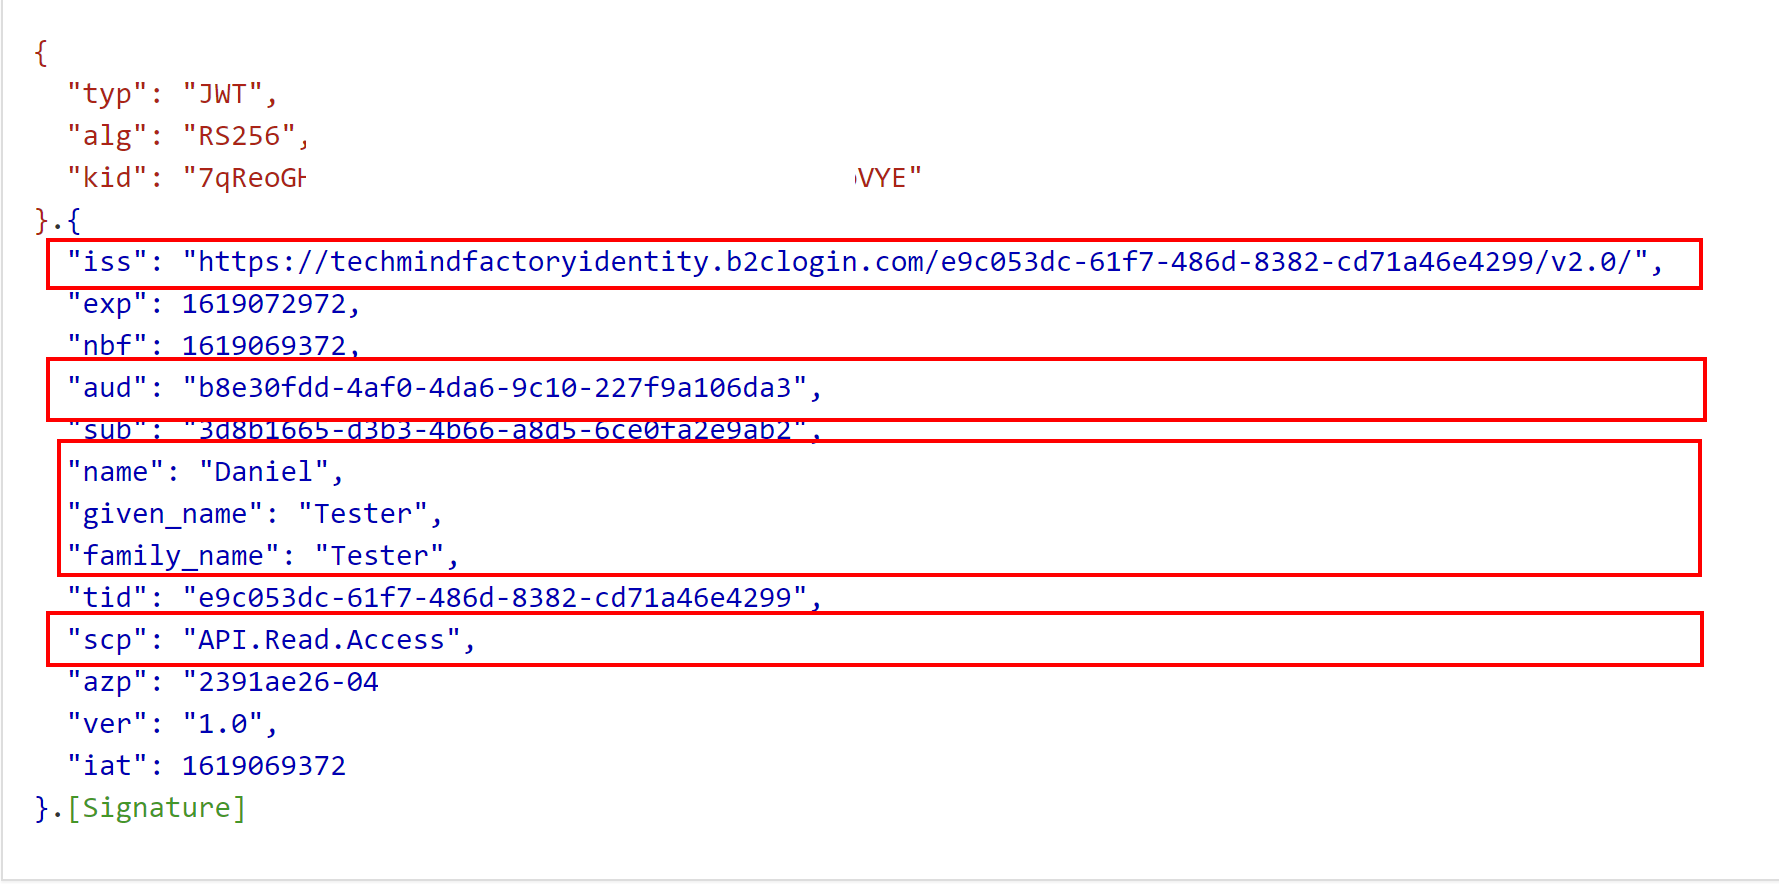
Below you can see the content of the access token. Note that it contains scp claim with value API.Read.Access. There is also iss claim which stands for issuer. This claim identifies the principal that issued the JWT so in this case our Azure AD B2C tenant. aud claim identifies the recipients that the JWT is intended for so in this case TMF Shared API registered in our Azure AD B2C tenant. There is also information about the user like the first name and last name:
Federation between Azure Active Directory and Azure Active Directory B2C
You probably have noticed that on the login page displayed by Azure AD B2C I have also Facebook and TMF Corporate User buttons. Facebook button enables login with your existing Facebook account. User is redirected to Facebook, provides credentias there and then is redirected to the Azure AD B2C again. Why Azure AD B2C trusts Facebook? There is a federation in place I described at the beginning of this article. Under this link you can read more about how to setup federation between Azure AD B2C and Facebook. Notice that you have to register an application in Facebook Developers Portal and make a reference to this application in the custom policies code.
When it comes to signing in with a corporate account, the mechanism is exactly the same. In the official documentation you can read more about how to setup federation between Azure AD and Azure AD B2C. Notice that, exactly like for Facebook and any other identity provider, you have to register an application in the Azure AD Portal and make a reference to this application in the custom policies code.
Summary
In this long (but I hope helpful!) article I introduced you to two identity services available in the Microsoft Azure cloud - Azure Active Directory and Azure Active Directory B2C. Now you know how to register applications, how to use Microsoft Identity Web, and Microsoft Identity Client libraries, and how to obtain access tokens to call secured Web APIs. In the next article, we are going to talk about user roles in an application using Azure AD App Roles.