Cars Island - DevOps practices for the application built on Azure - part 14
Introduction
In my first article, I introduced you to Cars Island car rental on the Azure cloud. I created this fake project to present how to use different Microsoft Azure cloud services and how to their SDKs. I also presented what will be covered in the next articles. Here is the last article from the series where I would like to discuss how to use some DevOps practices to manage the release of the application solution built on the Azure cloud.
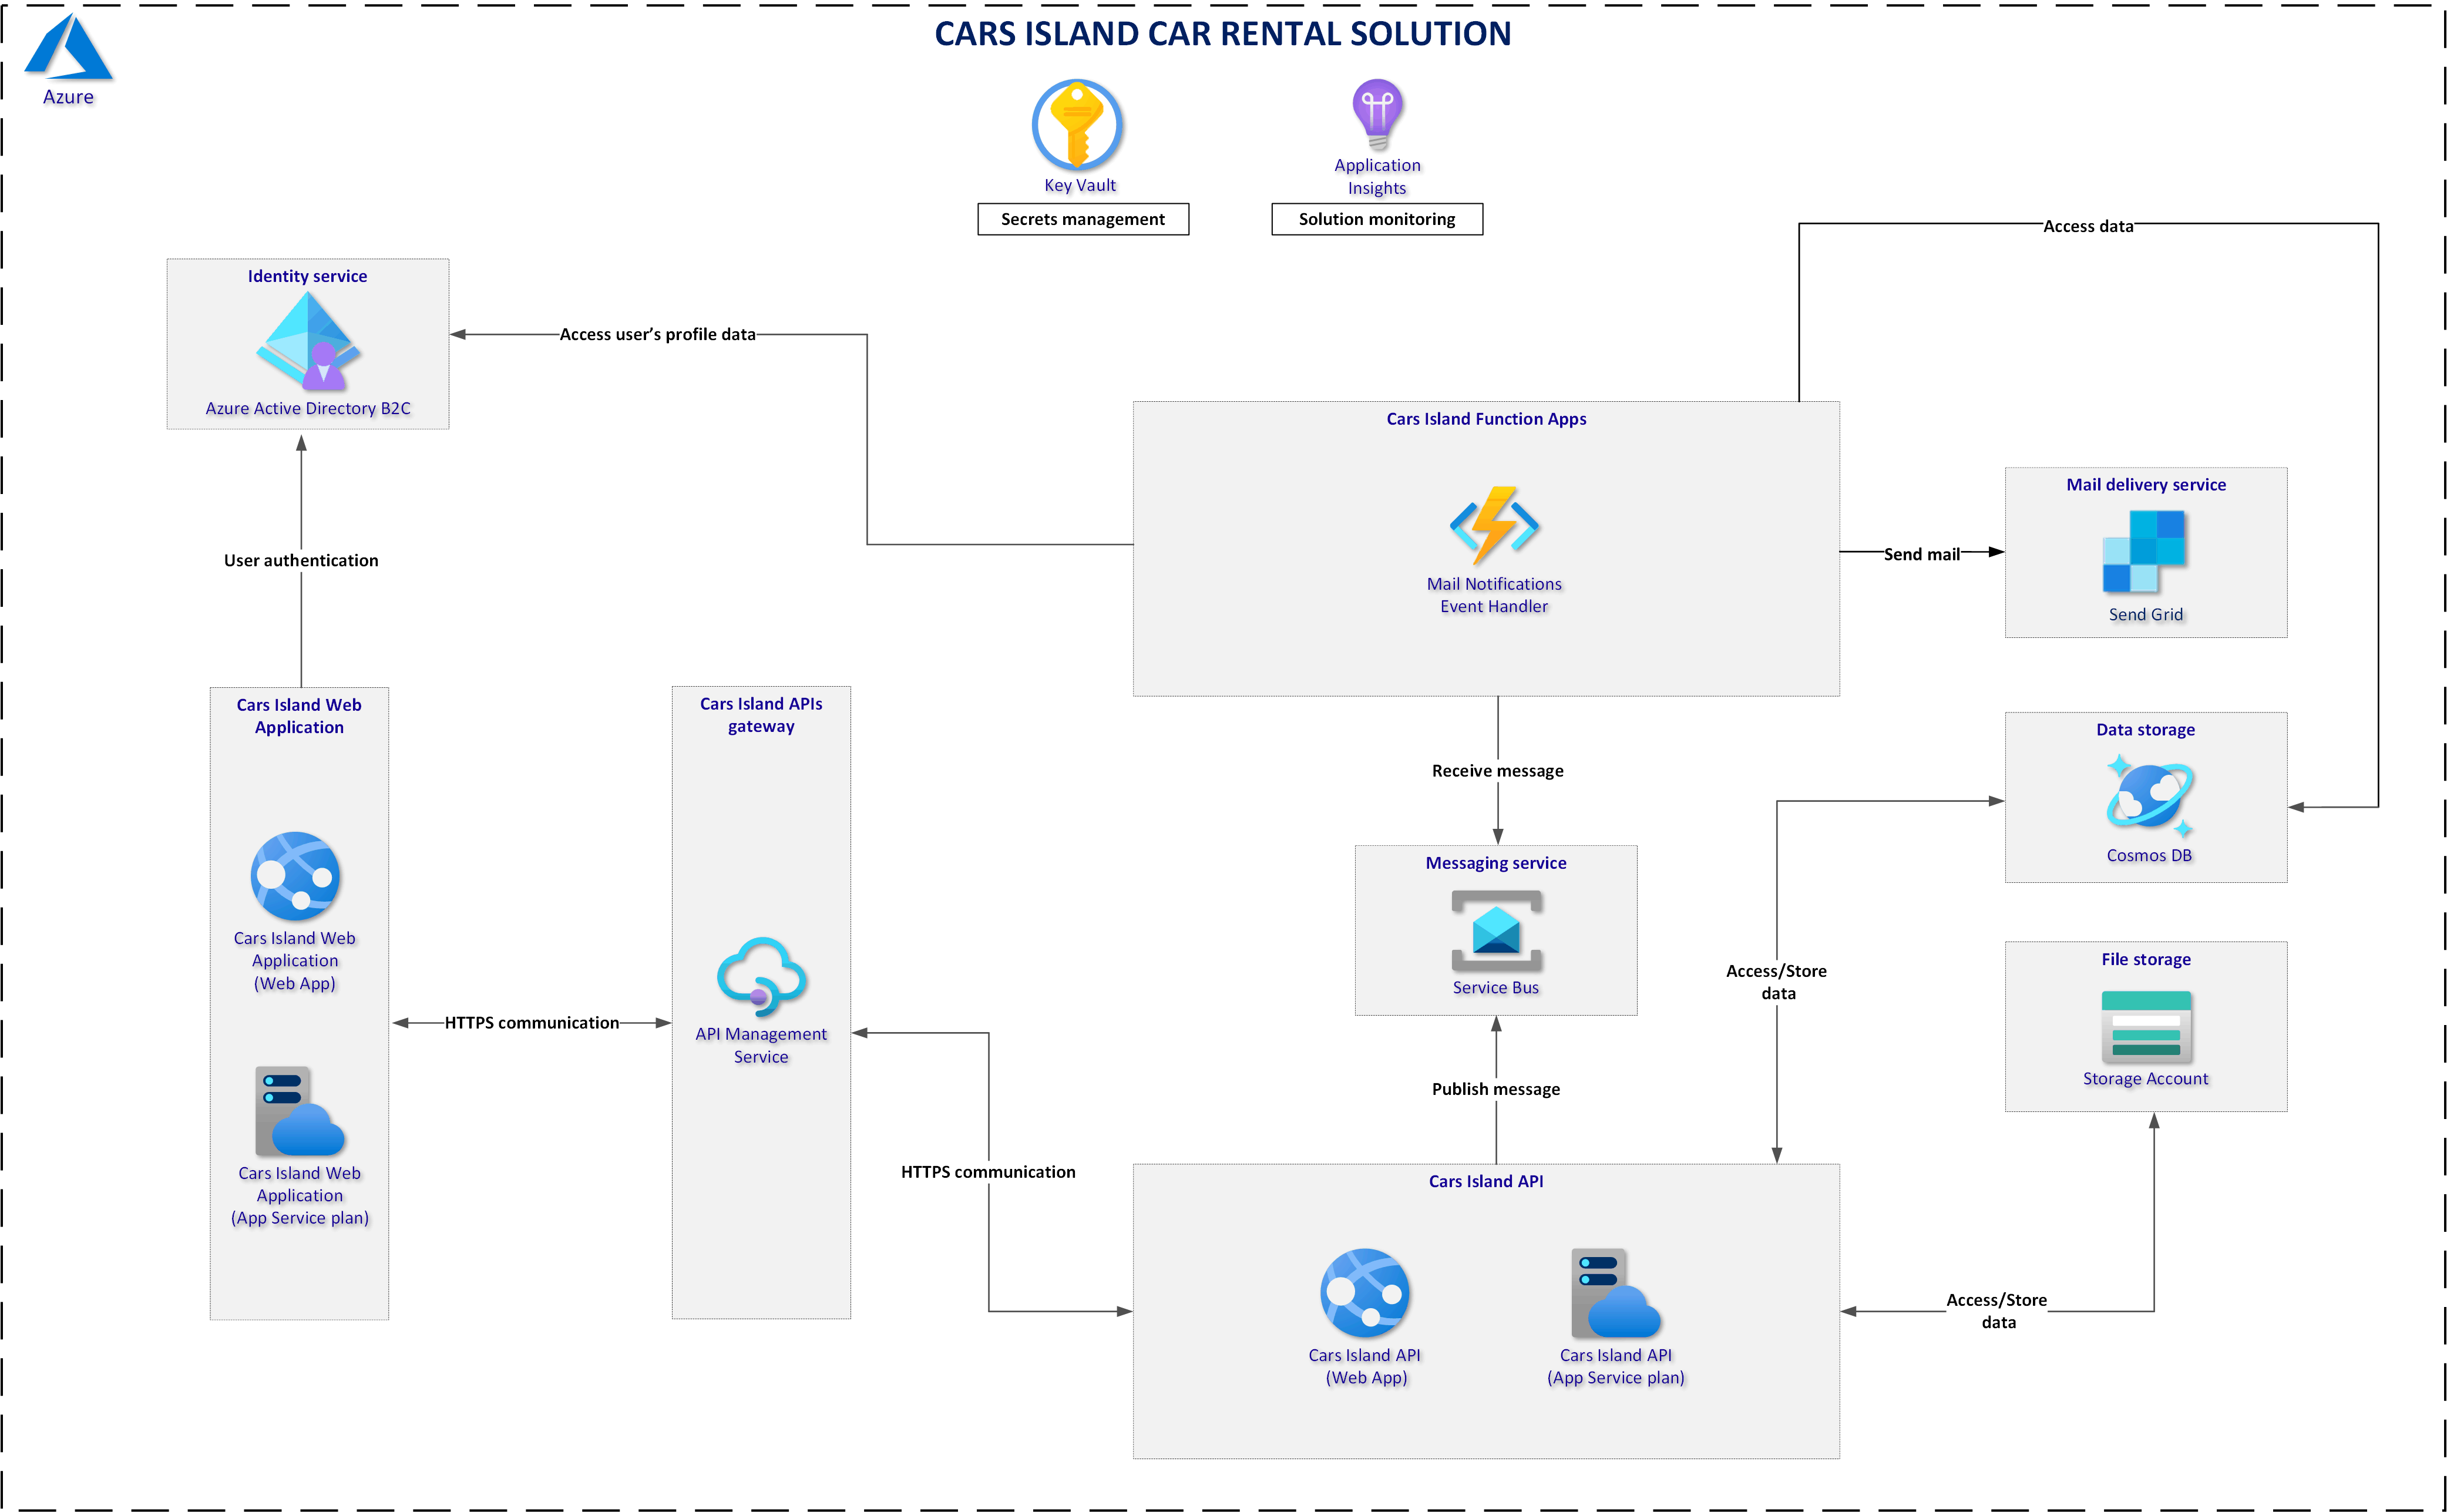
Below I present solution architecture:
Cars Island project is available on my GitHub
Main applications in the solution
From my previous articles you already know that I have three main applications in my solution:
- Blazor Web App - this is the Cars Island Web Portal
- ASP .NET Core Web API - API to handle requests from the portal
- Azure Function App - responsible for sending email confirmations for the reservations
Each application above is deployed to the Azure cloud. I wanted to automate the process of build and release phases to avoid deploying them manually from the Visual Studio. This is why I used Azure DevOps. In this article, I will talk about the release process for the Web API application but I have applied the same patterns for Web Portal and Function App.
Branch policies
Before I continue, a small disclaimer. You can use different branching strategies (like Git flow, GitHub flow, etc.) and still apply the below recommendations to make sure that changes are not directly committed to specific branches and that they are reviewed before the merge is done.
In the Cars Island project in the Azure DevOps I created separate GIT repositories for the Web Portal, Web API, Azure Function App:
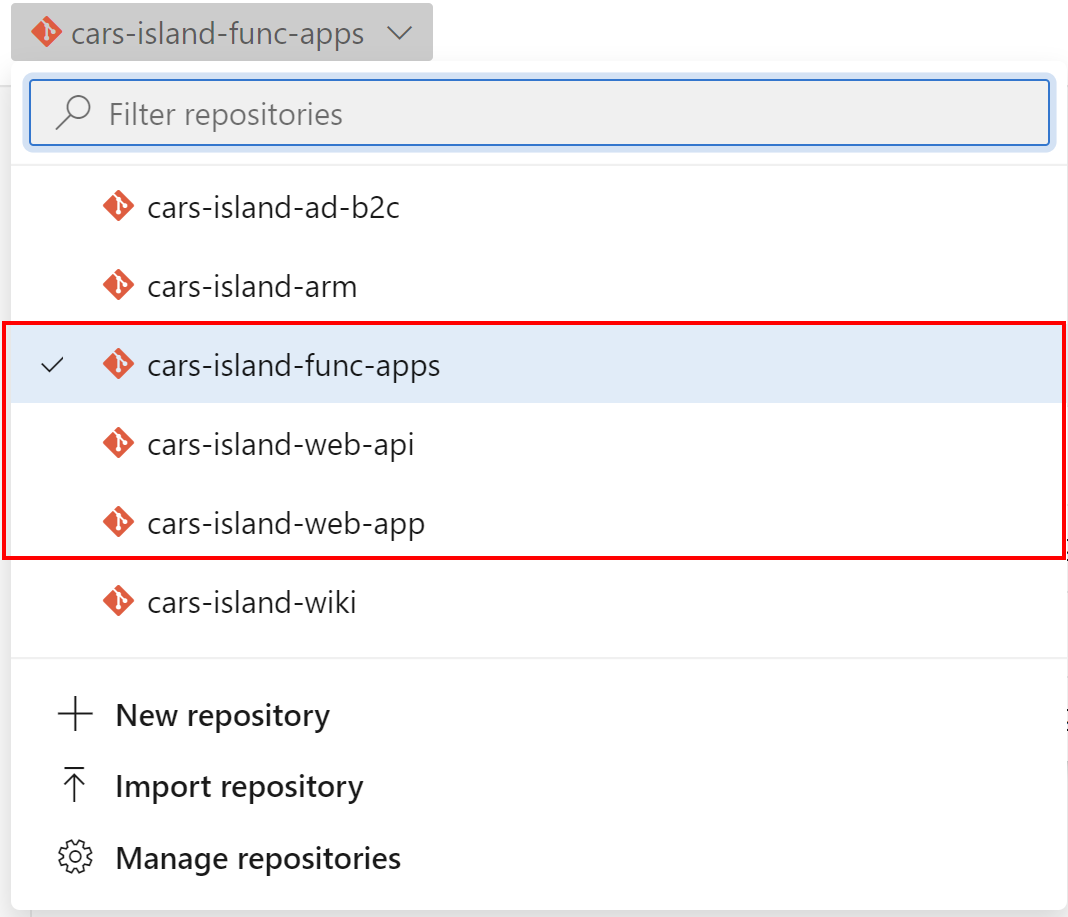
Each GIT repository has two core branches: develop, and master. Each branch has policies enabled so direct commits to these branches are not allowed.
This branch has policies enabled so direct commits are not allowed:
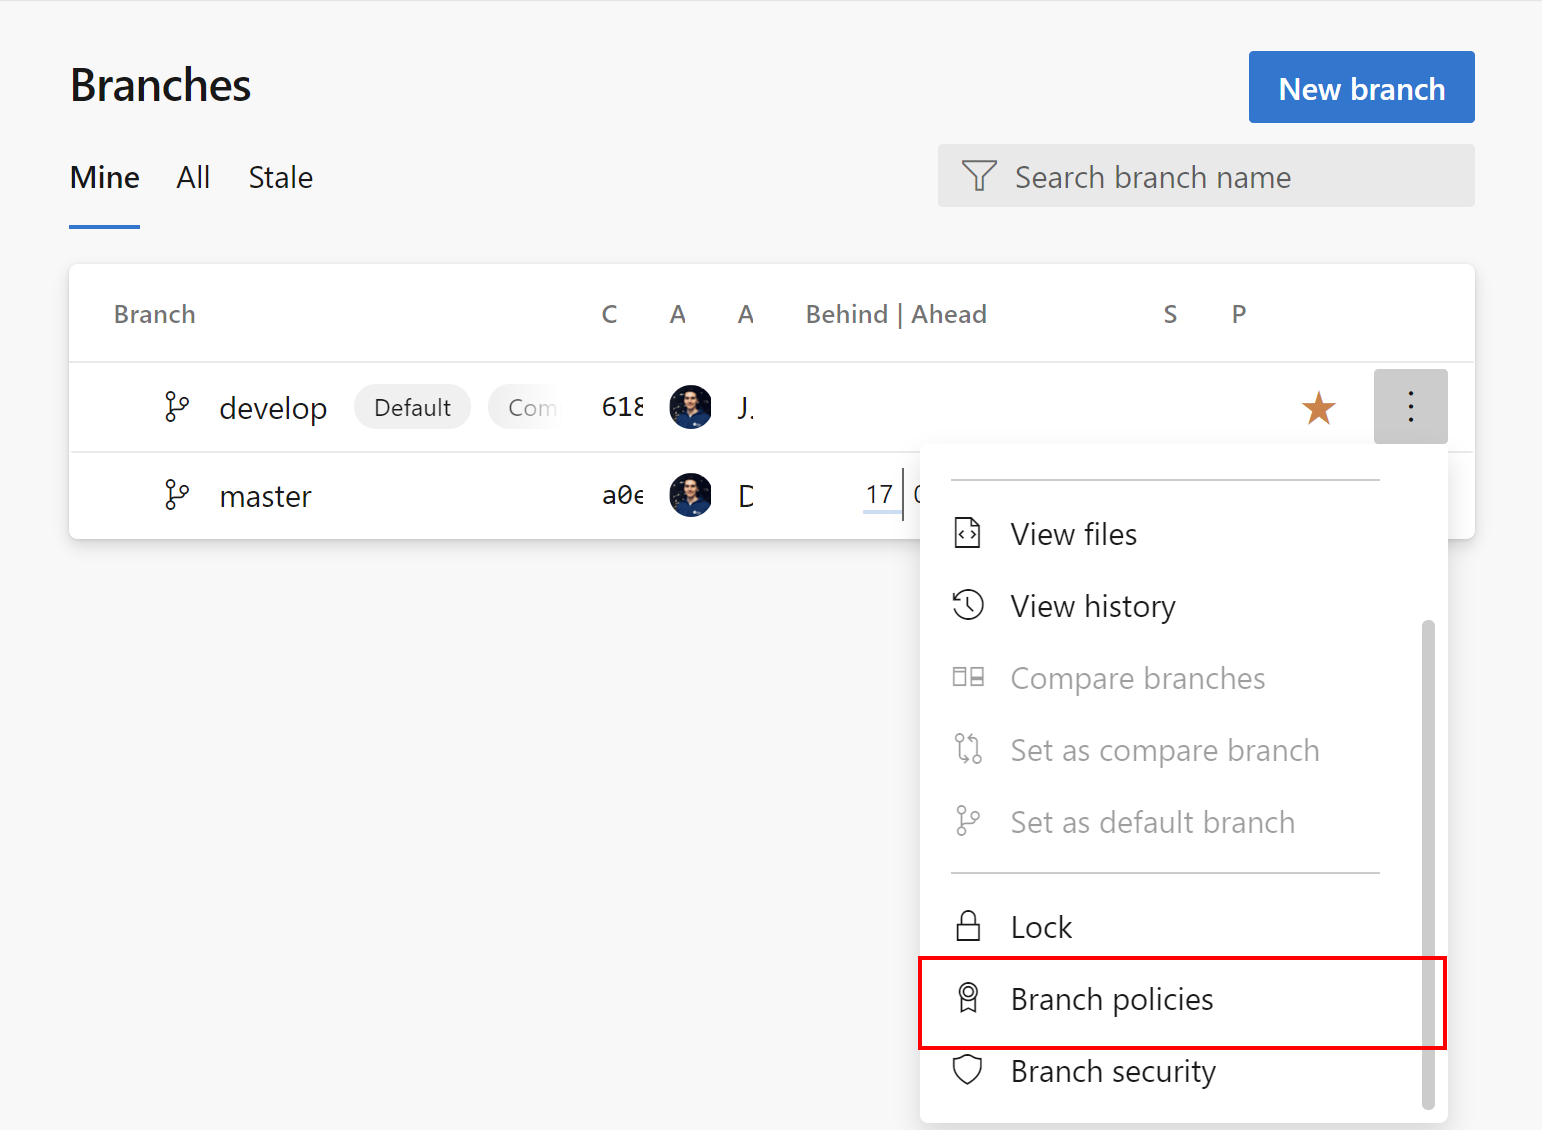
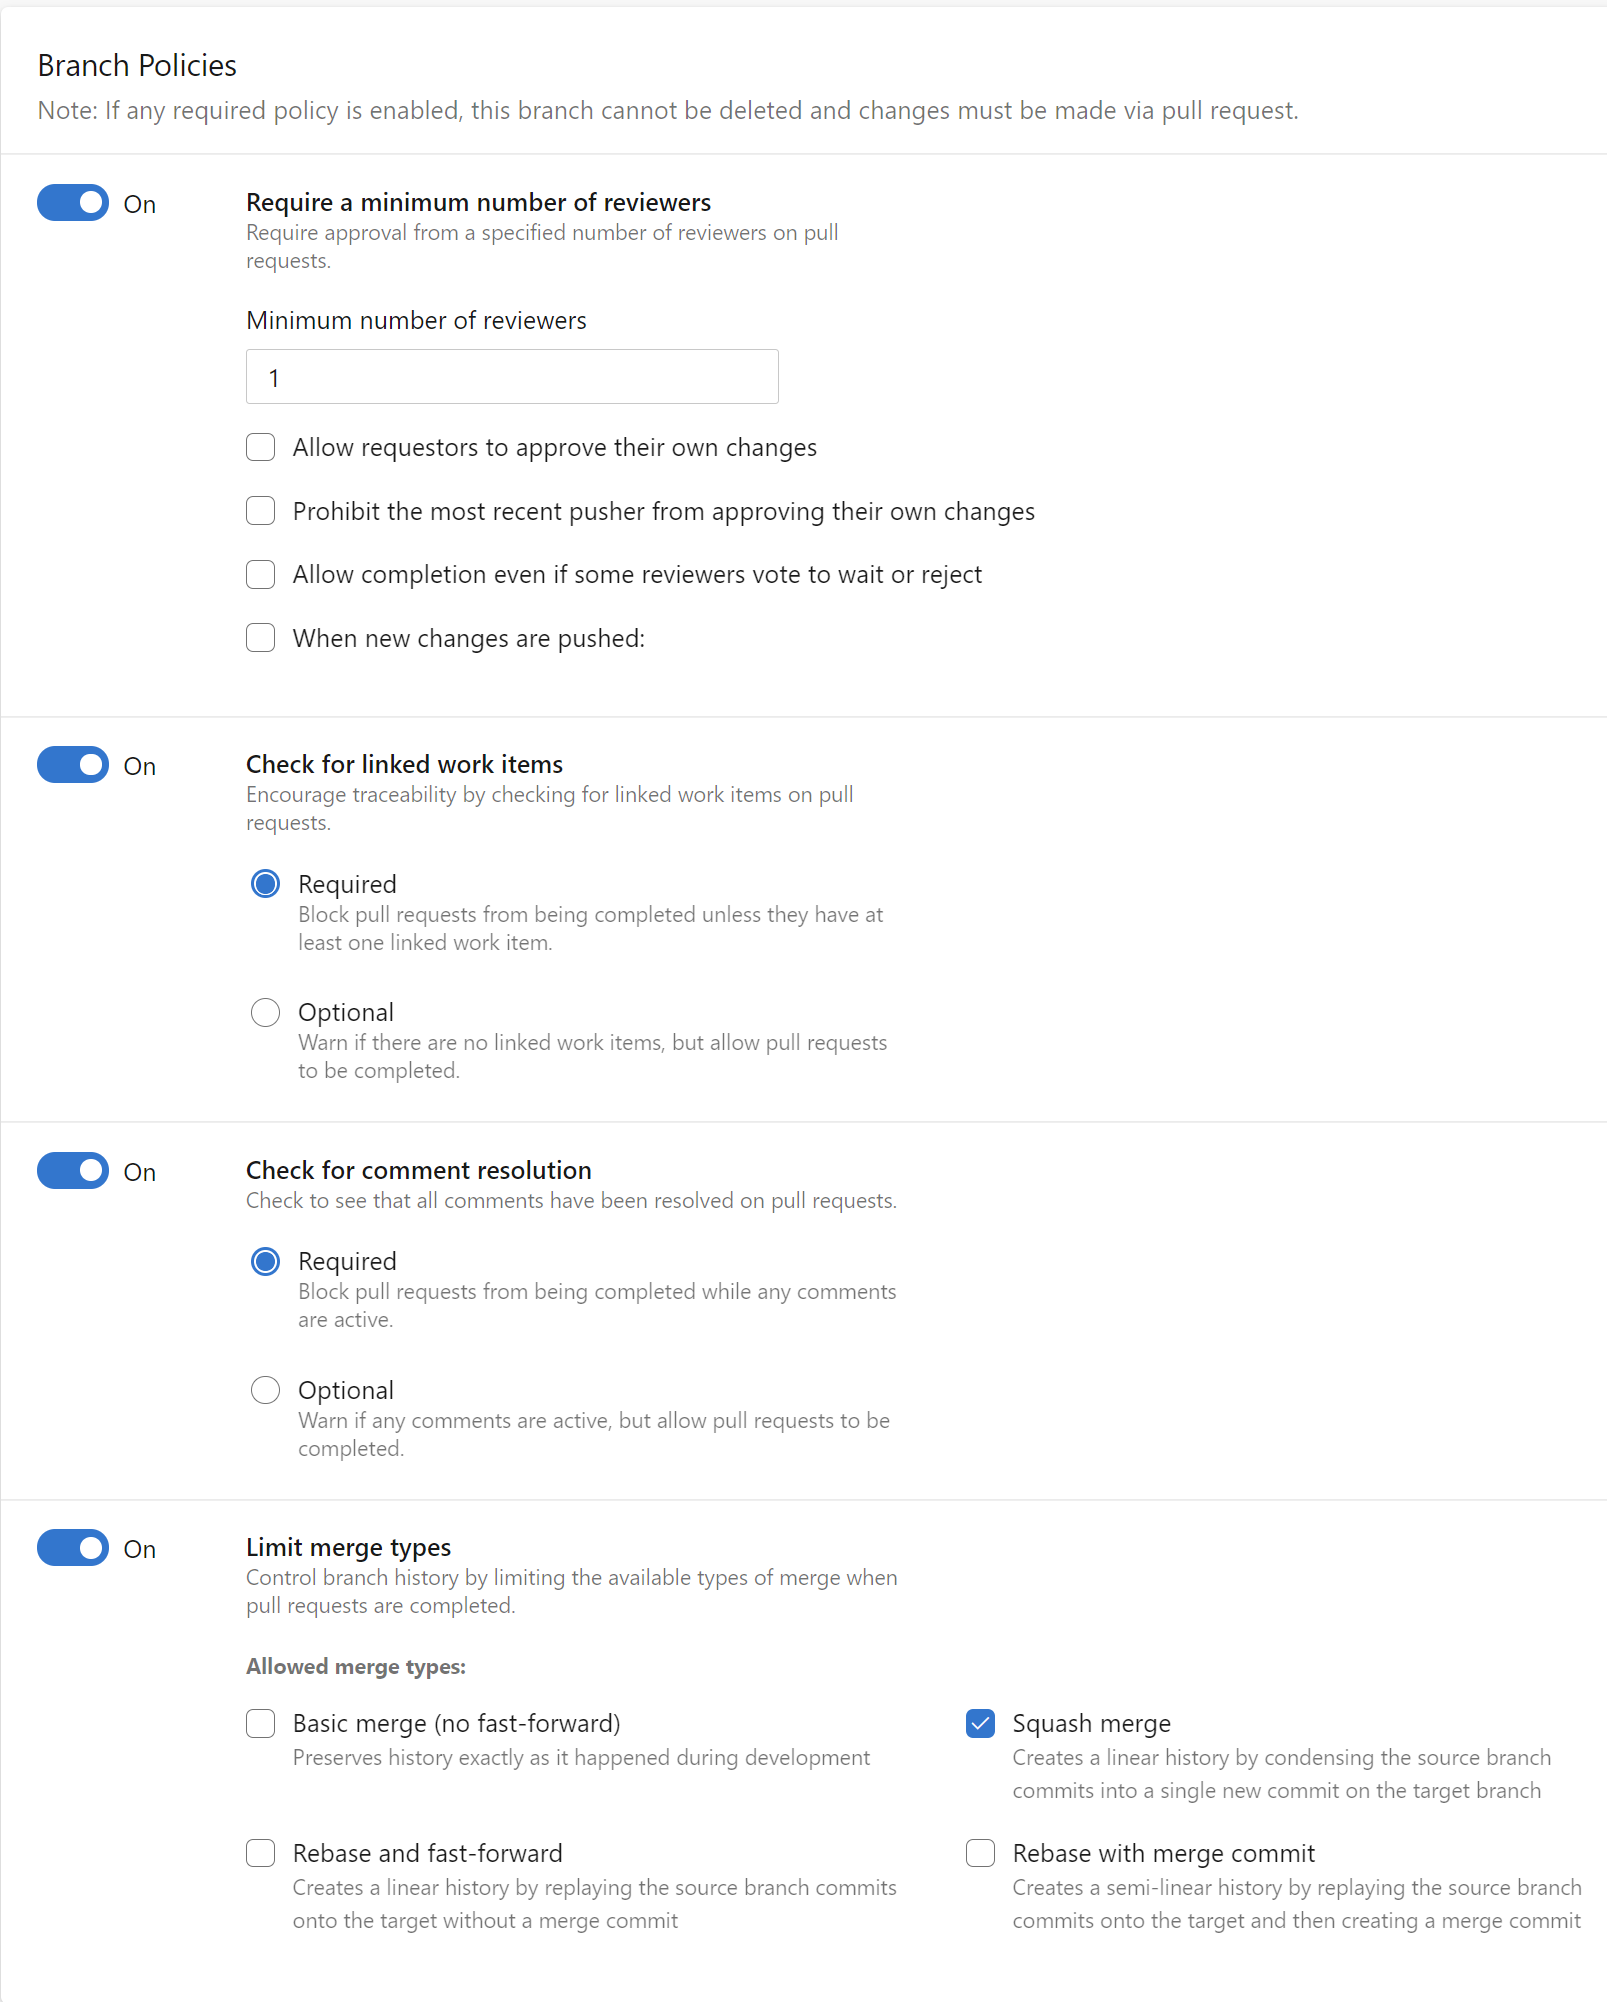
For each branch I applied the below policies:
Require a minimum number of reviewers
First of all - when there are any changes, they cannot be committed directly. A new pull request should be created to discuss what was changed. At least one person from the team has to review the changes and either approve them or reject them. Once changes are approved but someone will add anything new to the source branch (feature branch), approval will be reset and the reviewer has to review the changes again:
Check for linked work items
As you remember from my previous article, I created a backlog in Azure DevOps to control changes. In this backlog, there was dedicated Epic for the infrastructure. Each time there is a new pull request created, work items from this backlog have to be attached. Why? Because it is much easier to discover what kind of changes are applied.
Check for comment resolution
During the code review process, the reviewer can comment on some changes. The creator of the pull request has resolved these comments before the merge is possible. This prevents omitting the comments with important notes and requirements.
Limit merge types
We can control how commits history is preserved in the GIT repository. In this case, I applied Squash merge type because I want to have one single commit in the end when the merge is done.
Now let’s talk about the release pipeline and variables.
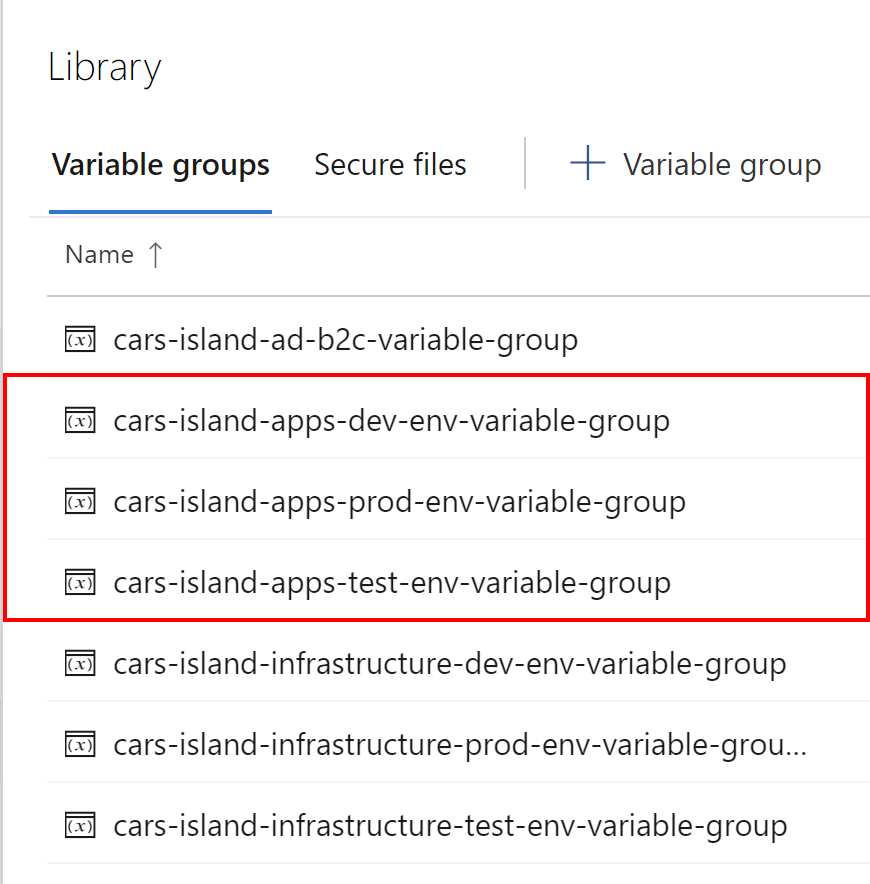
Azure DevOps Pipeline Variable Groups
Azure DevOps Pipeline Variable Groups can be used to store variables used in the different pipelines. As you can see I have three variable groups created - each one keeps variables for different environment - DEV, TEST, and PROD:
Let’s talk about variable group created for DEV environment. As you can see I declared many different variables:
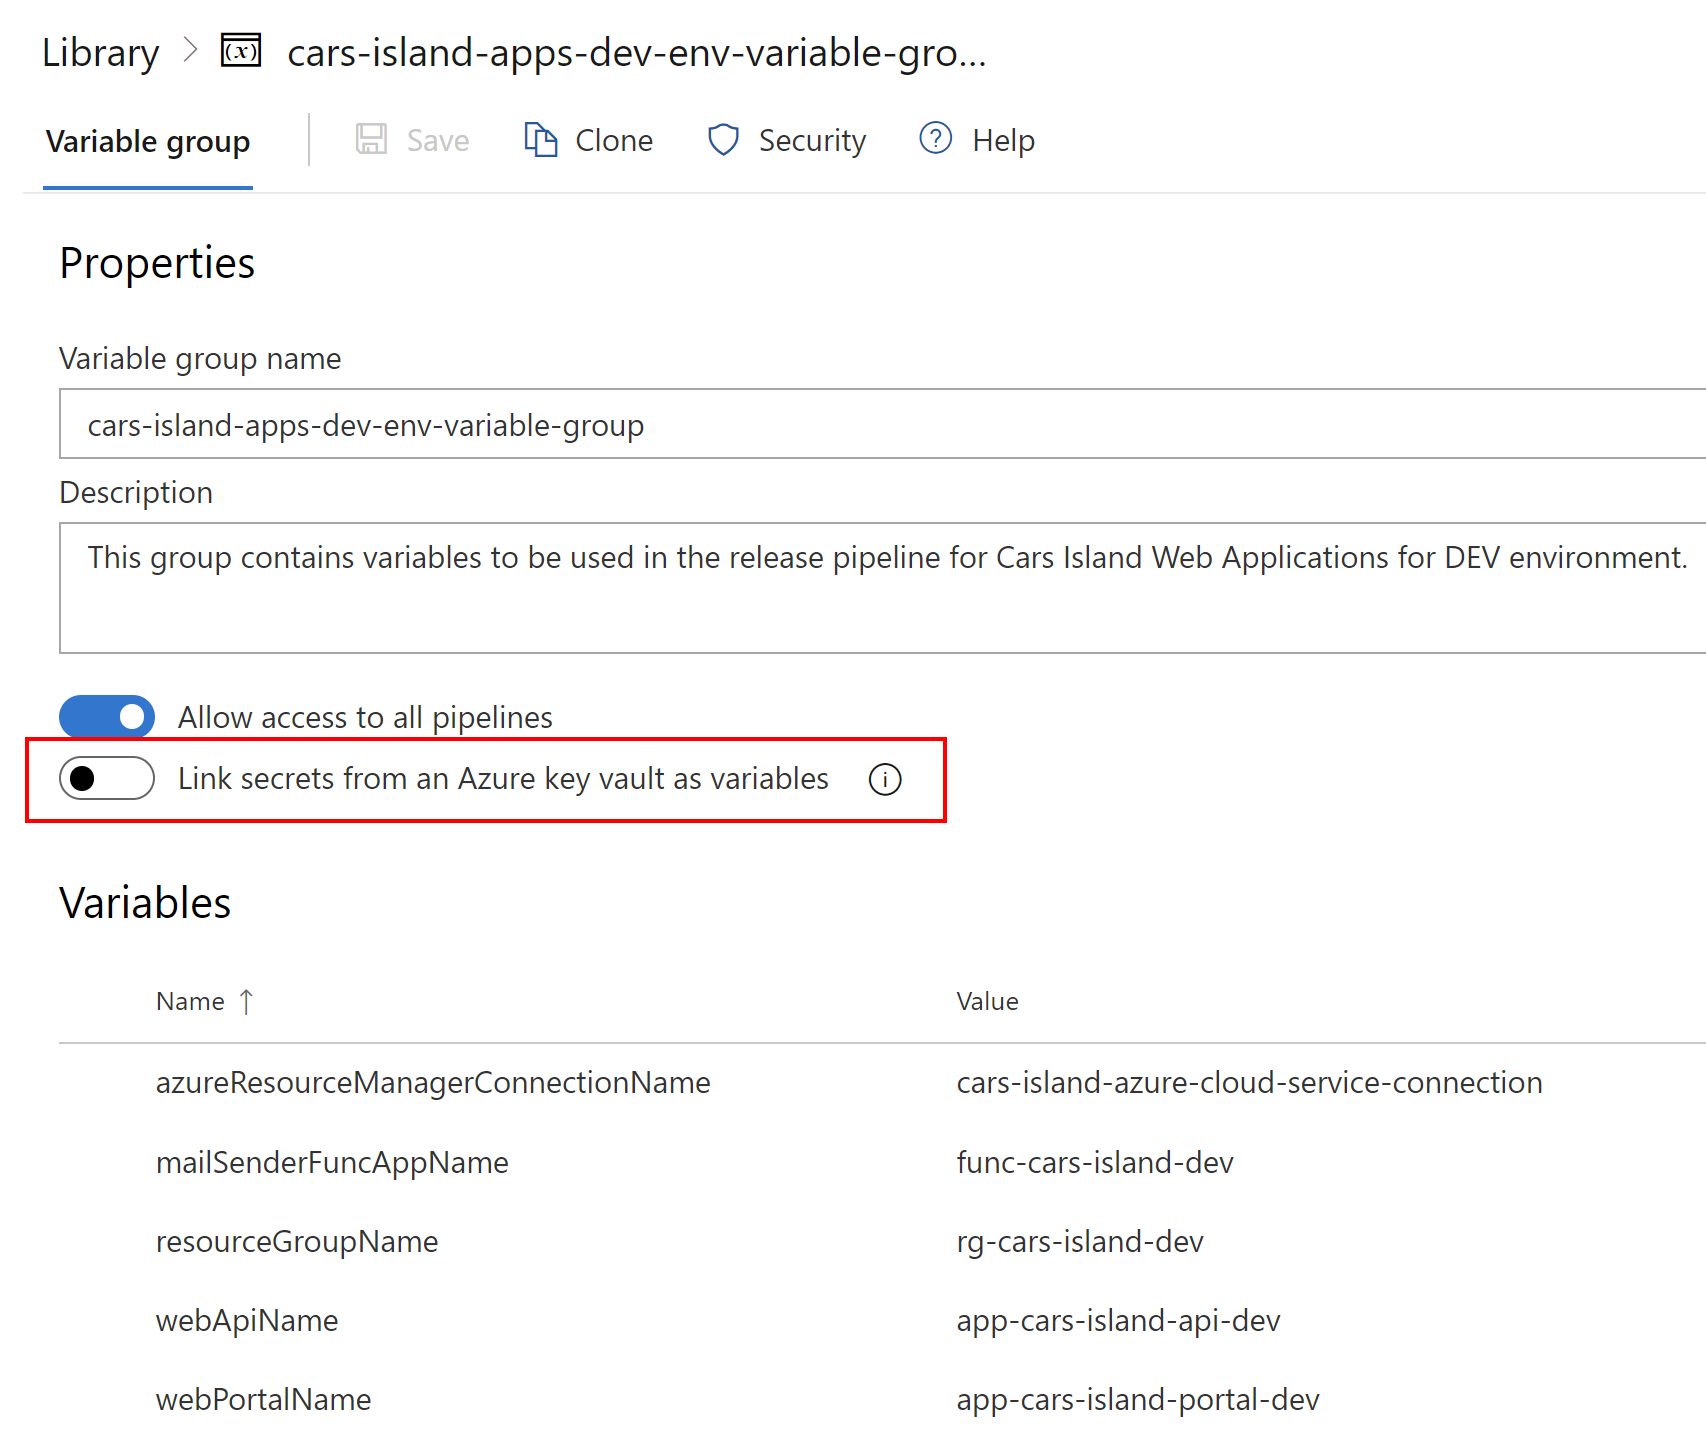
These variables will be used in the Azure DevOps pipelines for each application: Web Portal, Web API, and Function App.
Important
As you can see in the picture above, there is an option to link the secret from the Azure Key Vault. This option can be helpful when you have a separate, initial Key Vault, where you store values for the infrastructure that will be created. Example? You can store the username and password for the Azure SQL database there. Then this information can be injected into the ARM templates during the execution of the release pipeline. In Cars Island the process is simplified. I store secrets directly in the Azure DevOps variable groups.
Azure DevOps Environments
An environment in the Azure DevOps is a collection of resources, that can be targeted by deployments from a pipeline. Typical examples of environment names are Dev, Test, QA, Staging, and Production. I created three environments that I will reference in the release pipeline:
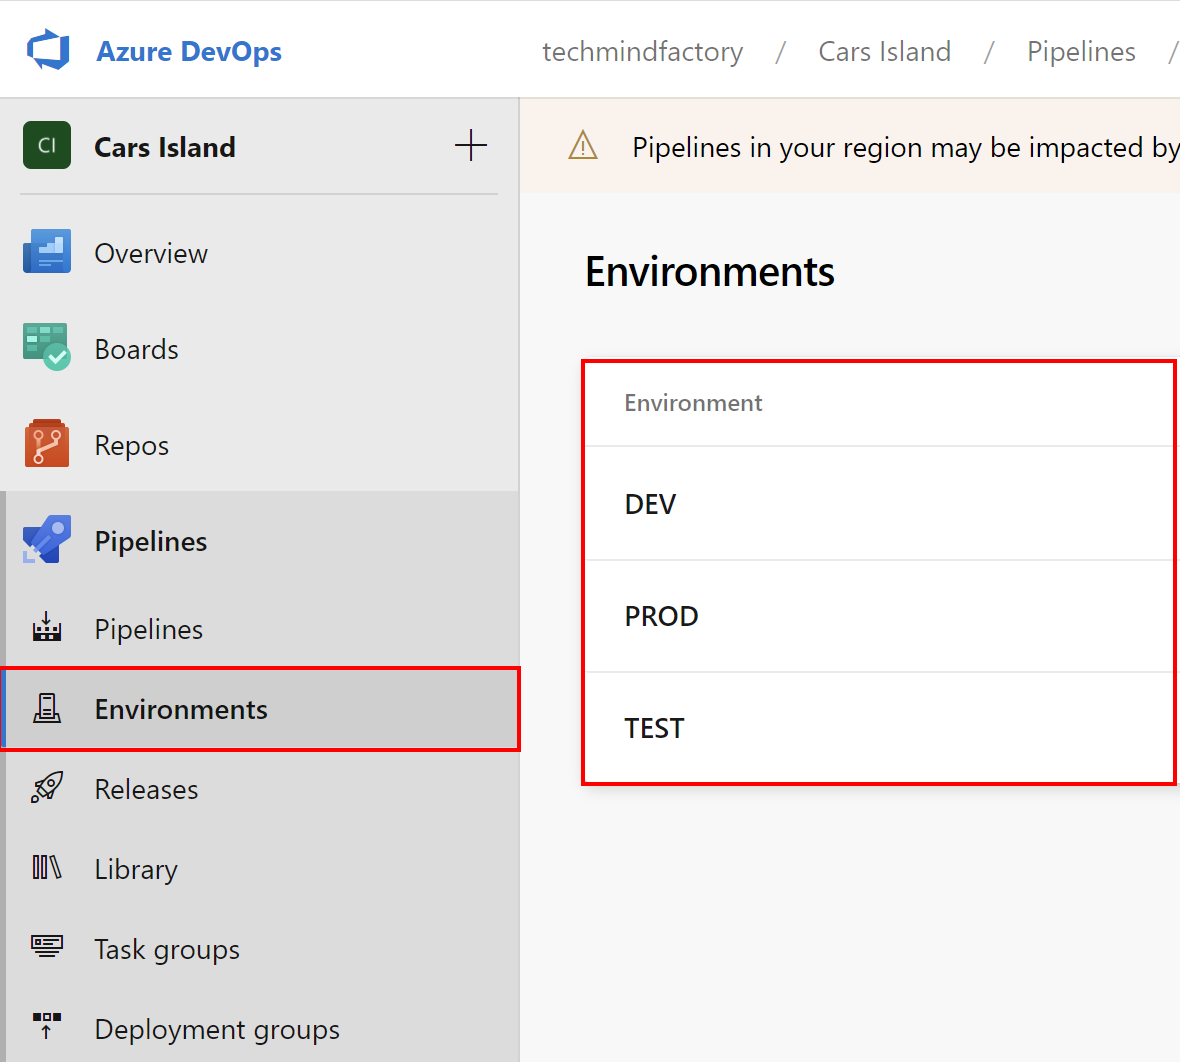
I encourage you to read this documentation to learn more about declaring environments.
Azure DevOps Pipeline Templates
Before I continue I would like to recommend watching my course called Microsoft DevOps Solutions: Implementing Orchestration Automation Solutions where I described in details some aspects mentioned in this article.
In the GIT repository for each application, I created a separate folder called pipelines where I store YAML files with a declaration for the application release. In the Azure DevOps you can of course use visual designer but recommended approach is to use YAML files to declare builds and releases as a code:
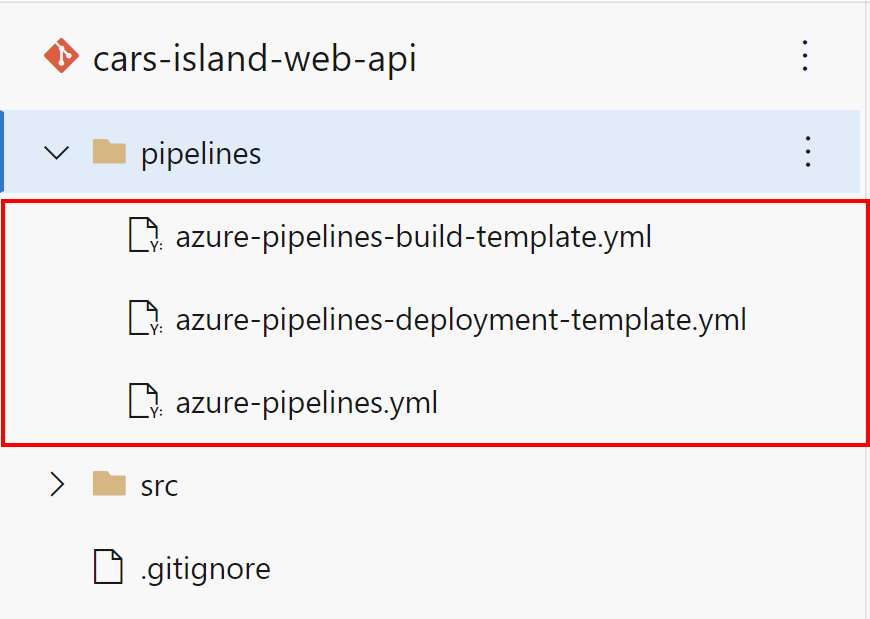
azure-pipelines-build-template.yml
jobs:
  - job: 'Build'
    displayName: "Build Cars Island Web API"
    pool:
      vmImage: 'VS2017-Win2016'
    steps:

    - task: DotNetCoreCLI@2
      displayName: Restore NuGet packages
      inputs:
        command: 'restore'
        projects: '**/*.csproj'

    - task: DotNetCoreCLI@2
      displayName: Build project
      inputs:
        command: 'build'
        projects: '**/*.csproj'

    - task: DotNetCoreCLI@2
      displayName: Publish project
      inputs:
        command: publish
        arguments: '--configuration Release --output $(Build.ArtifactStagingDirectory)'
        projects: '**/*.csproj'
        zipAfterPublish: true

    - task: PublishBuildArtifacts@1
      displayName: Publish package ready for deployment
      inputs:
        PathtoPublish: '$(Build.ArtifactStagingDirectory)'
        artifactName: 'drop'
The template above contains steps responsible for building the application package. This is the simplest way to create a build definition for ASP .NET Core Web API application.
azure-pipelines-deployment-template.yml
  jobs:
  - deployment: Deploy
    displayName: "Deploy Cars Island Web API"
    environment: $
    pool:
      vmImage: 'VS2017-Win2016'
    strategy:
      runOnce:
        deploy:
          steps:
          - task: DownloadBuildArtifacts@0
            displayName: 'Download the build artifacts'
            inputs:
              buildType: 'current'
              downloadType: 'single'
              artifactName: 'drop'
              downloadPath: '$(System.DefaultWorkingDirectory)'

          - task: AzureWebApp@1
            displayName: Release package to Azure Web App
            inputs:
              azureSubscription: $
              appName: $
              resourceGroupName: $
              deploymentMethod: 'zipDeploy'
              package: $(System.DefaultWorkingDirectory)/**/*.zip
The above template contains the release configuration for the Cars Island Web API. As you can see, we reference the artifact (package with built application) first and then we release the package to the Azure Web App.
azure-pipelines.yml
trigger:
- develop
- master

stages:
- stage: Build
  displayName: 'Build Cars Island Web API'
  jobs:
  - template: azure-pipelines-build-template.yml

- stage: DeployDEV
  displayName: 'Deploy Web API to DEV environment'
  condition: eq(variables['build.sourceBranch'], 'refs/heads/develop')
  dependsOn: Build
  variables:
  - group: 'cars-island-apps-dev-env-variable-group'
  jobs:
  - template: azure-pipelines-deployment-template.yml
    parameters:
      azureConnectionName: '$(azureResourceManagerConnectionName)'
      webAppName: '$(webApiName)'
      resourceGroupName: '$(resourceGroupName)'
      environment: 'DEV'

- stage: DeployTEST
  displayName: 'Deploy Web API to TEST environment'
  condition: eq(variables['build.sourceBranch'], 'refs/heads/master')
  dependsOn: Build
  variables:
  - group: 'cars-island-apps-test-env-variable-group'
  jobs:
  - template: azure-pipelines-deployment-template.yml
    parameters:
      azureConnectionName: '$(azureResourceManagerConnectionName)'
      webAppName: '$(webApiName)'
      resourceGroupName: '$(resourceGroupName)'
      environment: 'TEST'

- stage: DeployPROD
  displayName: 'Deploy Web API to PROD environment'
  condition: and(succeeded('DeployTEST'), eq(variables['build.sourceBranch'], 'refs/heads/master'))
  dependsOn: Build
  variables:
  - group: 'cars-island-apps-prod-env-variable-group'
  jobs:
  - template: azure-pipelines-deployment-template.yml
    parameters:
      azureConnectionName: '$(azureResourceManagerConnectionName)'
      webAppName: '$(webApiName)'
      resourceGroupName: '$(resourceGroupName)'
      environment: 'PROD'
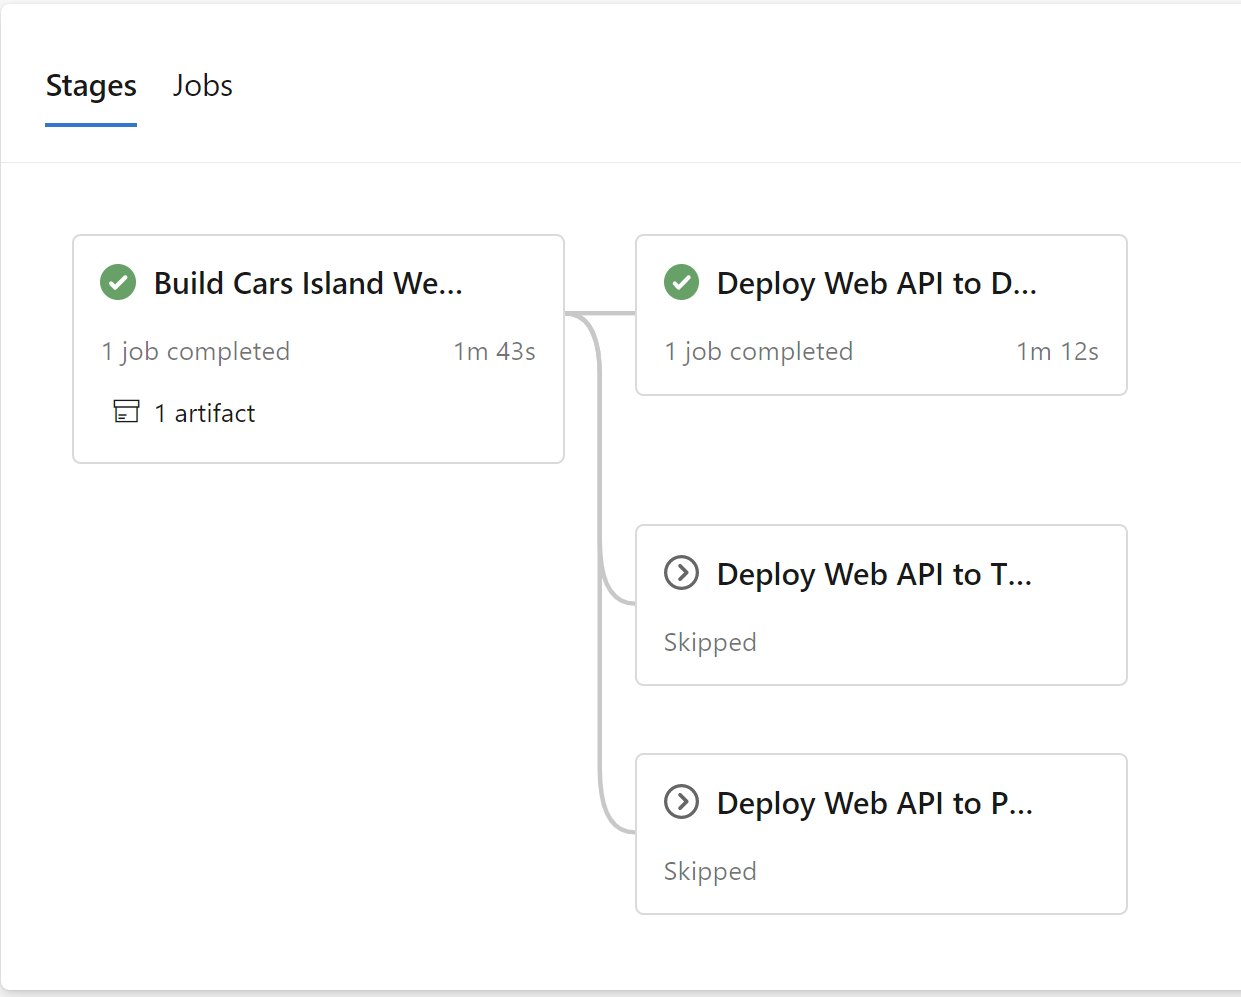
The template above contains three stages - each stage is responsible for deploying the package to a specific environment: DEV, TEST, AND PROD. Please note that I used condition so I can decide from which branch there should be deployment done for a specific environment (for DEV environment we will deploy package build from the develop branch).
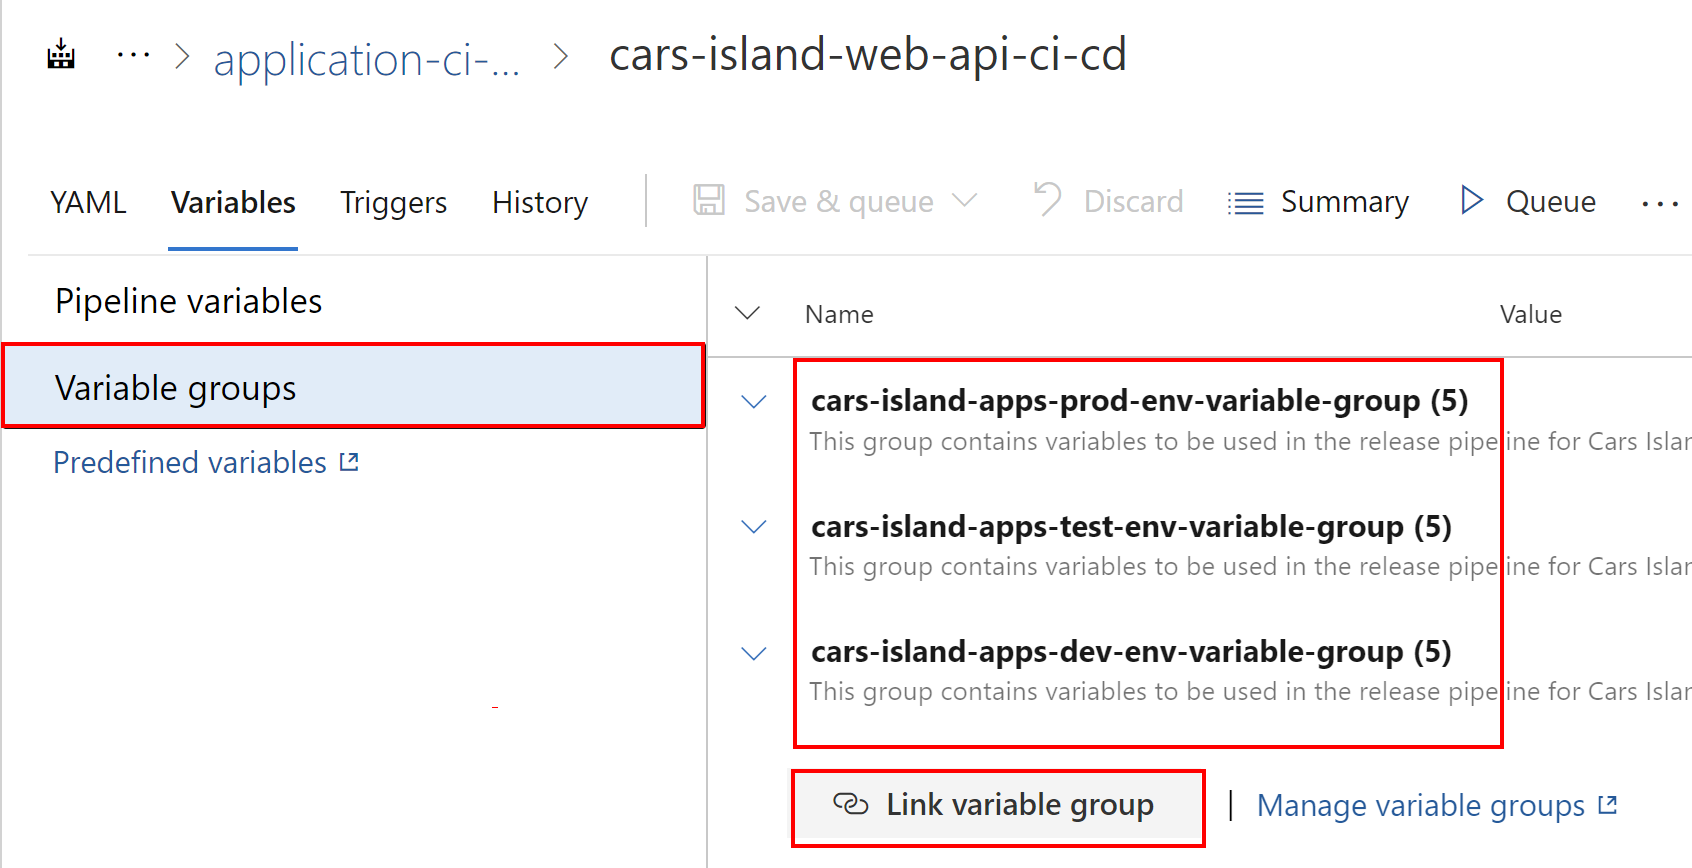
As you can see, each stage uses a different variable group (like DEV stage uses cars-island-apps-dev-env-variable-group variable group). Once these variable groups are linked to the pipeline, parameters can be injected and used in the YAML templates. How can we link these variable groups then?
Linking Variable Groups with Pipelines
Once we define new pipeline in the Azure DevOps, we can link variable groups so we can inject values for parameters presented above in the templates. To do it, click Edit button:

Then select Triggers:
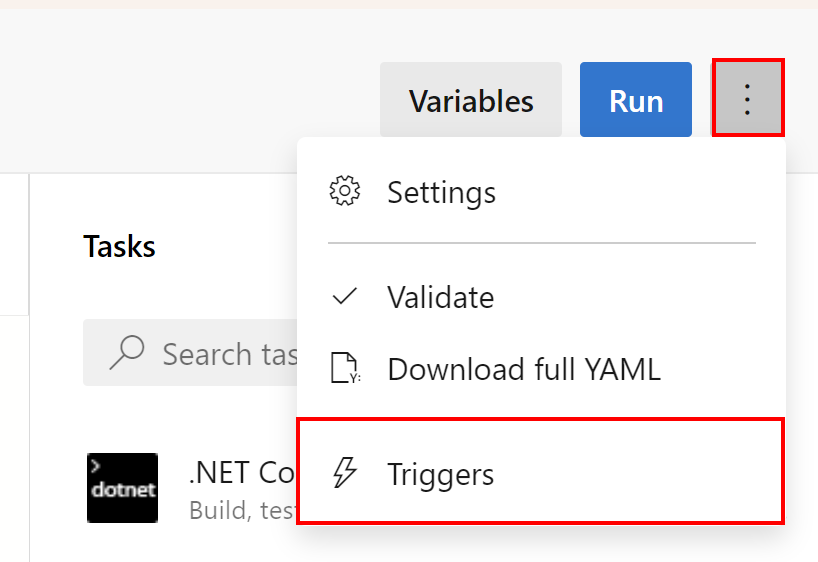
Then switch to the Variables section and select Variable groups. From this place you can link any variable group to use variables in the pipeline:
Run release for the Web API app
Once we have steps completed above, we can run the release pipeline. Please note that in this case all three environments will be created: DEV, TEST, and PROD:
What about scenarios in which we want to control when there is a deployment done for a specific environment (like for the production once)? In this case, we have to use gates.
Approvals and checks
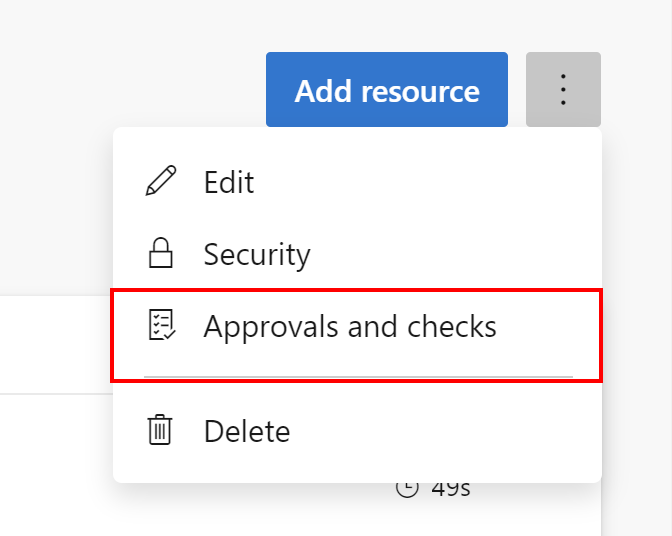
As you remember, I defined three environments in the Azure DevOps mentioned above in the article: DEV, TEST, and PROD. Now for each environment, I can define approvals and checks. To do it, we have to open a specific environment, like PROD, and select three dots, and then select Approvals and checks:
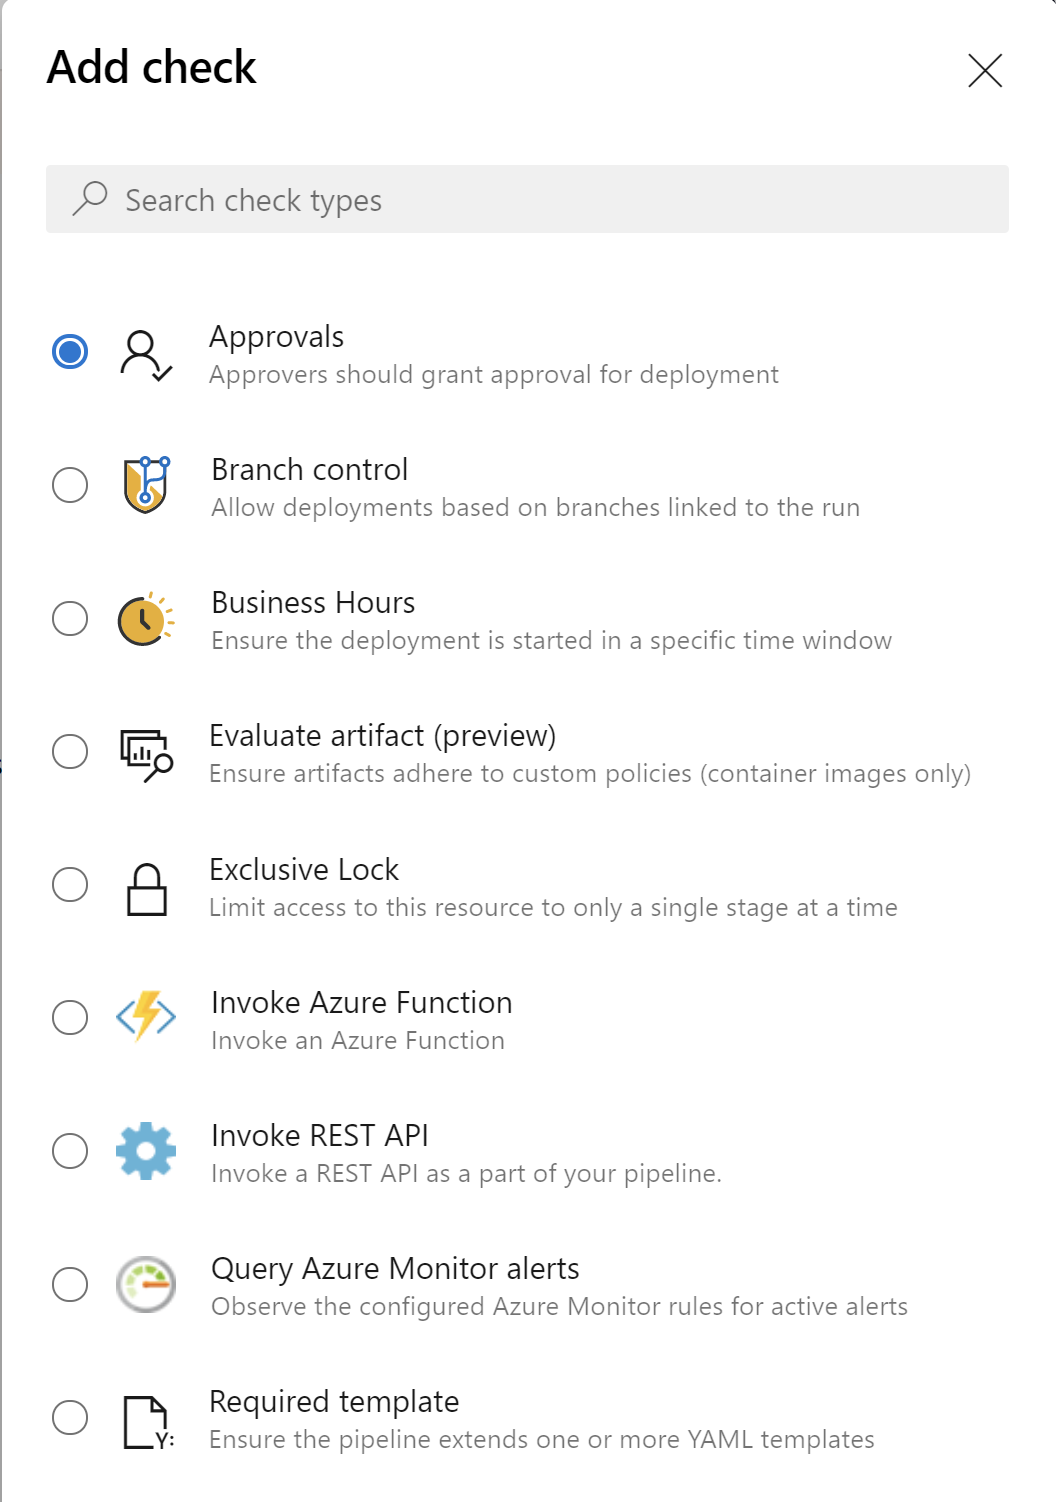
There is a whole list of available checks to select from:
You can select Approvals and then decide who is responsible for the final approval before there is deployment executed:
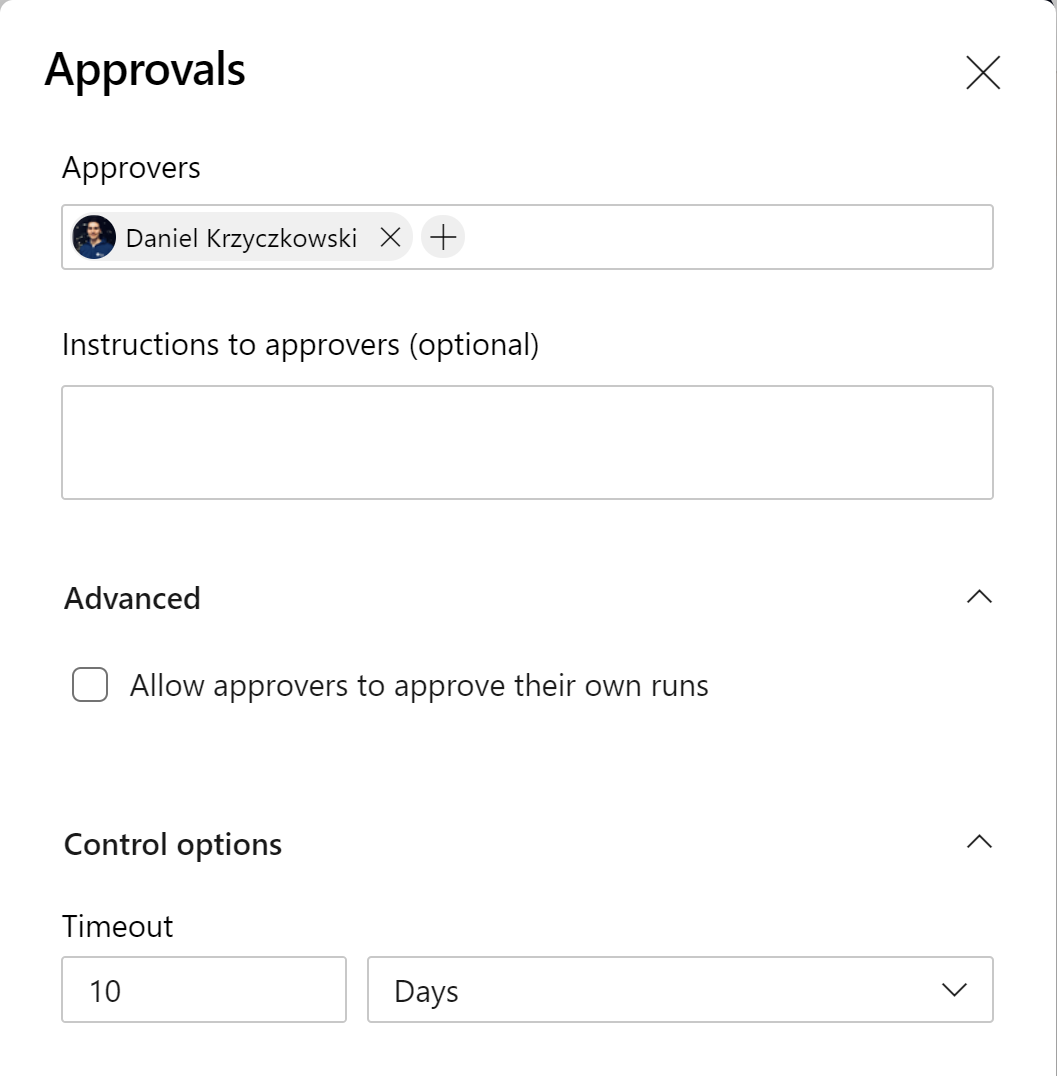
Each time there is a new release available, the person indicated above will have to manually approve the execution of the deployment stage.
Summary
In this article, I described how to use Azure DevOps to implement the DevOps process for the applications running on the Azure cloud. As you can see, there are many great features you can use to make your process more stable. Once again, I encourage you to watch my Pluralsight course called Microsoft DevOps Solutions: Implementing Orchestration Automation Solutions to learn more.