Cars Island ASP .NET Core API - integration with Azure Service Bus Queue - part 5
Introduction
In my first article, I introduced you to Cars Island car rental on the Azure cloud. I created this fake project to present how to use different Microsoft Azure cloud services and how to their SDKs. I also presented what will be covered in the next articles. Here is the fifth article from the series where I would like to discuss how to integrate with Azure Service Bus Queues and use the new .NET C# library.
In the Cars Island solution, Azure Service Bus Queue is used to queue the requests to send email confirmations once customer reservation is created in the system. Below I present solution architecture. As you can see once Web API process the reservation, there is a new message published to the queue. Mail Notifications Event Handler (Azure Function App) is triggered once a new message is in the queue and sends email confirmation using Azure SendGrid service. I wanted to decouple this functionality so API only created reservation but mail delivery is handled by a separate component (Azure Function App):

Cars Island project is available on my GitHub
Azure Service Bus setup
Azure Service Bus Queue creation
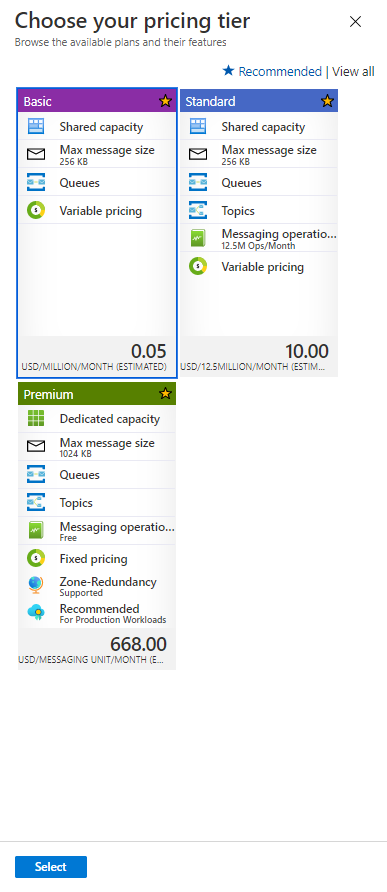
First of all, we have to create new instance of Azure Service Bus and configure it. I created the service with below configuration:
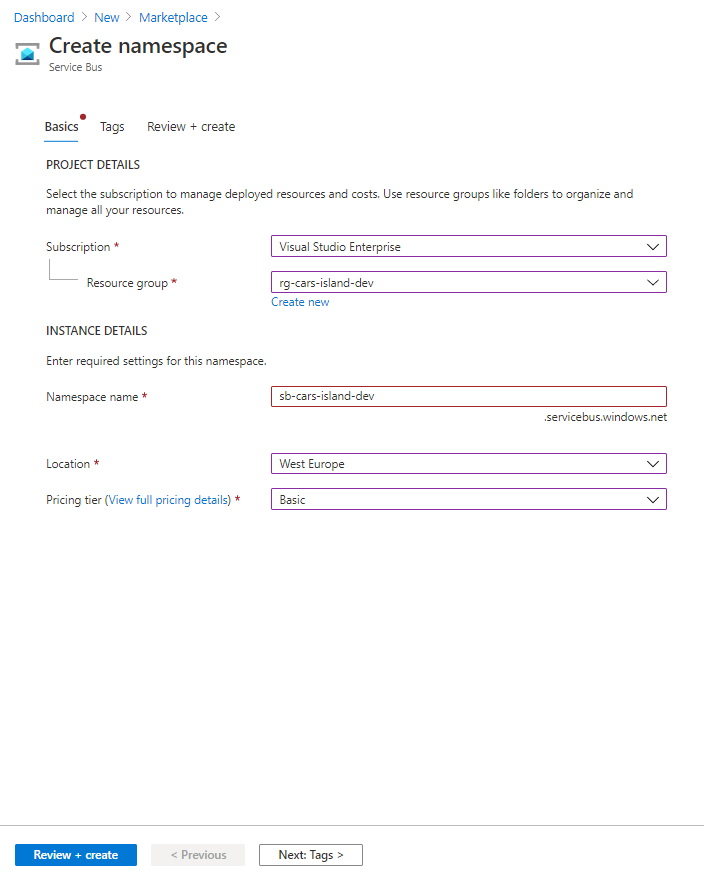
As you can see I provided the namespace name (I stuck to the recommended naming conventions). As you can also see I selected Basic pricing tier. Why? Because in this solution it is enough and provides access to queues. If you want to use Topics and Subscriptions which I will describe below, you should select Standard plan. The message size is also different between Basic, Premium, and Standard plans:
Queue setup
Once Azure Service Bus namespace is created, we can setup new queue. Let’s discuss the available configuration options to choose:
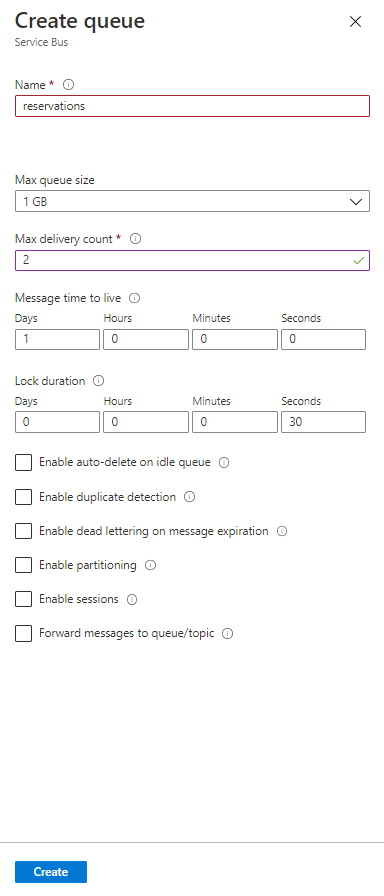
Name
Name of the queue. In my case, this is set to reservations.
Max queue size
There is no limit on a number of messages in the queue but there is a cap on the total size of the messages held by a queue. In my case, I set it to 1GB. Queue size could be one of the following values: 1 GB, 2 GB, 3 GB, 4 GB or 5 GB.
Max delivery count
Indicates the maximum number of times a message can be delivered. If a message is not processed successfully by receivers for X number of times, it is automatically dead-lettered after this number of deliveries. I set it to 2.
Message time to live
Message time to live determines how long a message will stay in the queue before it expires and is removed or dead-lettered. I set it to 1 day.
Lock duration
Sets the amount of time that a message is locked for other receivers. After its lock expires, a message pulled by one receiver becomes available to be pulled by other receivers. I left it set to 30 seconds (default).
There are also additional options to choose:
Enable auto-delete on idle queue
It enables auto-delete of the queue after idle for a specific amount of time.
Enable duplicate detection
With duplicate detection enabled, the queue to keep a history of all messages sent to the queue for a configurable amount of time. During that interval, the queue will not accept any duplicate messages.
Enable dead lettering on message expiration
Dead lettering messages involves holding messages that cannot be successfully delivered to any receiver to a separate queue after they have expired.
Enable partitioning
Service Bus partitions enable queues and topics, or messaging entities, to be partitioned across multiple message brokers and messaging stores. Partitioning means that the overall throughput of a partitioned entity is no longer limited by the performance of a single message broker or messaging store. Also, a temporary outage of a messaging store does not render a partitioned queue or topic unavailable.
Enable sessions
Service bus sessions allow ordered handling of unbounded sequences of related messages. With sessions enabled a queue can guarantee first-in-first-out delivery of messages.
Forward messages to queue/topic
Enables automatic forward of messages to a queue or topic in the same Azure Service Bus namespace.
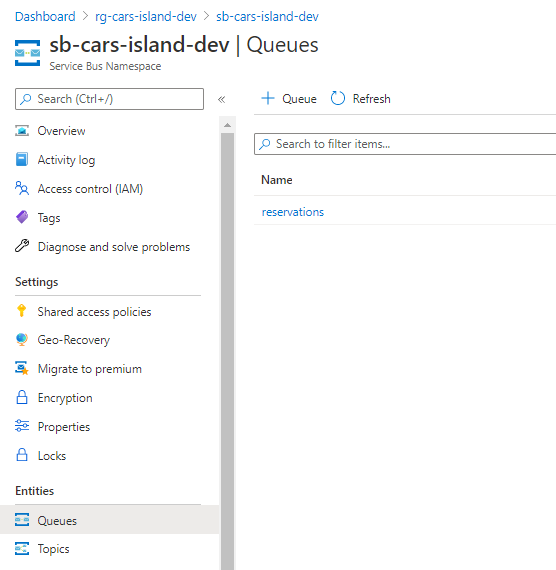
Once queue is created, we can send messages to it. Let’s see how to do it in the source code using the new Azure Service Bus .NET SDK.
Difference between Azure Service Bus Queue and Topic
The queue is a good solution when there is one sender and one receiver. In the Cars Island, there is a Web API that handles car reservations. There is also Azure Function App responsible for sending confirmation emails. This is the perfect scenario where we can decouple the components and use a queue. There is one sender (API) and one receiver (Function App).

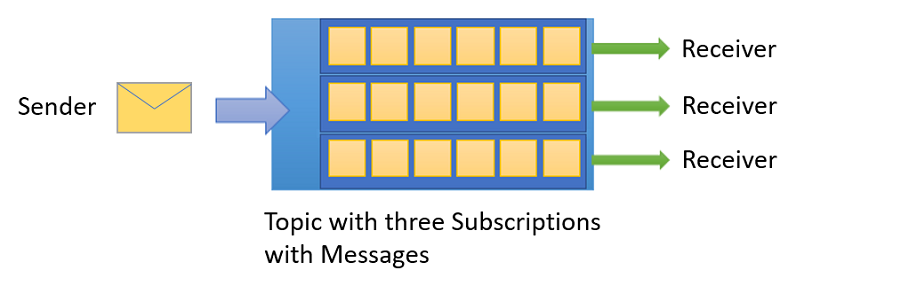
While a queue is used for point-to-point communication, topics and subscriptions are useful in publish/subscribe scenarios. Topics can have multiple, independent subscriptions, which attach to the topic and otherwise work exactly like queues from the receiver side. A subscriber to a topic can receive a copy of each message sent to that topic. Topics and subscriptions could be helpful if we had microservices architecture and there were multiple services waiting for the updates. In the Cars Island solution, there was no need of using Azure Service Bus topics.
Azure Service Bus .NET SDK integration
In the Cars Island project, I integrated the ASP .NET Core Web API application with Azure Service Bus using new library. I decided to use this library because it follows best practices and implement common patterns. If you want to learn more about new Azure SDKs, please check this official documentation.
Let’s start with an explanation of how the initial setup looks like. In the MessagingServiceCollectionExtensions.cs file you can find out how ServiceBusClient and ServiceBusSender are instantiated. To follow best practices related to lifetime management, ServiceBusClient and ServiceBusSender types are registered as a singleton in the IoC container. You can also ask why I have used services.TryAddSingleton with implementationFactory instead of just using services.AddSingleton with specific instance passed to it. I did it because it enables automatic object disposal so once the application is closed, all resources will be released automatically. You can read more about service registration methods.
    public static class MessagingServiceCollectionExtensions
    {
        public static IServiceCollection AddMessagingServices(this IServiceCollection services)
        {
            services.TryAddSingleton(implementationFactory =>
            {
                var serviceBusConfiguration = implementationFactory.GetRequiredService<IMessagingServiceConfiguration>();
                var serviceBusClient = new ServiceBusClient(serviceBusConfiguration.ListenAndSendConnectionString);
                var serviceBusSender = serviceBusClient.CreateSender(serviceBusConfiguration.QueueName);
                return serviceBusSender;
            });

            services.AddSingleton<ICarReservationMessagingService, CarReservationMessagingService>();

            return services;
        }
    }
As you can see above, I pass the connection string (with listen and send permissions) together with the name of the queue.
Sending messages to queue
Once we discussed Azure Service Bus queue setup and integration with the .NET SDK in the source code, we can discuss how it can be used.
There is CarReservationMessagingService instance registered. Let’s discuss its structure. As you can see below CarReservationMessagingService class uses ServiceBusSender instance to communicate with the Azure Service Bus queue. Inside PublishNewCarReservationMessageAsync method, new CarReservationIntegrationMessage instance is created with details about car reservation. As you can see there is information about car ID, customer ID and dates. The message payload is serialized to JSON and sent using SendMessageAsync method:
    public class CarReservationMessagingService : ICarReservationMessagingService
    {
        private readonly ServiceBusSender _serviceBusSender;

        public CarReservationMessagingService(ServiceBusSender serviceBusSender)
        {
            _serviceBusSender = serviceBusSender
                                ?? throw new ArgumentNullException(nameof(serviceBusSender));
        }

        public async Task PublishNewCarReservationMessageAsync(CarReservation carReservation)
        {
            var carReservationIntegrationMessage = new CarReservationIntegrationMessage
            {
                Id = Guid.NewGuid().ToString(),
                CarId = carReservation.CarId,
                CustomerId = carReservation.CustomerId,
                RentFrom = carReservation.RentFrom,
                RentTo = carReservation.RentTo
            };

            var serializedMessage = JsonSerializer.Serialize(carReservationIntegrationMessage);
            ServiceBusMessage message = new ServiceBusMessage(serializedMessage);
            await _serviceBusSender.SendMessageAsync(message);
        }
    }
CarReservationMessagingService is used in the CarReservationController. Once there is a new reservation saved, a new message is added to the Service Bus queue.
Handling messages using Azure Function App
Once new messages is added to the Service Bus queue, there is Azure Function App with Service Bus queue trigger. Every time there is a new message, this Function App is triggered. Once message is processed it is automatically disposed:
    public class MailSenderFuncApp
    {
        private readonly ICarReservationMessagingService _carReservationMessagingService;

        public MailSenderFuncApp(ICarReservationMessagingService carReservationMessagingService)
        {
            _carReservationMessagingService = carReservationMessagingService
                                                    ?? throw new ArgumentNullException(nameof(carReservationMessagingService));
        }

        [FunctionName("mail-sender-func-app")]
        public async Task RunAsync([ServiceBusTrigger("reservations", Connection = "AzureServiceBusConnectionString")] string queueItem)
        {
            await _carReservationMessagingService.HandleNewCarReservationMessageAsync(queueItem);
        }
    }
Once new messages is received, Function App uses Azure SendGrid service to send an email confirmation. I will discuss integration with SendGrid service in the next articles.
There are two different modes in which Service Bus receives messages: ReceiveAndDelete or PeekLock. In the ReceiveAndDelete mode, when Service Bus receives the request from the consumer, it marks the message as being consumed and returns it to the consumer application.
In the PeekLock mode, the receive operation becomes two-stage. Service Bus receives message, locks it to prevent other consumers from receiving it, and then return the message to the application. After the application finishes processing the message or stores it reliably for future processing, it completes the second stage of the receive process by calling CompleteAsync on the message.
The Function App runtime receives a message in PeekLock mode. It calls Complete on the message if the function finishes successfully, or calls Abandon if the function fails.
Summary
In this article, I described how to set up an Azure Service Bus queue and how to integrate it into the ASP .NET Core Web API application and Azure Function App. Source code of the Cars Island solution is available on my GitHub so you can see all implementation details.
If you want to learn more about the Azure Service Bus service, check this official documentation.