Azure AD B2C Series - Custom Policies with custom claims
I had a chance to work with the Azure Active Directory B2C quite a lot recently and decided that it would be nice to share some knowledge about it. Just to make life easier for people using it especially when there are some custom usage scenarios. This is the first article from the series and in this article I would like to present how to use custom claims (custom attributes) in the Azure AD B2C Identity Experience Framework Custom Policies.
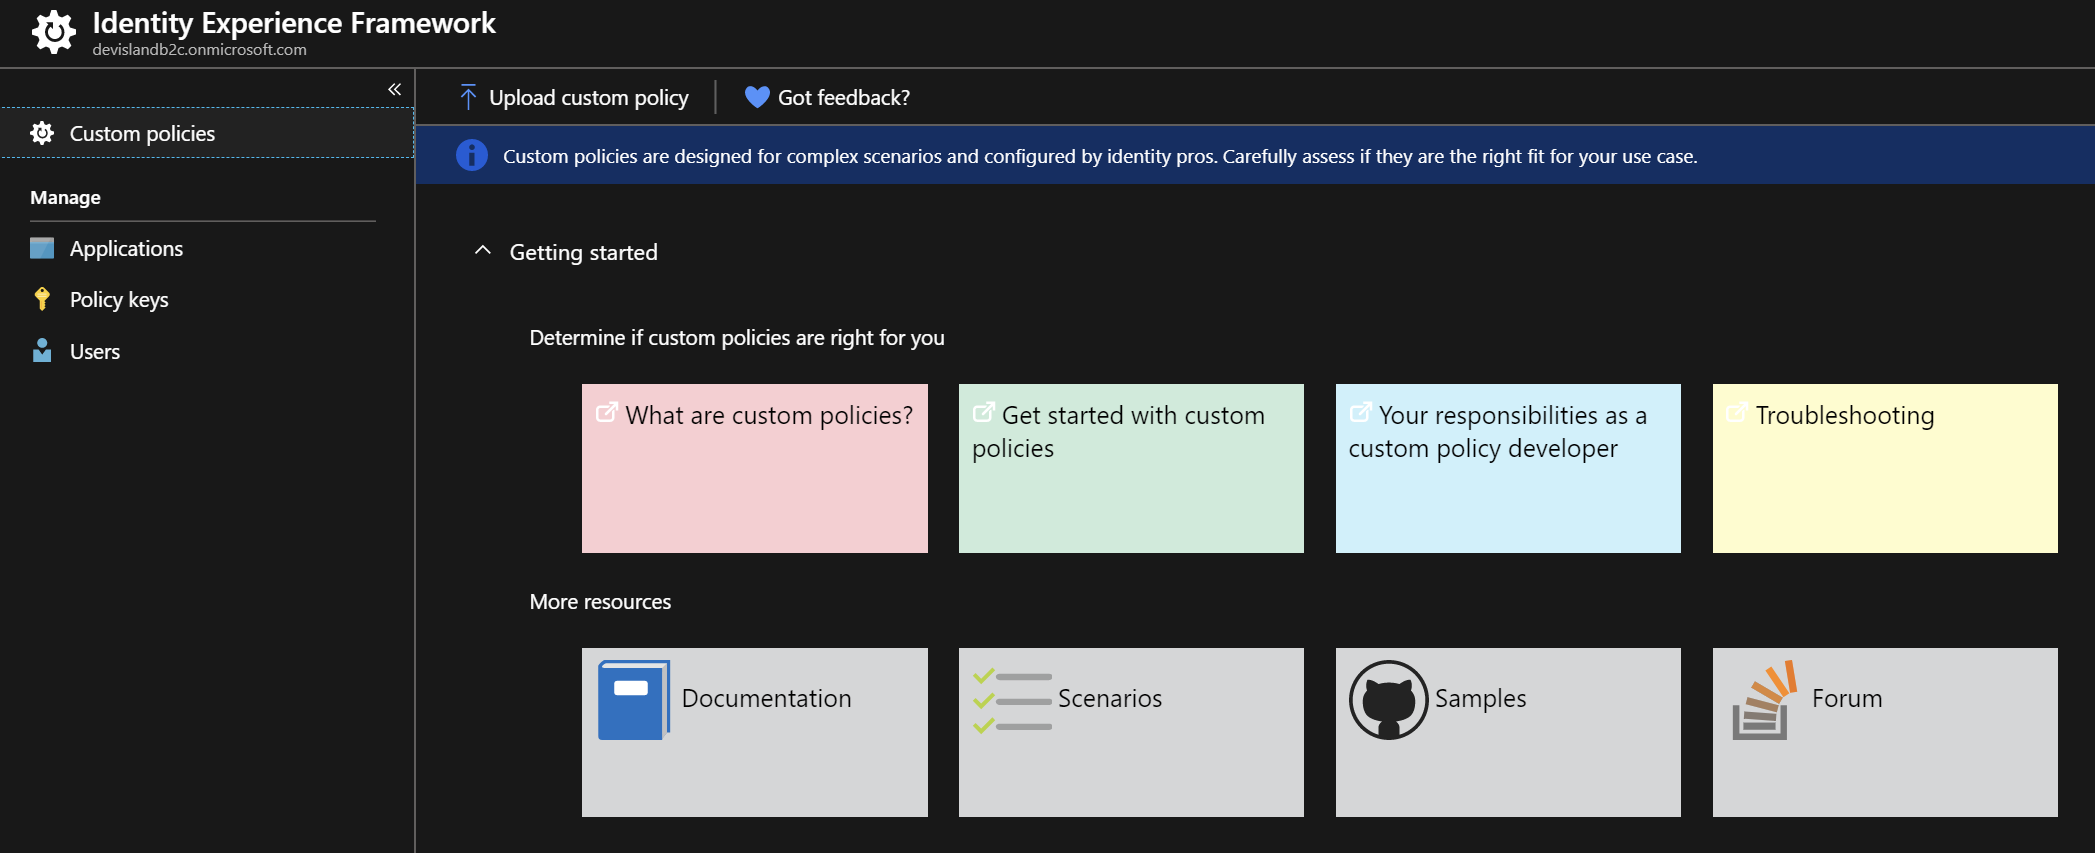
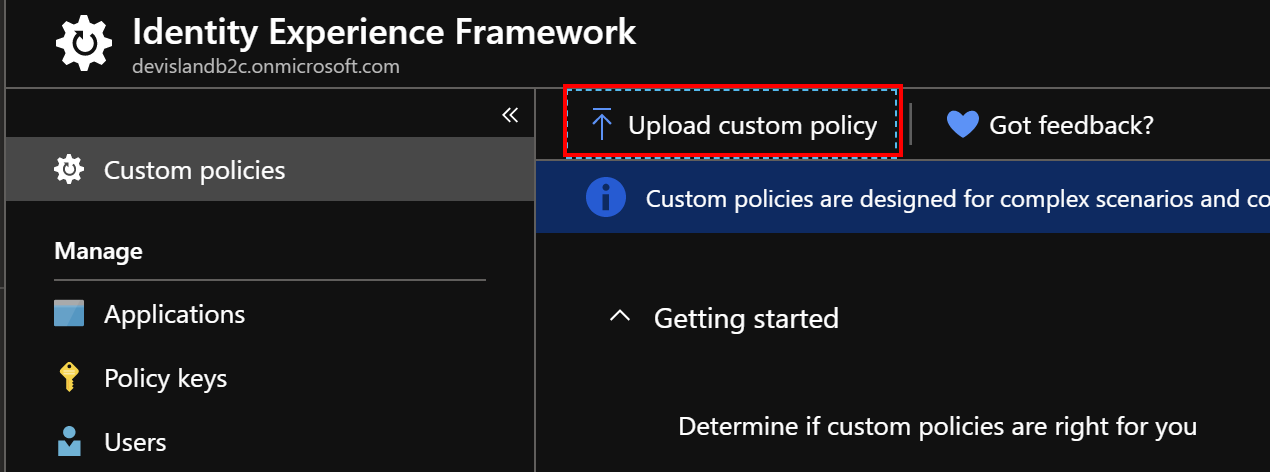
There are also links to the great content after opening “Identity Experience Framework” tab in the Azure portal:
Introduction and assumptions
Before we start I assume that you are familiar with the Azure AD B2C Identity Experience Framework and initial setup is done. If you would like to start I recommend to check official documentation. In this series we will use already configured AD B2C tenant with Custom Policies. After all steps from the documentation are completed we are ready to move forward.
We will use “SocialAndLocalAccounts” policies files from the starter pack.
Below files will be used:
- TrustFrameworkBase.xml
- TrustFrameworkExtensions.xml
- SignUpOrSignin.xml
- ProfileEdit.xml
- PasswordReset.xml
Custom claims (attributes)
There is a list of built-in claims (attributes) for user entity in the Azure AD B2C:
- objectId
- accountEnabled
- city
- country
- displayName
- givenName
- jobTitle
- otherMails
- postalCode
- signInNames
- signInNames.emailAddress
- signInNames.userName
- state
- streetAddress
- surname
- userIdentities
They can be found in the official documentation.
Custom claims (attributes)
Built-in claims are fine but what about scenarios where we would like to use custom claims - like uniqie ID from external system or birthday? Then we need to add custom claims. In this section I will present how to do it.
Create new application in the Azure Active Directory
- In the Azure portal in the Azure AD B2C catalog, select Azure Active Directory tab from the menu on the left side.
- Select “App registrations”
- Select “New application registration”
- Type the name for the app: “WebApp-GraphAPI-DirectoryExtensions”
- Select type of the app: “Web app/API”
- Set “The sign-on URL” to: https://{yourAdB2cTenant}.onmicrosoft.com/WebApp-GraphAPI-DirectoryExtensions
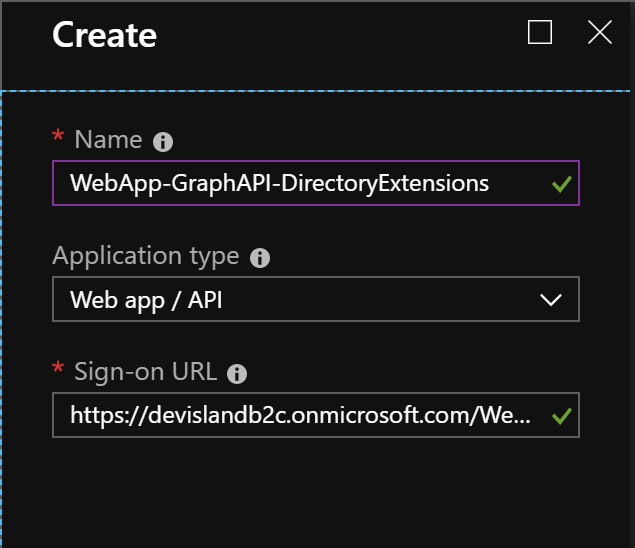
Click “Create” button. Now navigate to the “Settings” of the newly created app.
- Select “Required permissions”
- Click on the “Windows Azure Active Directory”
- Select checkbox for the permission: “Read and write directory data” in the “Application Permissions” section
- Next click on the “Grant permissions” button and click “Yes”
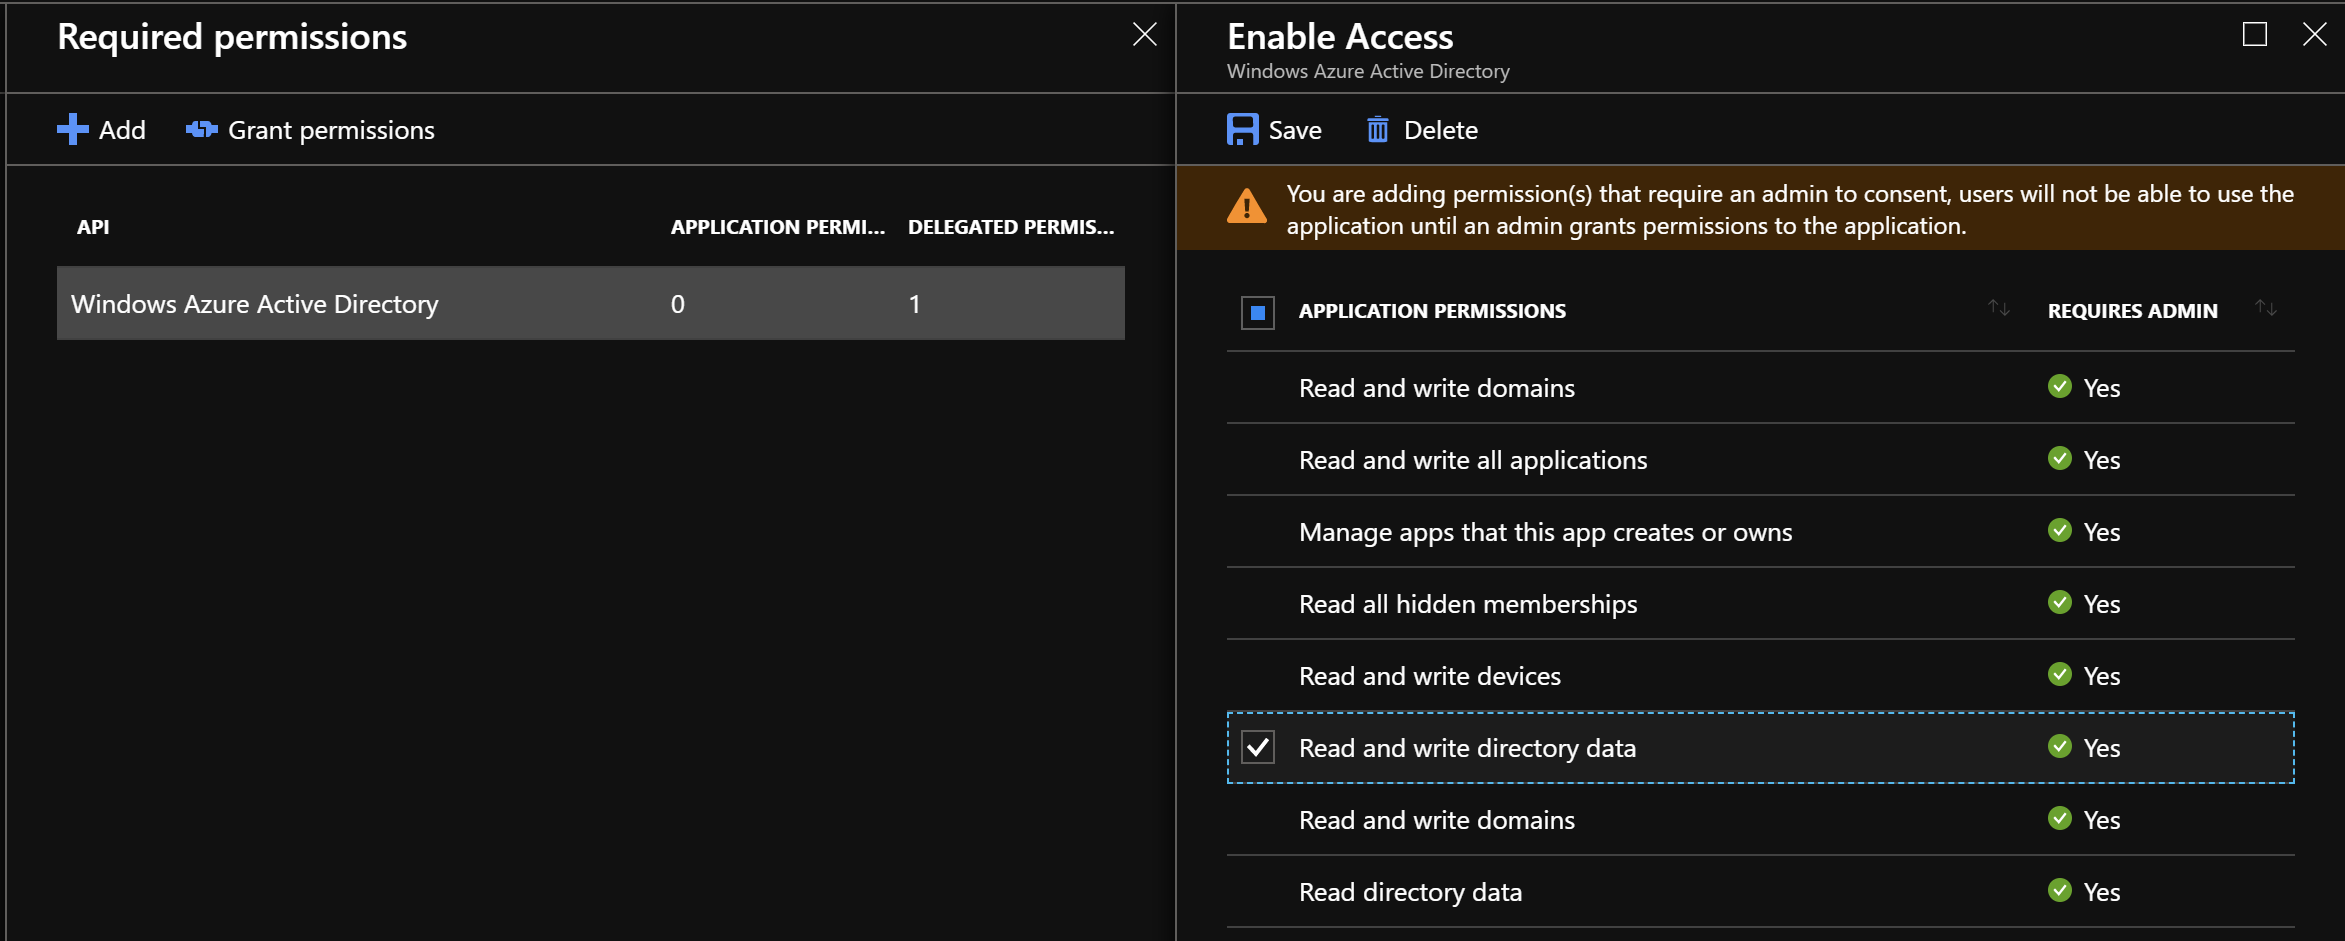
Copy “Application ID” and “Object ID” values - we will use them later:

Modify custom policies files
After creating new application in the Azure Active Directory to handle custom attributes we have to modify custom policies:
- TrustFrameworkBase.xml
- TrustFrameworkExtensions.xml
- SignUpOrSignin.xml
- ProfileEdit.xml
- PasswordReset.xml
Update TrustFrameworkBase.xml file
In the “TrustFrameworkBase.xml” file update ClaimsProvider named “Azure Active Directory” with metadata section - you have to provide “Application ID” and “Object ID” copied above:
         <Metadata>
            <Item Key="ApplicationObjectId">insert objectId here</Item>
            <Item Key="ClientId">insert appId here</Item>
          </Metadata>
Paste metadata code just under the “Protocol” tag:
 <ClaimsProvider>
      <DisplayName>Azure Active Directory</DisplayName>
      <TechnicalProfiles>
        <TechnicalProfile Id="AAD-Common">
          <DisplayName>Azure Active Directory</DisplayName>
          <Protocol Name="Proprietary" Handler="Web.TPEngine.Providers.AzureActiveDirectoryProvider, Web.TPEngine, Version=1.0.0.0, Culture=neutral, PublicKeyToken=null" />
         <!-- Provide objectId and appId before using extension properties. -->
         <Metadata>
            <Item Key="ApplicationObjectId">insert objectId here</Item>
            <Item Key="ClientId">insert appId here</Item>
          </Metadata>
      <!-- End of changes -->
          <CryptographicKeys>
          .........
There is one important note (from the official documentation):
“When the TechnicalProfile writes for the first time to the newly created extension property, you might experience a one-time error. The extension property is created the first time it’s used.”
Add custom claim called “extension_external_system_id” with default value set to: “external_system_id_1234”.
In this article I would like to show how to add custom claim (attribute) with default value. In the next article I will show how to fill this attribute’s value using external service (Azure Function).
Ad below “ClaimType” with “Id” set to “extension_external_system_id” to the BuildingBlocks section above the “signInName” claim type:
 <ClaimType Id="extension_external_system_id">
      <DisplayName>ID of the user from the External System</DisplayName>
      <DataType>string</DataType>
      <UserHelpText>ID assigned in the External System</UserHelpText>
      <UserInputType>TextBox</UserInputType>
 </ClaimType>
  <ClaimType Id="extension_external_system_id">
        <DisplayName>ID of the user from the External System</DisplayName>
        <DataType>string</DataType>
        <UserHelpText>ID assigned in the External System</UserHelpText>
        <UserInputType>TextBox</UserInputType>
    </ClaimType>
      <!-- Claims needed for local accounts. -->
      <ClaimType Id="signInName">
        <DisplayName>Sign in name</DisplayName>
        <DataType>string</DataType>
        <UserHelpText />
        <UserInputType>TextBox</UserInputType>
      </ClaimType>
Update ProfileEdit.xml file
We have to upate “ProfileEdit.xml” file with the custom claim (attribute). By including the custom claim in the “RelyingParty” element, it’s included in the token for the application:
<OutputClaim ClaimTypeReferenceId="extension_external_system_id"/>
 <RelyingParty>
    <DefaultUserJourney ReferenceId="ProfileEdit" />
    <TechnicalProfile Id="PolicyProfile">
      <DisplayName>PolicyProfile</DisplayName>
      <Protocol Name="OpenIdConnect" />
      <OutputClaims>
        <OutputClaim ClaimTypeReferenceId="objectId" PartnerClaimType="sub" />
        <OutputClaim ClaimTypeReferenceId="tenantId" AlwaysUseDefaultValue="true" DefaultValue="{Policy:TenantObjectId}" />
        <!-- Provide the custom claim identifier -->
        <OutputClaim ClaimTypeReferenceId="extension_external_system_id" DefaultValue="external_system_id_1234"/>
        <!-- End of changes -->
      </OutputClaims>
      <SubjectNamingInfo ClaimType="sub" />
    </TechnicalProfile>
  </RelyingParty>
Update “SelfAsserted-ProfileUpdate” technical profile in the TrustFrameworkBase.xml file
Find “SelfAsserted-ProfileUpdate” technical profile in the “TrustFrameworkBase.xml” file and update it with below “OutputClaim” value:
<OutputClaim ClaimTypeReferenceId="extension_external_system_id" DefaultValue="external_system_id_1234"/>
  <TechnicalProfile Id="SelfAsserted-ProfileUpdate">
          <DisplayName>User ID signup</DisplayName>
          <Protocol Name="Proprietary" Handler="Web.TPEngine.Providers.SelfAssertedAttributeProvider, Web.TPEngine, Version=1.0.0.0, Culture=neutral, PublicKeyToken=null" />
          <Metadata>
            <Item Key="ContentDefinitionReferenceId">api.selfasserted.profileupdate</Item>
          </Metadata>
          <IncludeInSso>false</IncludeInSso>
          <InputClaims>
            <InputClaim ClaimTypeReferenceId="alternativeSecurityId" />
            <InputClaim ClaimTypeReferenceId="userPrincipalName" />
            <!-- Optional claims. These claims are collected from the user and can be modified. Any claim added here should be updated in the
                 ValidationTechnicalProfile referenced below so it can be written to directory after being updateed by the user, i.e. AAD-UserWriteProfileUsingObjectId. -->
            <InputClaim ClaimTypeReferenceId="givenName" />
            <InputClaim ClaimTypeReferenceId="surname" />
          </InputClaims>
          <OutputClaims>
            <!-- Required claims -->
            <OutputClaim ClaimTypeReferenceId="executed-SelfAsserted-Input" DefaultValue="true" />
            <!-- Optional claims. These claims are collected from the user and can be modified. Any claim added here should be updated in the
                 ValidationTechnicalProfile referenced below so it can be written to directory after being updateed by the user, i.e. AAD-UserWriteProfileUsingObjectId. -->
            <OutputClaim ClaimTypeReferenceId="givenName" />
            <OutputClaim ClaimTypeReferenceId="surname" />

             <!-- Add the external system ID -->
              <OutputClaim ClaimTypeReferenceId="extension_external_system_id" DefaultValue="external_system_id_1234"/>
            <!-- End of changes -->
          </OutputClaims>
          <ValidationTechnicalProfiles>
            <ValidationTechnicalProfile ReferenceId="AAD-UserWriteProfileUsingObjectId" />
          </ValidationTechnicalProfiles>
        </TechnicalProfile>
Update “AAD-UserWriteProfileUsingObjectId” technical profile in the TrustFrameworkBase.xml file
Find “AAD-UserWriteProfileUsingObjectId” technical profile in the “TrustFrameworkBase.xml” file and add “extension_external_system_id” claim the “PersistedClaims” block:
<PersistedClaim ClaimTypeReferenceId="extension_external_system_id" DefaultValue="external_system_id_1234"/>
        <TechnicalProfile Id="AAD-UserWriteProfileUsingObjectId">
          <Metadata>
            <Item Key="Operation">Write</Item>
            <Item Key="RaiseErrorIfClaimsPrincipalAlreadyExists">false</Item>
            <Item Key="RaiseErrorIfClaimsPrincipalDoesNotExist">true</Item>
          </Metadata>
          <IncludeInSso>false</IncludeInSso>
          <InputClaims>
            <InputClaim ClaimTypeReferenceId="objectId" Required="true" />
          </InputClaims>
          <PersistedClaims>
            <!-- Required claims -->
            <PersistedClaim ClaimTypeReferenceId="objectId" />
            <!-- Optional claims -->
            <PersistedClaim ClaimTypeReferenceId="givenName" />
            <PersistedClaim ClaimTypeReferenceId="surname" />

          <!-- Add the external system ID -->
            <PersistedClaim ClaimTypeReferenceId="extension_external_system_id" DefaultValue="external_system_id_1234"/>
          <!-- End of changes -->
          </PersistedClaims>
          <IncludeTechnicalProfile ReferenceId="AAD-Common" />
        </TechnicalProfile>
This addition persists the value of the claim in the extension property for the current user in the directory.
Update “AAD-UserReadUsingObjectId” technical profile in the TrustFrameworkBase.xml file
<OutputClaim ClaimTypeReferenceId="extension_external_system_id" DefaultValue="external_system_id_1234"/>
<TechnicalProfile Id="AAD-UserReadUsingObjectId">
          <Metadata>
            <Item Key="Operation">Read</Item>
            <Item Key="RaiseErrorIfClaimsPrincipalDoesNotExist">true</Item>
          </Metadata>
          <IncludeInSso>false</IncludeInSso>
          <InputClaims>
            <InputClaim ClaimTypeReferenceId="objectId" Required="true" />
          </InputClaims>
          <OutputClaims>
            <!-- Optional claims -->
            <OutputClaim ClaimTypeReferenceId="signInNames.emailAddress" />
            <OutputClaim ClaimTypeReferenceId="displayName" />
            <OutputClaim ClaimTypeReferenceId="otherMails" />
            <OutputClaim ClaimTypeReferenceId="givenName" />
            <OutputClaim ClaimTypeReferenceId="surname" />

            <!-- Add the external system ID -->
              <OutputClaim ClaimTypeReferenceId="extension_external_system_id" DefaultValue="external_system_id_1234"/>
            <!-- End of changes -->
          </OutputClaims>
          <IncludeTechnicalProfile ReferenceId="AAD-Common" />
        </TechnicalProfile>
This enables reading the value of the extension attribute every time a user signs in. Please note that we only changed technical profiles in the flow of local accounts only. If you would like to do the same with the social media accounts, please check documentation.
Update signup_signin.xml file
At the end we would like to include “extension_external_system_id” claim in the final token. To do it open “signup_signin.xml” policy file and add below “OutputClaim”:
<OutputClaim ClaimTypeReferenceId="extension_external_system_id" />
 <RelyingParty>
    <DefaultUserJourney ReferenceId="SignUpOrSignIn" />
    <TechnicalProfile Id="PolicyProfile">
      <DisplayName>PolicyProfile</DisplayName>
      <Protocol Name="OpenIdConnect" />
      <OutputClaims>
        <OutputClaim ClaimTypeReferenceId="displayName" />
        <OutputClaim ClaimTypeReferenceId="givenName" />
        <OutputClaim ClaimTypeReferenceId="surname" />
        <OutputClaim ClaimTypeReferenceId="email" />
        <OutputClaim ClaimTypeReferenceId="objectId" PartnerClaimType="sub" />
        <OutputClaim ClaimTypeReferenceId="identityProvider" />
        <OutputClaim ClaimTypeReferenceId="tenantId" AlwaysUseDefaultValue="true" DefaultValue="{Policy:TenantObjectId}" />
        <OutputClaim ClaimTypeReferenceId="extension_external_system_id" />
      </OutputClaims>
      <SubjectNamingInfo ClaimType="sub" />
    </TechnicalProfile>
  </RelyingParty>
Verify changes
Now in the final step we have to verify if custom claim (attribute) called “extension_external_system_id” is included in the final token.
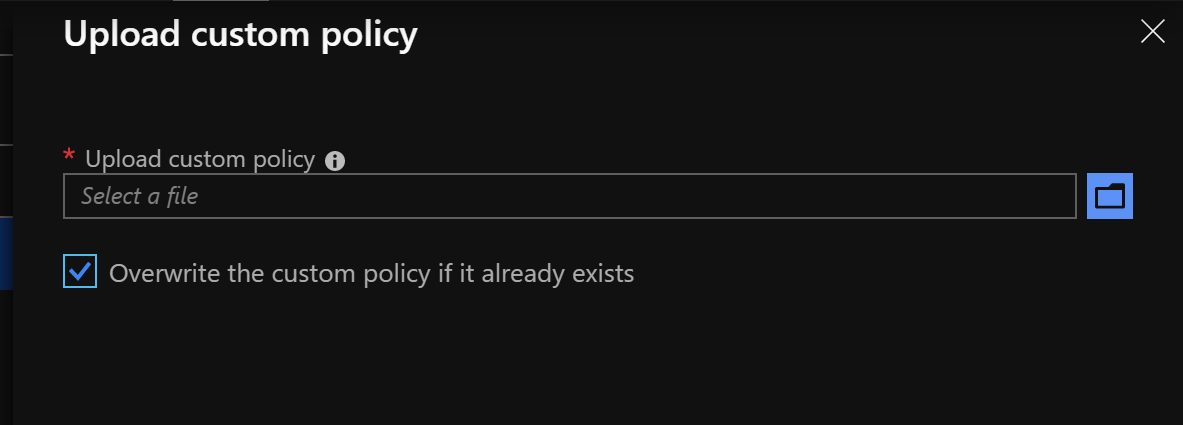
1.Upload all policies file in the Azure portal (remeber to select “Override policy if exists”):
2.Run “signup_signin” policy using “Run now” button. Register new user and once its done, verify token using jwt.ms webiste
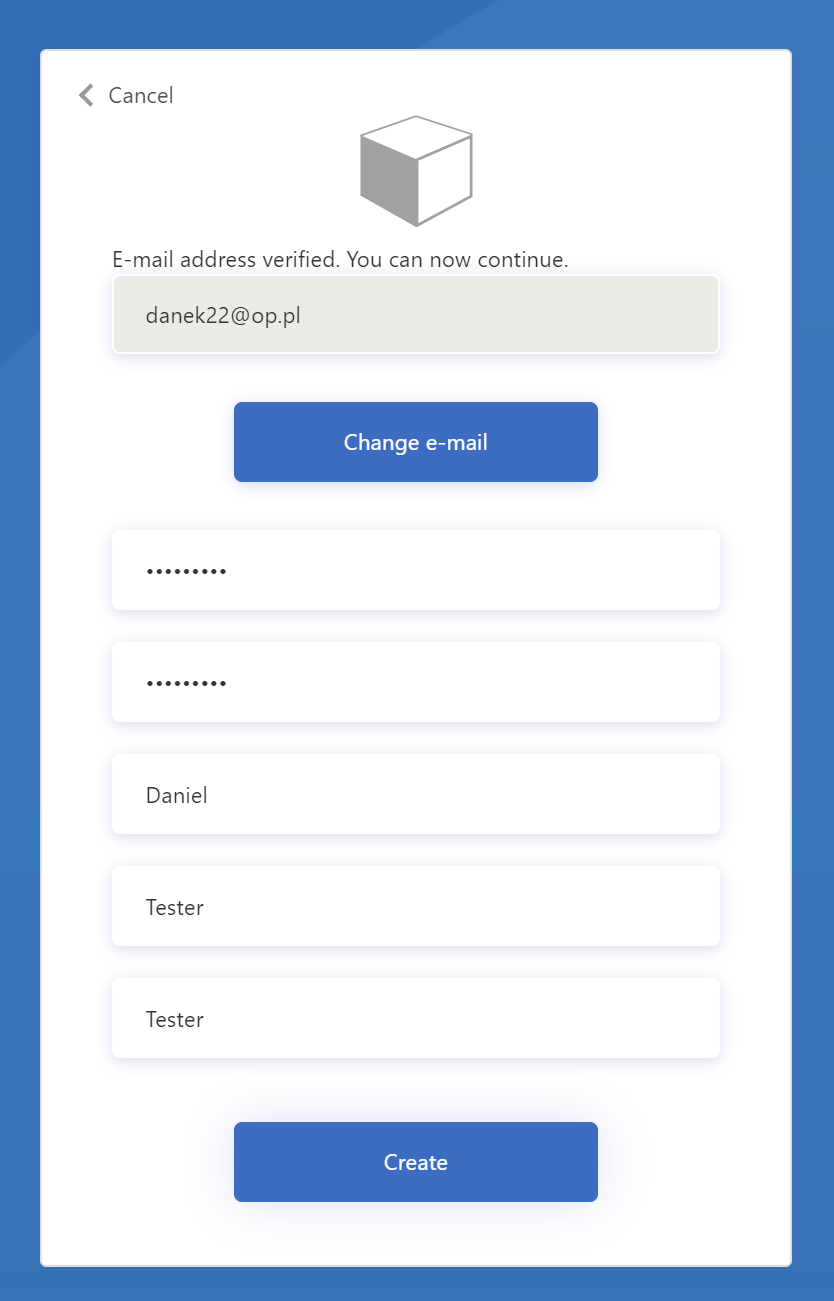
You should see that custom claim “extension_external_system_id” is included in the JWT token after decoding it:
{
...
  "email": "danek22@op.pl",
  "name": "Daniel",
  "given_name": "Tester",
  "family_name": "Tester",
  "extension_external_system_id": "external_system_id_1234"
}
Summary
In this article I presented how to use custom claims (attributes) in the Azure AD B2C Identity Experience Framework using custom policies. In the next article I will present how to get custom attribute value from the external service using Azure Function.